> ## Documentation Index
> Fetch the complete documentation index at: https://domoinc-bradley-turek-pfilter-operators-reference.mintlify.site/llms.txt
> Use this file to discover all available pages before exploring further.
# Create a Workflow
## Intro
Depending on the complexity of your process, creating and configuring a workflow for the first time can require significant time and effort. You can always contact your Domo account team for support.
This article describes how to create a workflow from our library of pre-built templates or from a blank canvas.
After creating a workflow version, you must *validate*,*deploy*, and *start* it. Learn how below.
**Glossary:** *Italicized* terms in this article have particular definitions within Workflows. Visit the Workflows [glossary](/s/article/000005108) to learn the definitions.
**Learn more:** See [Manage Workflows](/s/article/000005179) to learn about workflow *versions*, the *executions* list, and tracking information.
***
## Required Grant
You can create new workflows as long as you have at least an Editor system role or a custom role with the Create Workflows grant enabled.
Learn about [system](/s/article/360043438953) and [custom](/s/article/360043438973) roles.
**Note:** If you can't access Workflows even with the appropriate grant, contact your Domo account team to enable the feature.
## Access Workflows
You can access Workflows from the main Domo navigation.
This table describes the two default views of the Workflows home.
| Description | Default view |
| --------------------------------------------------------------------------------------------------------------------------------------------------------------------------------------------------------------------------- | ----------------------------------------------------------------------------------------------------------------------------------------------------------------------------------------------------------------------------------------------------------------------------------------------------------------------------------------------------------------------------------------------------------------------------------------------------------------------------------------------------------------------------------------------------------------------------------------------------------------------------------------------------------------------------------------------------------------------------------------------------------------------------------------------------------------------------------------------------------------------------------------------------------------------------------------------------------------------------------------------------------------------------------------------------------------------------------------------------------------------------------------------------------------------------------------------------------------------------------------------------------------------------------------------------------------------------------------------------------------------------------------------------------------------------------------------------------------------------------------------------------------------------------------------------------------------------------------------------------------------------------------------------------------------------------------------------------------- |
| If you have access to at least one workflow (including those you've created), the default view lists all your available workflows. | 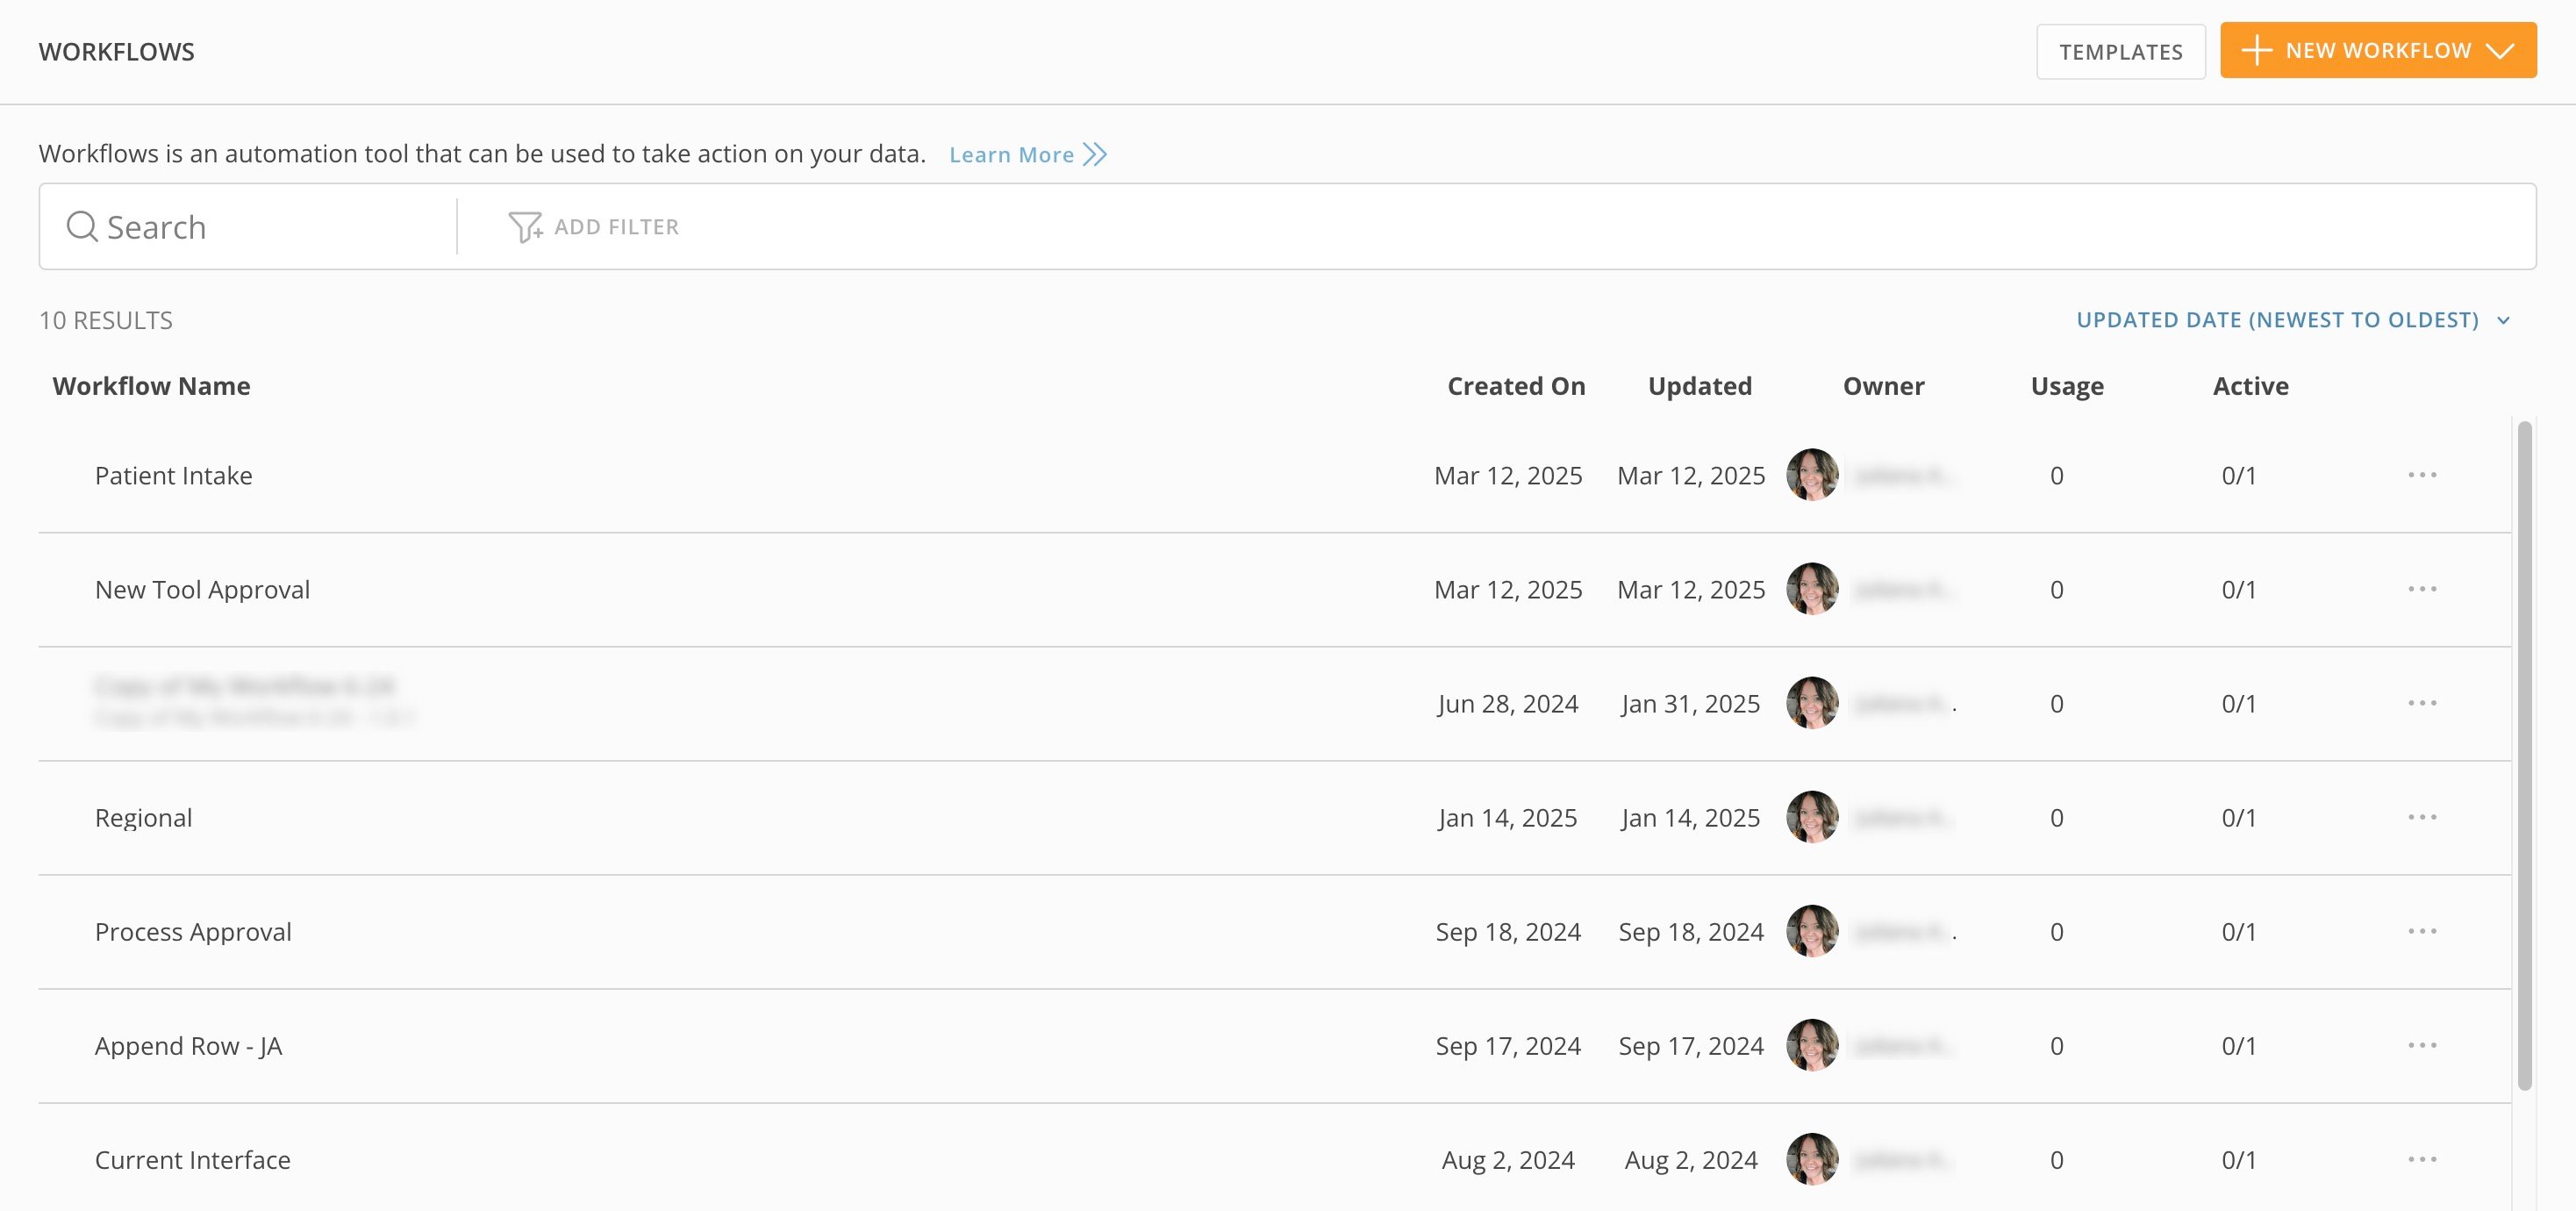 |
| If you don't have access to any workflow, the default view is the template library. **Template Library:** The template library contains pre-built workflows for processes, including approval requests and page archiving. |
|
| If you don't have access to any workflow, the default view is the template library. **Template Library:** The template library contains pre-built workflows for processes, including approval requests and page archiving. | 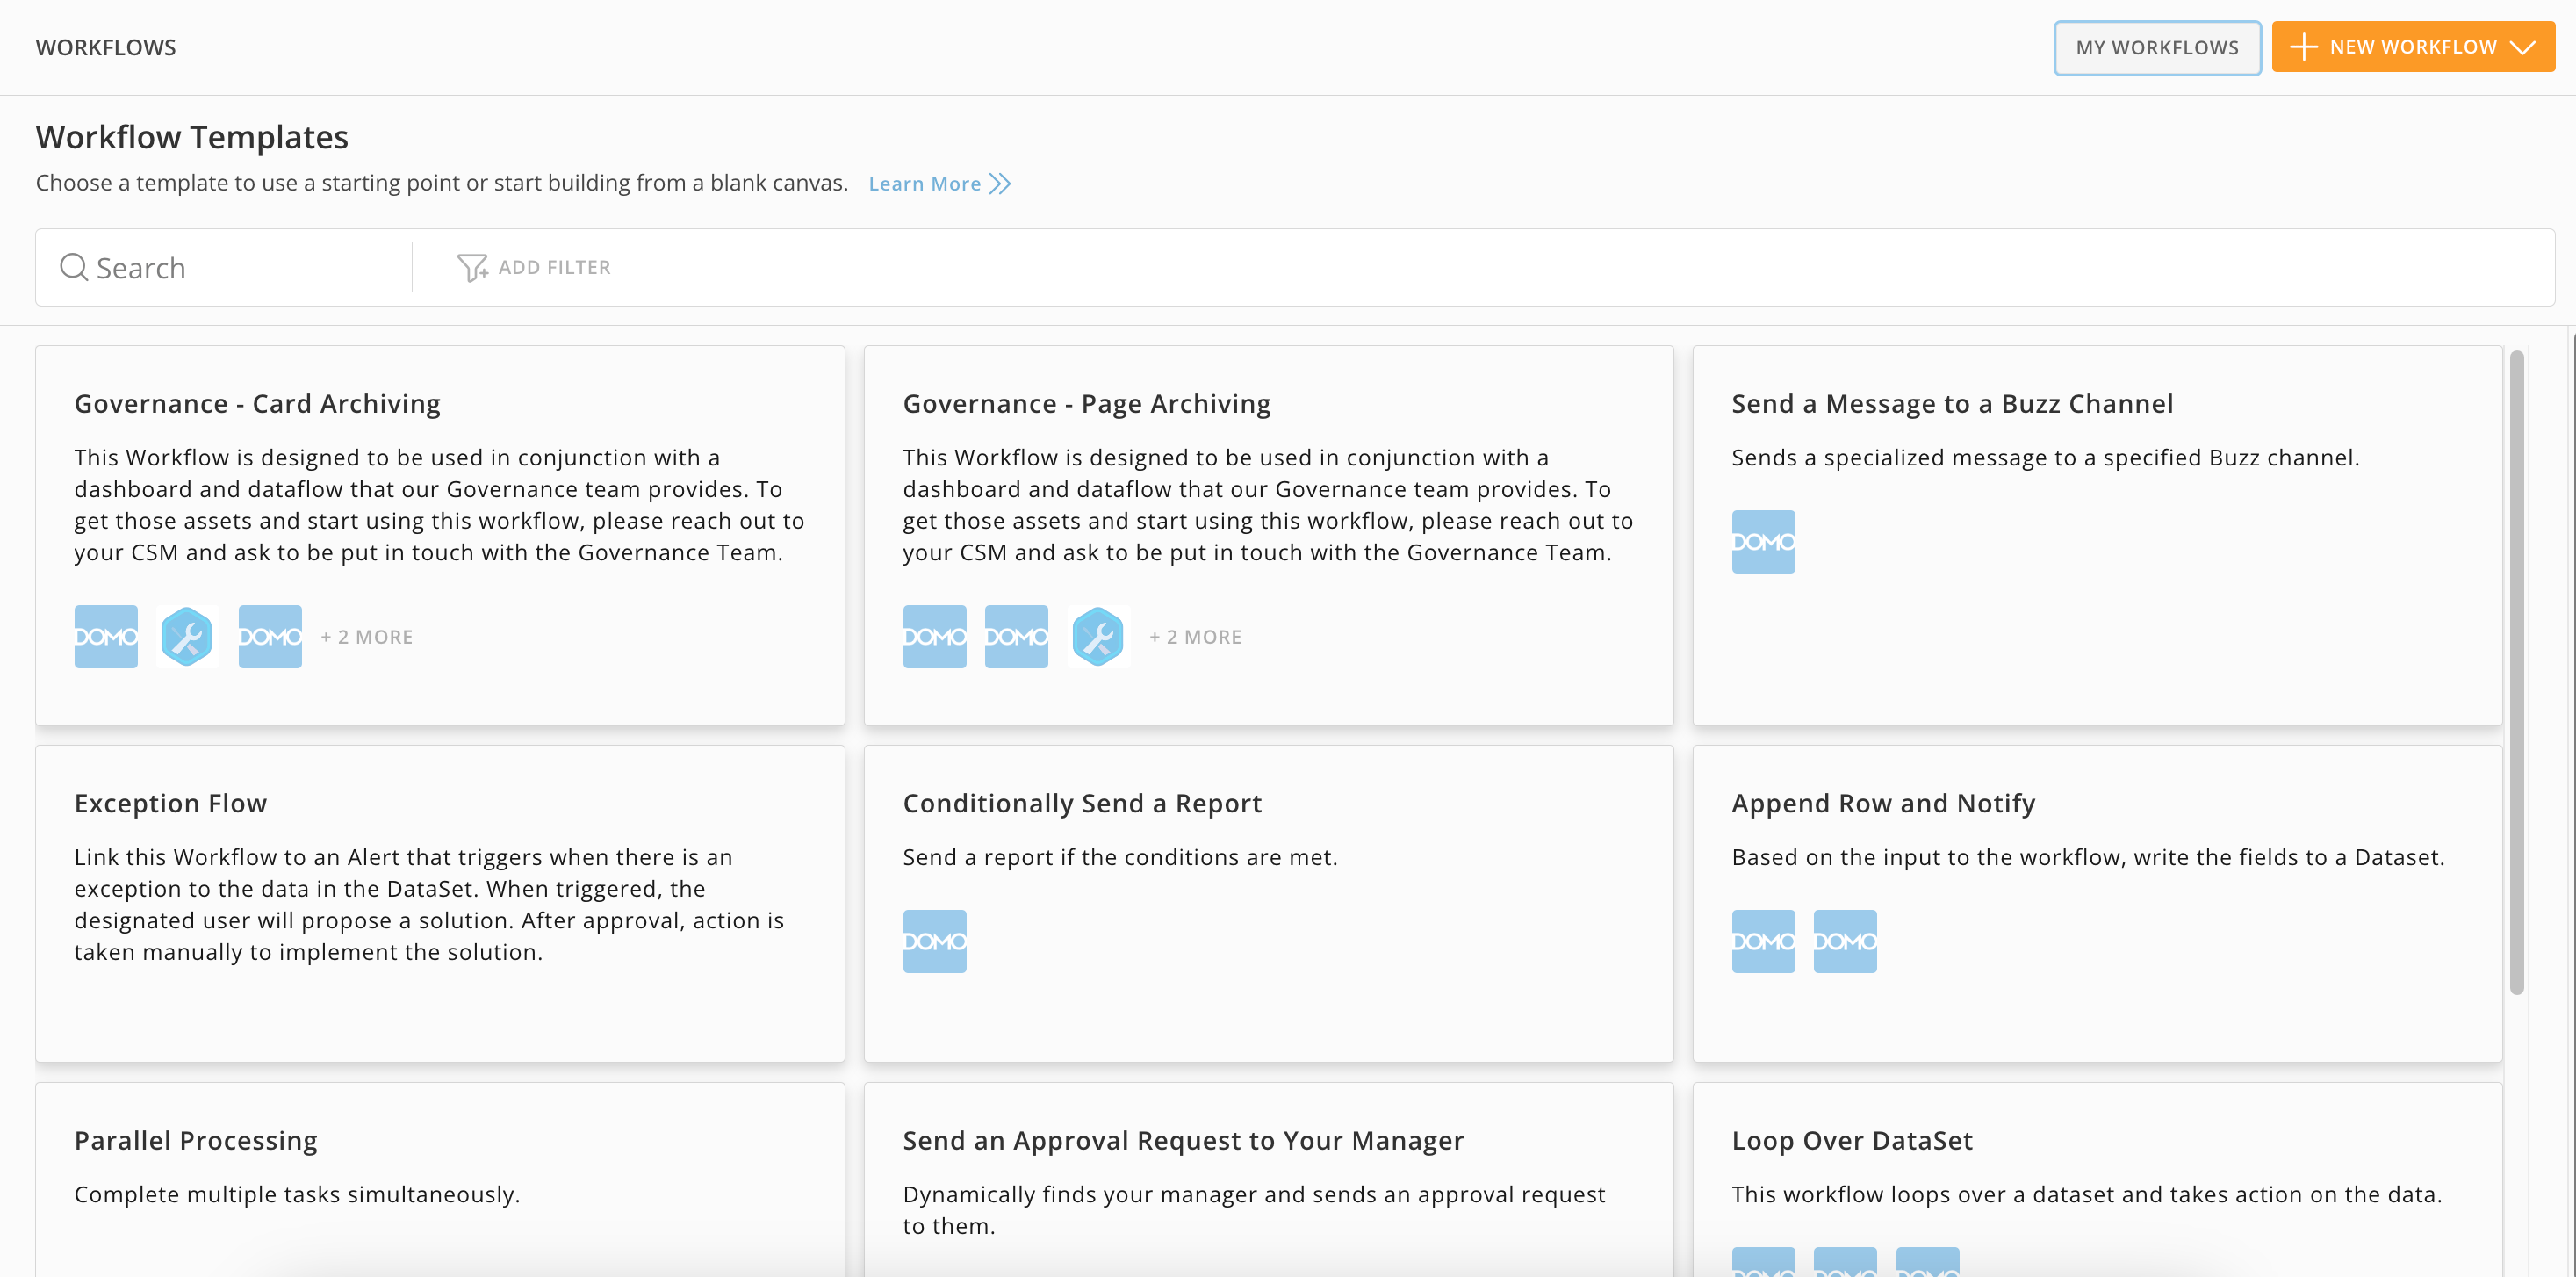 |
## Create a Workflow from a Template
You can create a workflow from the template library or create a "template" from an existing workflow you have access to by creating a new *version* of it or performing a **Save As** action to reuse and customize it.
**Note:** You must have the Create Workflows grant to create a workflow. Learn more about [required grants](/s/article/000005179) for Workflows.
1. From your default Workflows view, select **+ New Workflow** > **Create from Template**to open the template library.
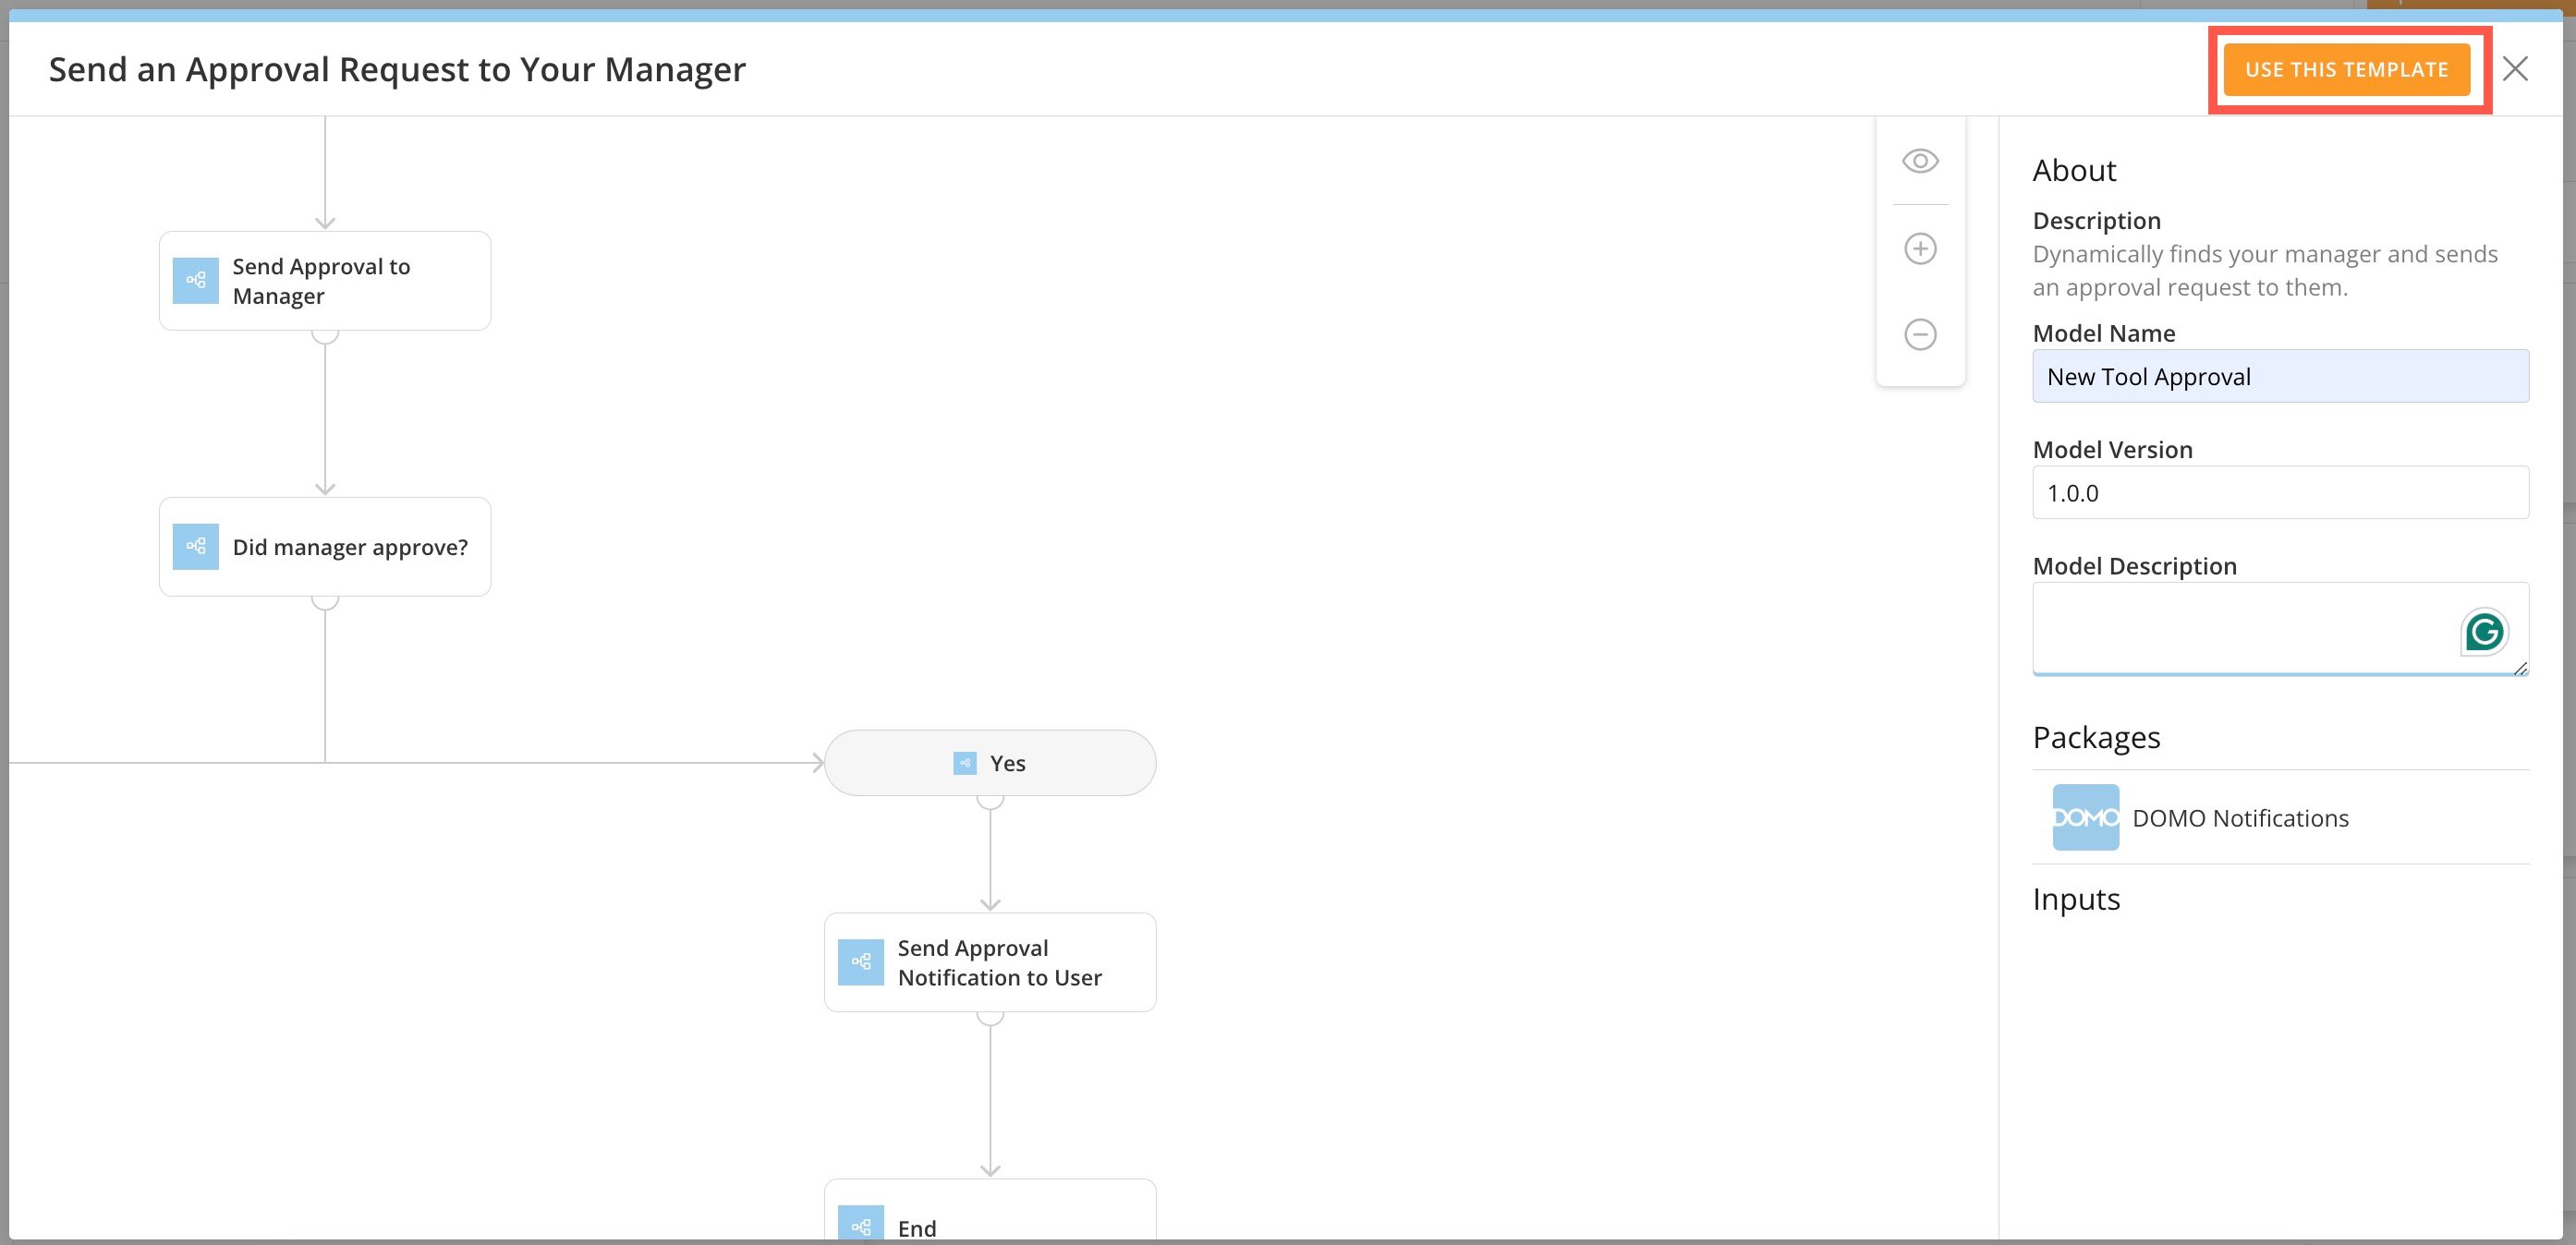
2. Choose a template from the library and enter a name in the **Model Name** field. (The max character limit is 75.) Your workflow must have a name to proceed.
* If you change the pre-populated version number, the number must be in the `<>` format.
**Tip:** It's good practice to use a name and description that helps you identify the workflow in the workflows list.
3\. Select **Use This Template** to open the template in the Workflows [canvas](#design-your-workflow).
|
## Create a Workflow from a Template
You can create a workflow from the template library or create a "template" from an existing workflow you have access to by creating a new *version* of it or performing a **Save As** action to reuse and customize it.
**Note:** You must have the Create Workflows grant to create a workflow. Learn more about [required grants](/s/article/000005179) for Workflows.
1. From your default Workflows view, select **+ New Workflow** > **Create from Template**to open the template library.
2. Choose a template from the library and enter a name in the **Model Name** field. (The max character limit is 75.) Your workflow must have a name to proceed.
* If you change the pre-populated version number, the number must be in the `<>` format.
**Tip:** It's good practice to use a name and description that helps you identify the workflow in the workflows list.
3\. Select **Use This Template** to open the template in the Workflows [canvas](#design-your-workflow).
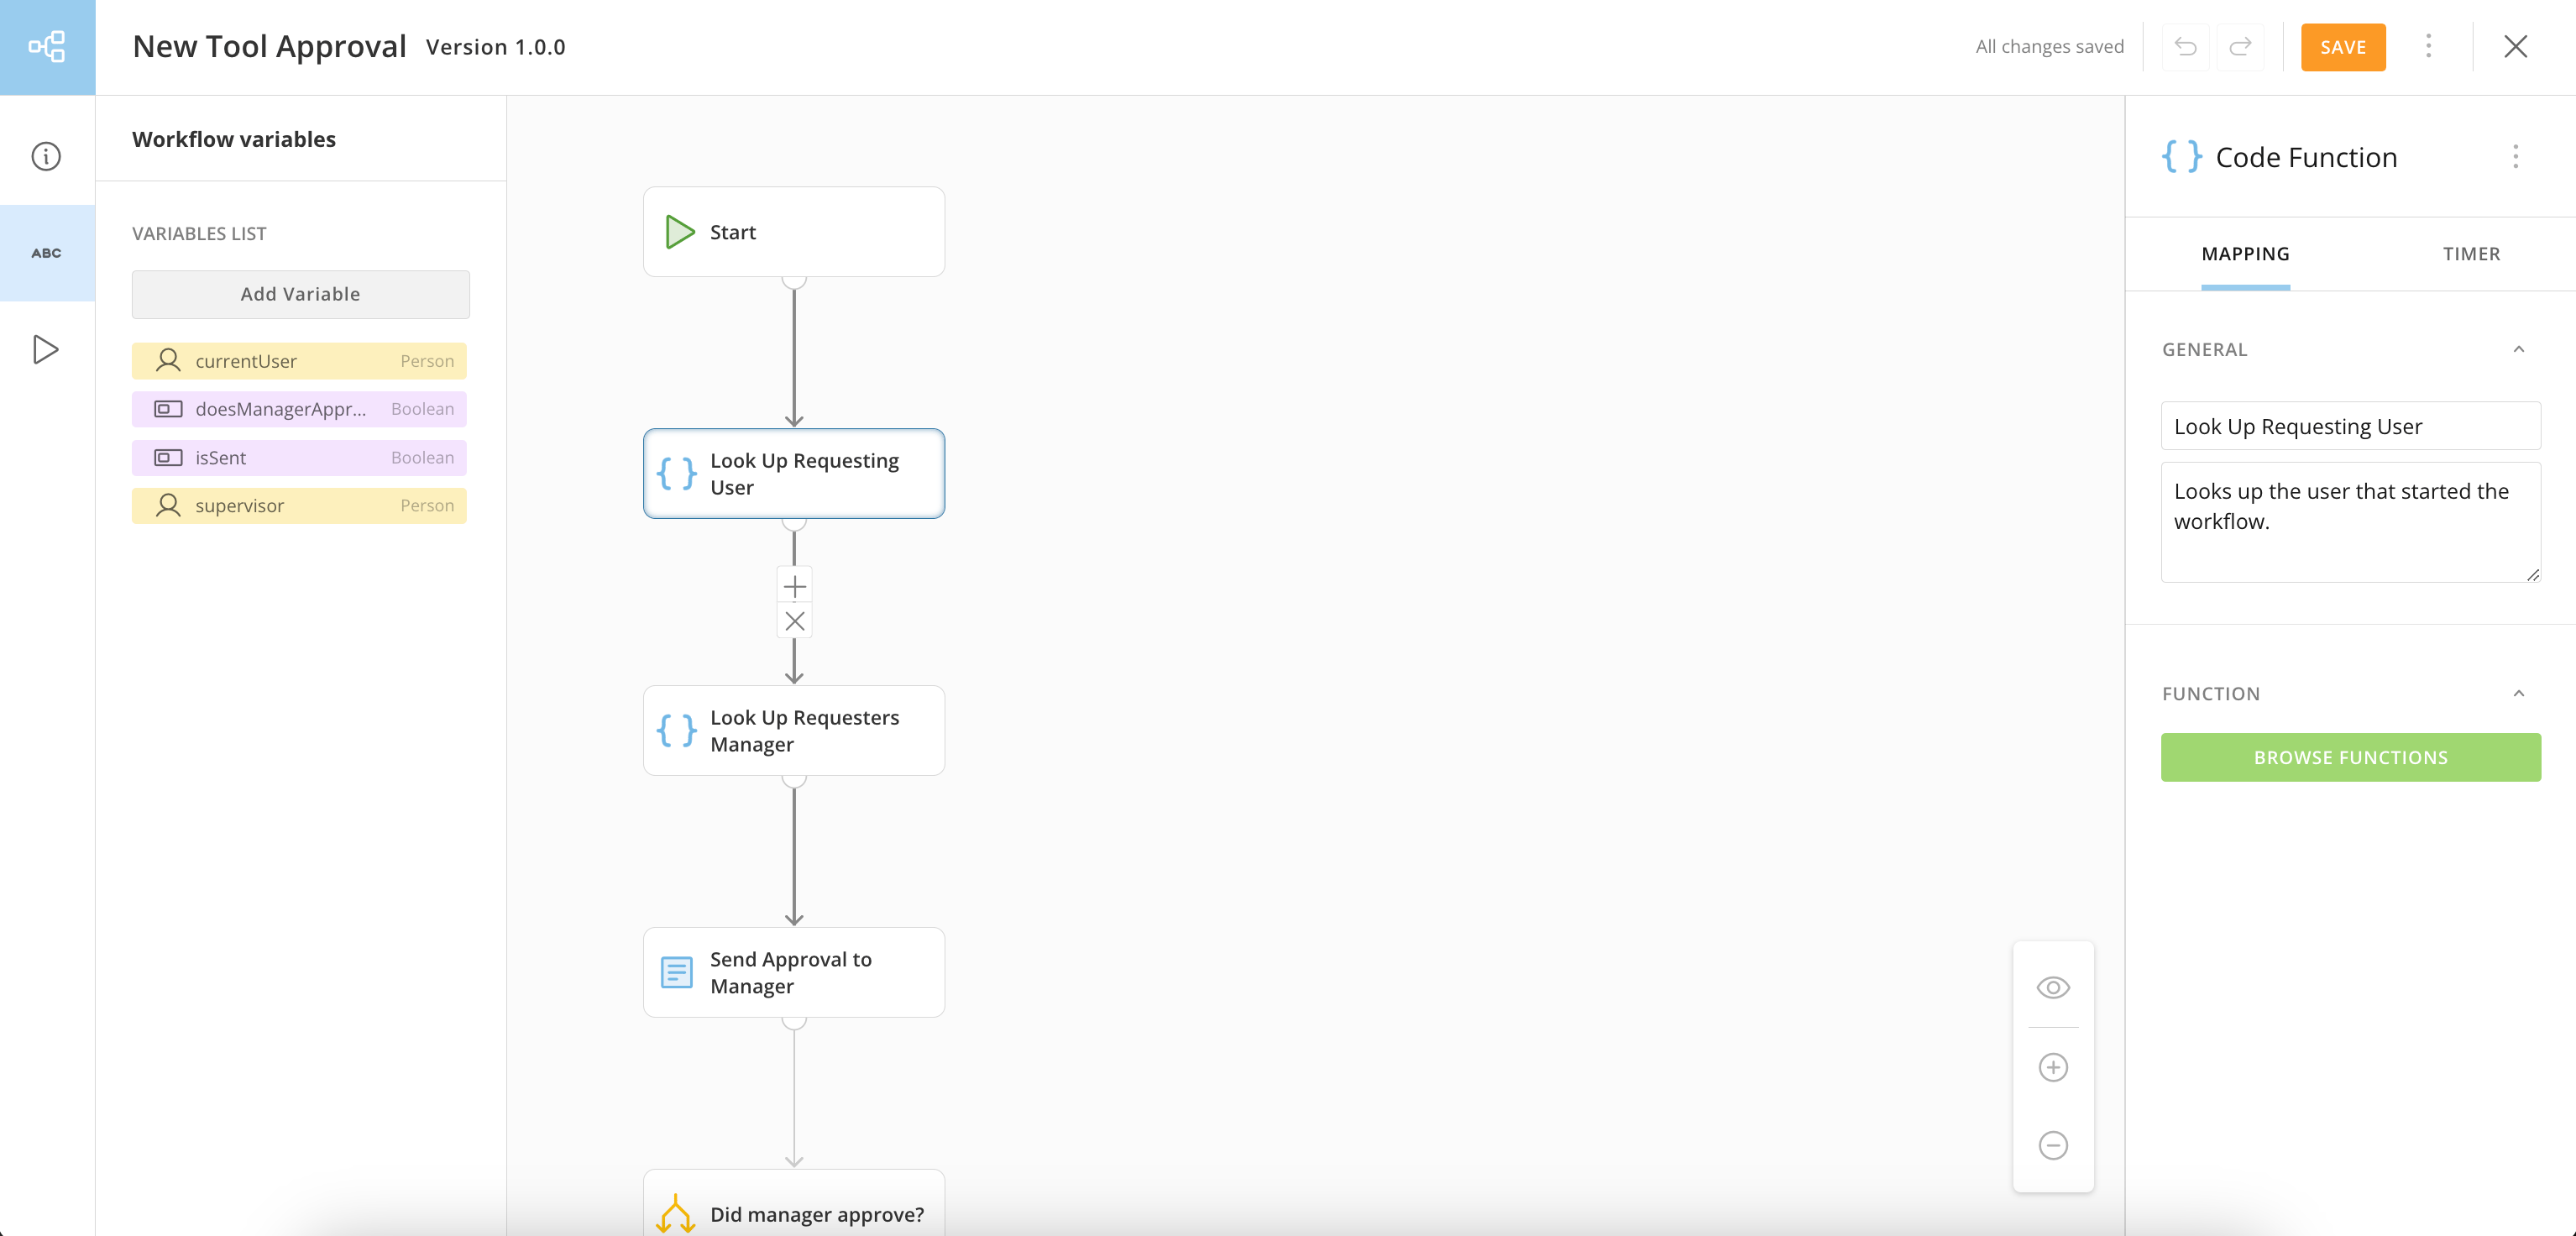
 4\. Make any changes to the template configuration. Configuration options include:
* Selecting a [shape](#add-shapes-to-your-canvas) and configuring it in the right configuration panel. Click an empty area of the canvas to close the configuration panel.
* Select a flow (connect), or line, between the shapes to view the
4\. Make any changes to the template configuration. Configuration options include:
* Selecting a [shape](#add-shapes-to-your-canvas) and configuring it in the right configuration panel. Click an empty area of the canvas to close the configuration panel.
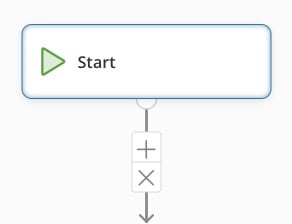
* Select a flow (connect), or line, between the shapes to view the  **Add**/**Remove shape** controls and change shapes on the canvas.
* Click-and-drag shapes and flows around the canvas to change the design of your workflow.
**Add**/**Remove shape** controls and change shapes on the canvas.
* Click-and-drag shapes and flows around the canvas to change the design of your workflow.
 5. Select **Save**to keep your changes.
**Next step:** Learn how to [validate](#validate-a-workflow) your workflow.
## Create a Workflow from a Blank Canvas
**Note:** You must have the Create Workflows grant to create a workflow. Learn more about [required grants](/s/article/000005179) for Workflows.
1. From your default Workflows view, select **+ New Workflow** > **Blank Workflow**.
2. Enter a name for your workflow. (The max character limit for the name is 75.)
3. Select **Save** and open the [canvas](#design-your-workflow).
* If you change the pre-populated version number, the number must be in the *\* format.
4. Add shapes and flows, or lines, to the canvas and configure them. Configuration options include:
* Selecting a [shape](#add-shapes-to-your-canvas) and configuring it in the right configuration panel. Click a blank space on the canvas to close the configuration panel.
* Select a flow (connect), or line, between the shapes to view the **Add**/**Remove shape**controls and change shapes on the canvas.
5. * Click-and-drag shapes and flows around the canvas to change the design of your workflow.
6. Select **Save** to keep your changes.
**Next step:** Learn how to [validate](#validate-a-workflow) your workflow.
## Design Your Workflow
The Workflows canvas is where you design and edit your workflow.
### Left Panel Information
When the canvas opens, the left panel displays information about the workflow in the
5. Select **Save**to keep your changes.
**Next step:** Learn how to [validate](#validate-a-workflow) your workflow.
## Create a Workflow from a Blank Canvas
**Note:** You must have the Create Workflows grant to create a workflow. Learn more about [required grants](/s/article/000005179) for Workflows.
1. From your default Workflows view, select **+ New Workflow** > **Blank Workflow**.
2. Enter a name for your workflow. (The max character limit for the name is 75.)
3. Select **Save** and open the [canvas](#design-your-workflow).
* If you change the pre-populated version number, the number must be in the *\* format.
4. Add shapes and flows, or lines, to the canvas and configure them. Configuration options include:
* Selecting a [shape](#add-shapes-to-your-canvas) and configuring it in the right configuration panel. Click a blank space on the canvas to close the configuration panel.
* Select a flow (connect), or line, between the shapes to view the **Add**/**Remove shape**controls and change shapes on the canvas.
5. * Click-and-drag shapes and flows around the canvas to change the design of your workflow.
6. Select **Save** to keep your changes.
**Next step:** Learn how to [validate](#validate-a-workflow) your workflow.
## Design Your Workflow
The Workflows canvas is where you design and edit your workflow.
### Left Panel Information
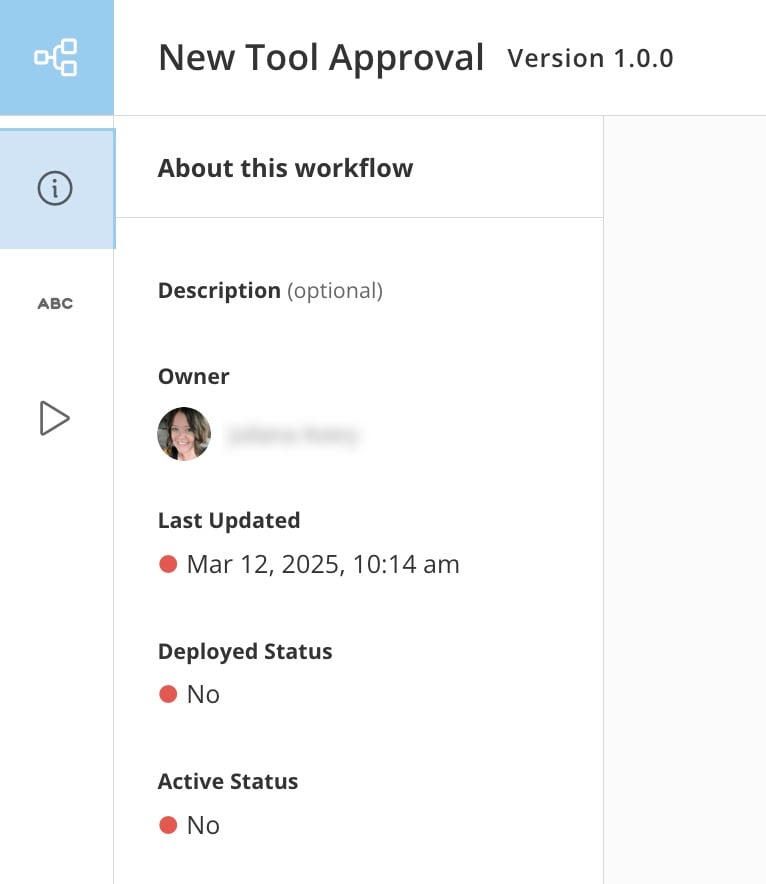
When the canvas opens, the left panel displays information about the workflow in the  **About this workflow** tab. The information includes whether the workflow is deployed and active.\
A 🔴 red dot by the **Last Updated** date means that there are unsaved edits for the version.
**About this workflow** tab. The information includes whether the workflow is deployed and active.\
A 🔴 red dot by the **Last Updated** date means that there are unsaved edits for the version.
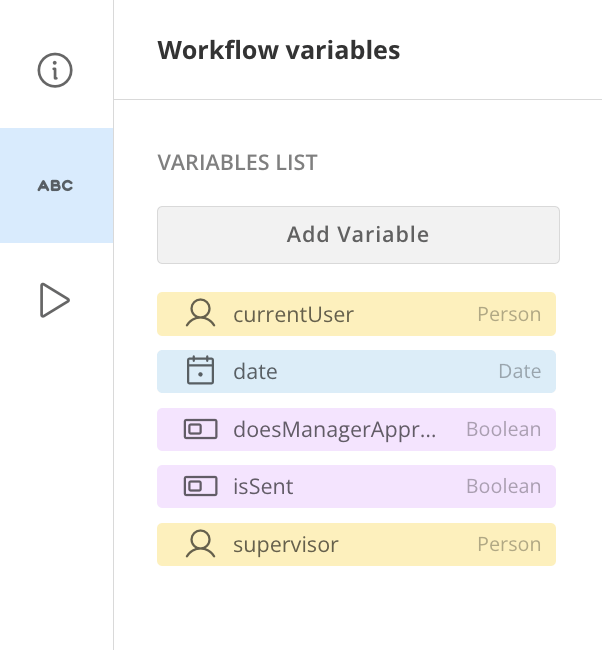
 In the
  **Workflow variables** tab, you can add and view variables color-coded by data type. Learn how to [add a variable](#add-a-variable) and use the [data association tool](#view-data-association) below.
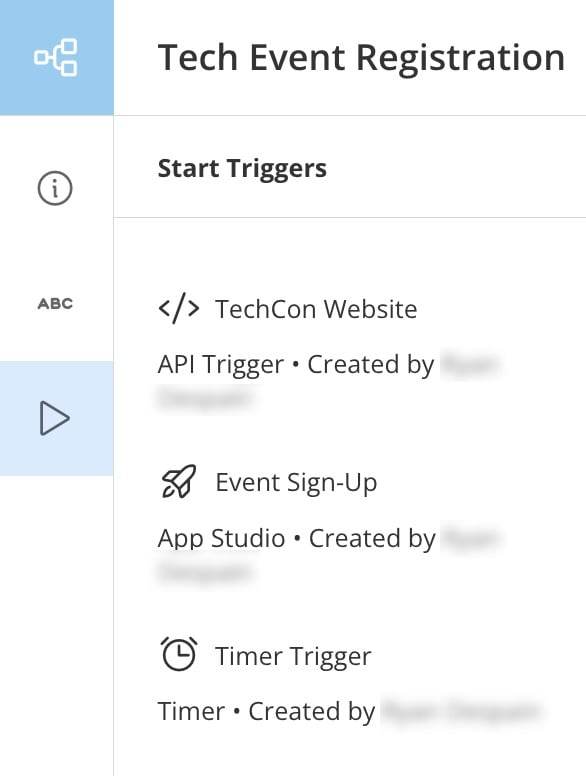
 The **Triggers** tab displays the configured triggers for this workflow version. Other than manual triggers, triggers can only be configured after a version has been deployed. Learn more about [triggers](/s/article/000005179).
 ### Move Around the Canvas
Use the following controls to help you move around the canvas and design your workflow:
#### Element Controls
Use the following mouse/trackpad and hotkeys commands to move shapes and flows around the canvas.
##### Select Elements
* **Single element select** **—** Left-click a node or edge of an element to select it.
### Move Around the Canvas
Use the following controls to help you move around the canvas and design your workflow:
#### Element Controls
Use the following mouse/trackpad and hotkeys commands to move shapes and flows around the canvas.
##### Select Elements
* **Single element select** **—** Left-click a node or edge of an element to select it.
 * **Multi-element select —** Click and drag the cursor to select multiple elements, or **Shift** + click on shapes to select multiple shapes.\
Holding **Control** (Windows)**/Command** (Mac) and selecting multiple nodes also selects multiple elements.
* **Multi-element select —** Click and drag the cursor to select multiple elements, or **Shift** + click on shapes to select multiple shapes.\
Holding **Control** (Windows)**/Command** (Mac) and selecting multiple nodes also selects multiple elements.
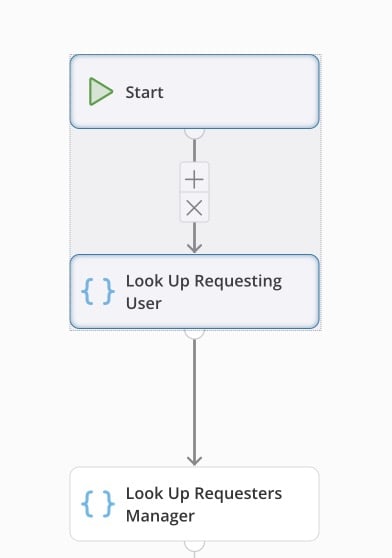 * **Select All Elements —** Press **Control** (Windows)**/Command** (Mac) + **A** to select all the elements.
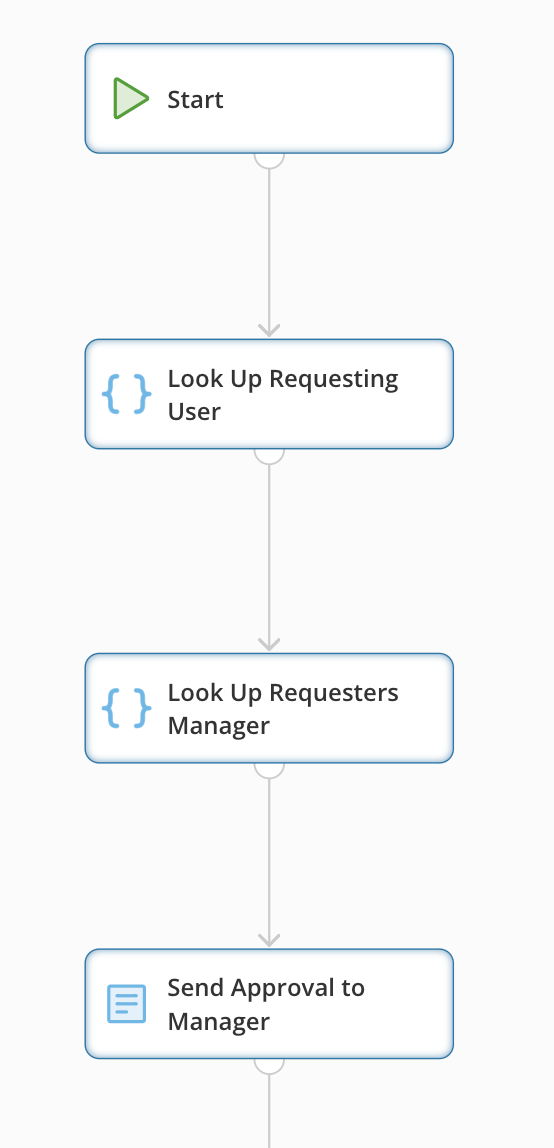 ##### Pan
* Left-click an empty area of the canvas and drag to move the entire canvas.
* Hold the **space bar** while left-clicking the mouse or pressing your trackpad, then drag the cursor to move the canvas.
* On a trackpad, you can also use two fingers to pan around the canvas.
#### Zoom
Zoom with the **Zoom in/Zoom out**controls.
##### Pan
* Left-click an empty area of the canvas and drag to move the entire canvas.
* Hold the **space bar** while left-clicking the mouse or pressing your trackpad, then drag the cursor to move the canvas.
* On a trackpad, you can also use two fingers to pan around the canvas.
#### Zoom
Zoom with the **Zoom in/Zoom out**controls.
 #### Center
Selecting the
#### Center
Selecting the  **eye** icon centers your workflow on the canvas.
### Use the Configuration Panel
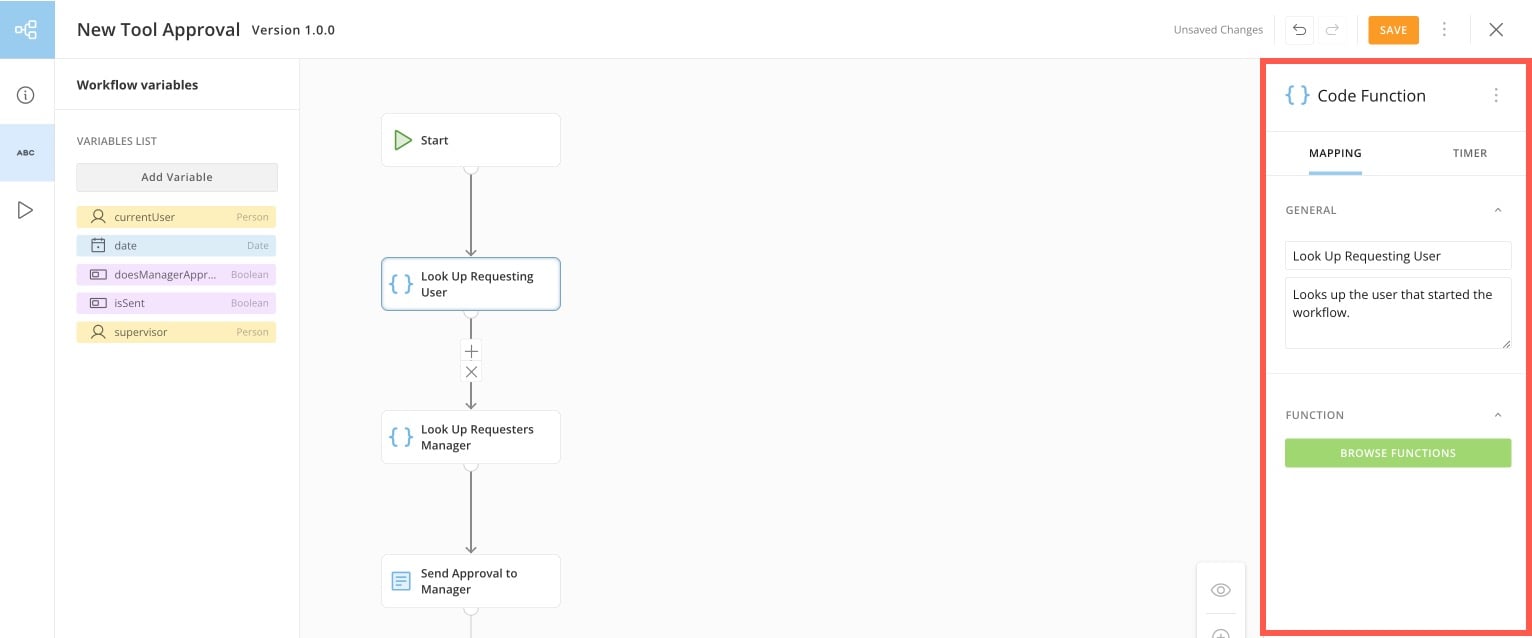
When you add a start or any other shape to the canvas and select it, a configuration panel displays to the right of the canvas, as shown below. The configuration panel may contain tabs, based on the shape. In the example below, the Code Function configuration panel has two tabs: **Mapping**and **Timer**.
When no shape is selected, no configuration panel displays.
To close the configuration panel, select an empty area of the canvas.
**eye** icon centers your workflow on the canvas.
### Use the Configuration Panel
When you add a start or any other shape to the canvas and select it, a configuration panel displays to the right of the canvas, as shown below. The configuration panel may contain tabs, based on the shape. In the example below, the Code Function configuration panel has two tabs: **Mapping**and **Timer**.
When no shape is selected, no configuration panel displays.
To close the configuration panel, select an empty area of the canvas.
 ### Add a Variable
Follow these steps to add a variable to the **Workflow variables** list:
1. In the canvas left navigation, go to the **Workflow variables** tab.
### Add a Variable
Follow these steps to add a variable to the **Workflow variables** list:
1. In the canvas left navigation, go to the **Workflow variables** tab.
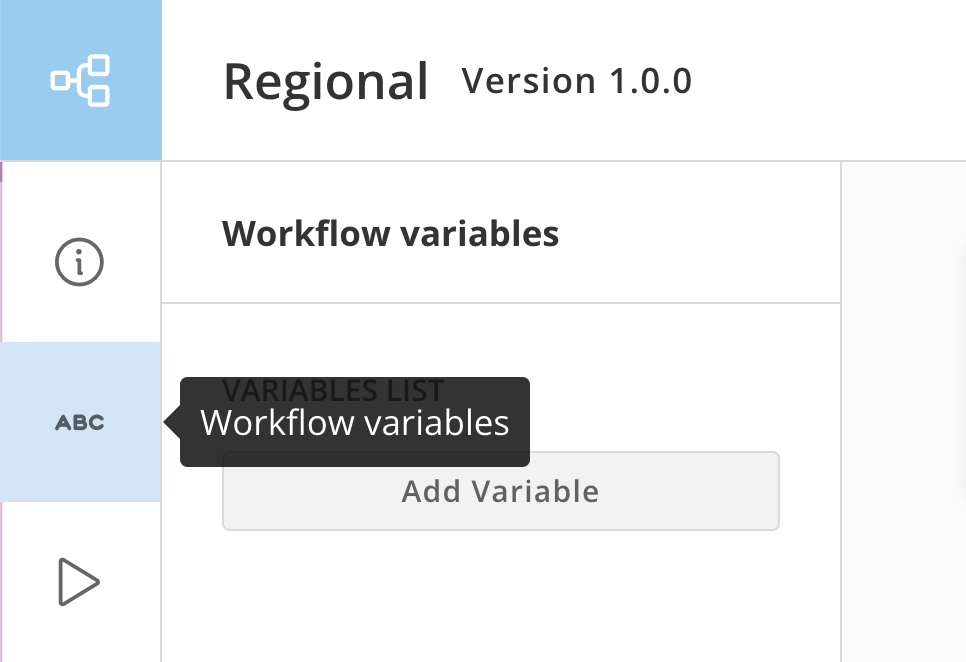 2. Select **Add Variable** to open the modal.
3. Enter a name in the **Variable Name** field. You cannot use spaces or special characters in the variable name.
4. Choose a data type from the **Data Type** dropdown. The data type may require a subtype or have additional options. Learn more about [data types](/s/article/000005797).\
If you want to make it a list variable, check the box labeled **Make List**.
2. Select **Add Variable** to open the modal.
3. Enter a name in the **Variable Name** field. You cannot use spaces or special characters in the variable name.
4. Choose a data type from the **Data Type** dropdown. The data type may require a subtype or have additional options. Learn more about [data types](/s/article/000005797).\
If you want to make it a list variable, check the box labeled **Make List**.
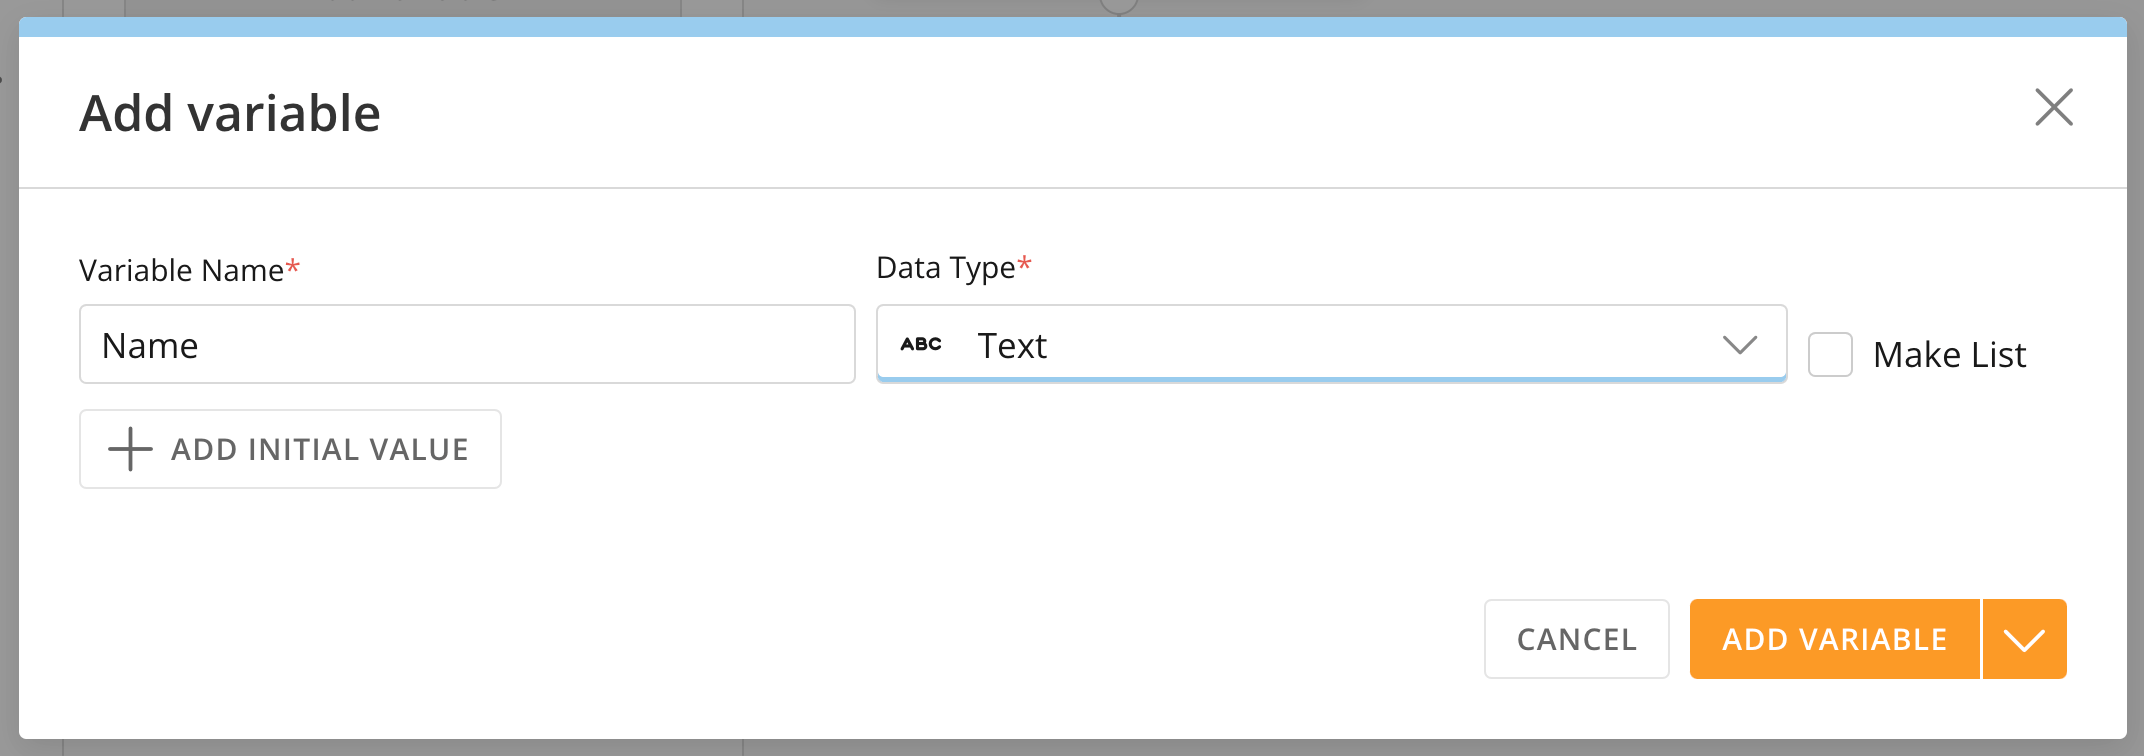 5. (Optional) If you want this variable to always have a certain value when the workflow executes, select **+ Add Initial Value**.\
You can then enter an initial value, depending on the data type. Learn more about [data types](/s/article/000005797).
5. (Optional) If you want this variable to always have a certain value when the workflow executes, select **+ Add Initial Value**.\
You can then enter an initial value, depending on the data type. Learn more about [data types](/s/article/000005797).
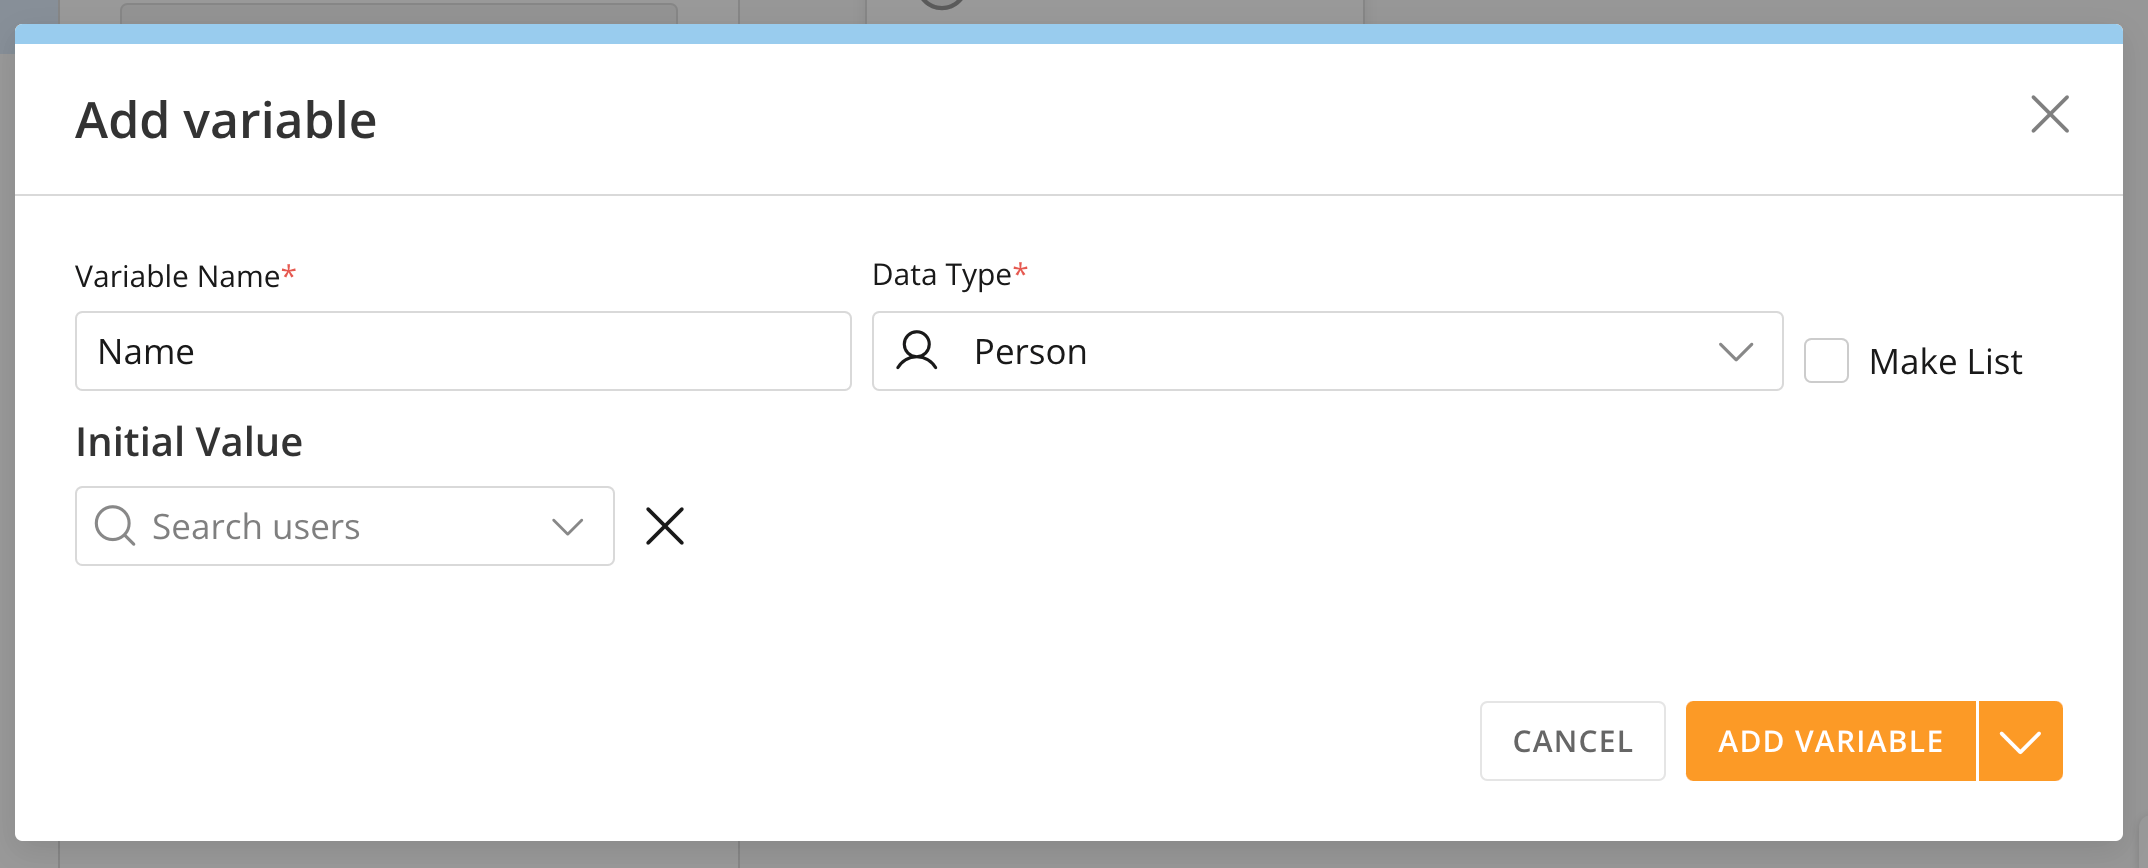 6. Select **Add Variable** to add the variable to the variables list or choose
  **More options** > **Save and add another** to add another variable to the list.
### Edit and Delete a Variable
Follow these steps to edit a variable in the **Workflows variables** tab:
1. Go to the **Workflow variables** tab in the canvas left navigation.
2. Hover over any variable in the list and select
**More options** > **Save and add another** to add another variable to the list.
### Edit and Delete a Variable
Follow these steps to edit a variable in the **Workflows variables** tab:
1. Go to the **Workflow variables** tab in the canvas left navigation.
2. Hover over any variable in the list and select  **Edit** to open the modal.
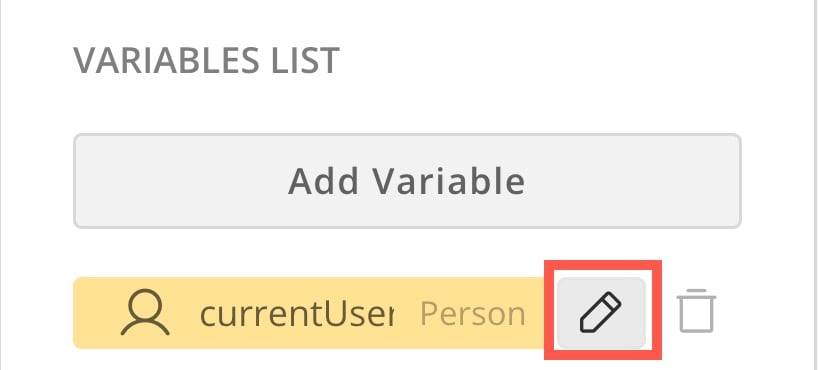 3. Edit the name or data type and select **Update** to save your changes.
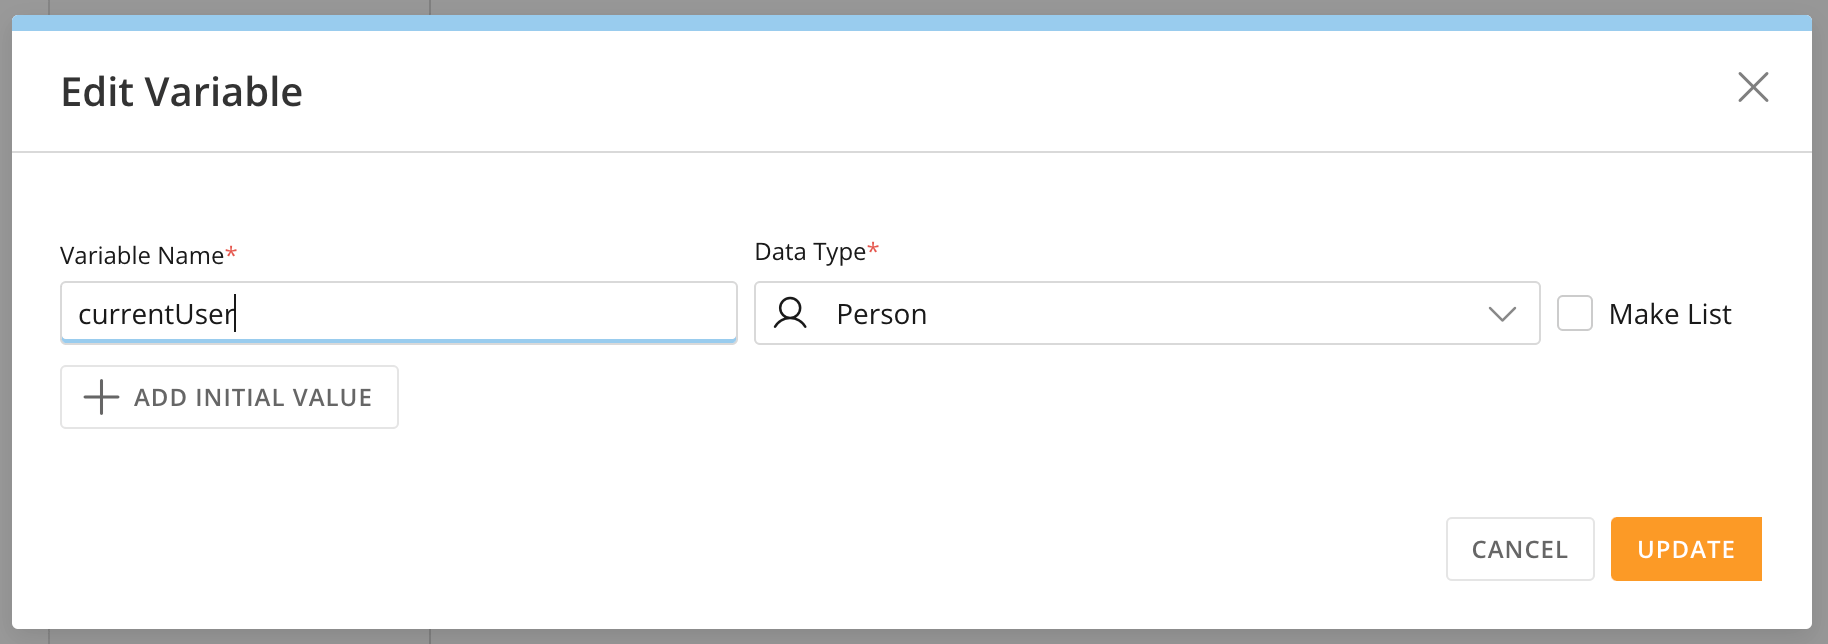 Follow these steps to delete a variable in the **Workflow variables** tab:
1. Go to the **Workflow variables** tab in the canvas left navigation.
2. Hover over any variable in the list and select
Follow these steps to delete a variable in the **Workflow variables** tab:
1. Go to the **Workflow variables** tab in the canvas left navigation.
2. Hover over any variable in the list and select  **Delete**.
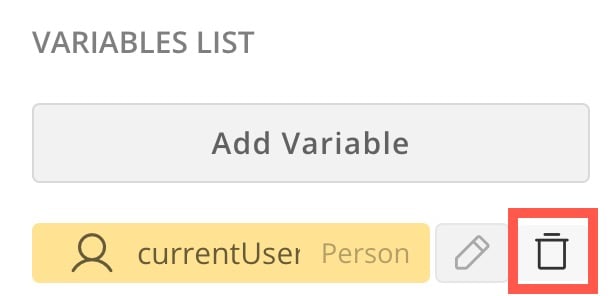 3. Confirm removal of the variable.
**Important:** Deleting a variable may cause unmapped parameters if the variable is being used to configure a shape.
### View Data Association
The data association tool allows you to see where variables are in your workflow.
In the **Workflow variables** tab of the left navigation, select a variable in the variables list. The shapes in the workflow that reference that variable are highlighted in the variable's color and a correspondingly colored banner displays at the top of the canvas.
In the example below, the **Send Approval Notification to User** code function references the `currentUser` variable; both the function and the banner are colored yellow because `currentUser` has a Person data type.
3. Confirm removal of the variable.
**Important:** Deleting a variable may cause unmapped parameters if the variable is being used to configure a shape.
### View Data Association
The data association tool allows you to see where variables are in your workflow.
In the **Workflow variables** tab of the left navigation, select a variable in the variables list. The shapes in the workflow that reference that variable are highlighted in the variable's color and a correspondingly colored banner displays at the top of the canvas.
In the example below, the **Send Approval Notification to User** code function references the `currentUser` variable; both the function and the banner are colored yellow because `currentUser` has a Person data type.
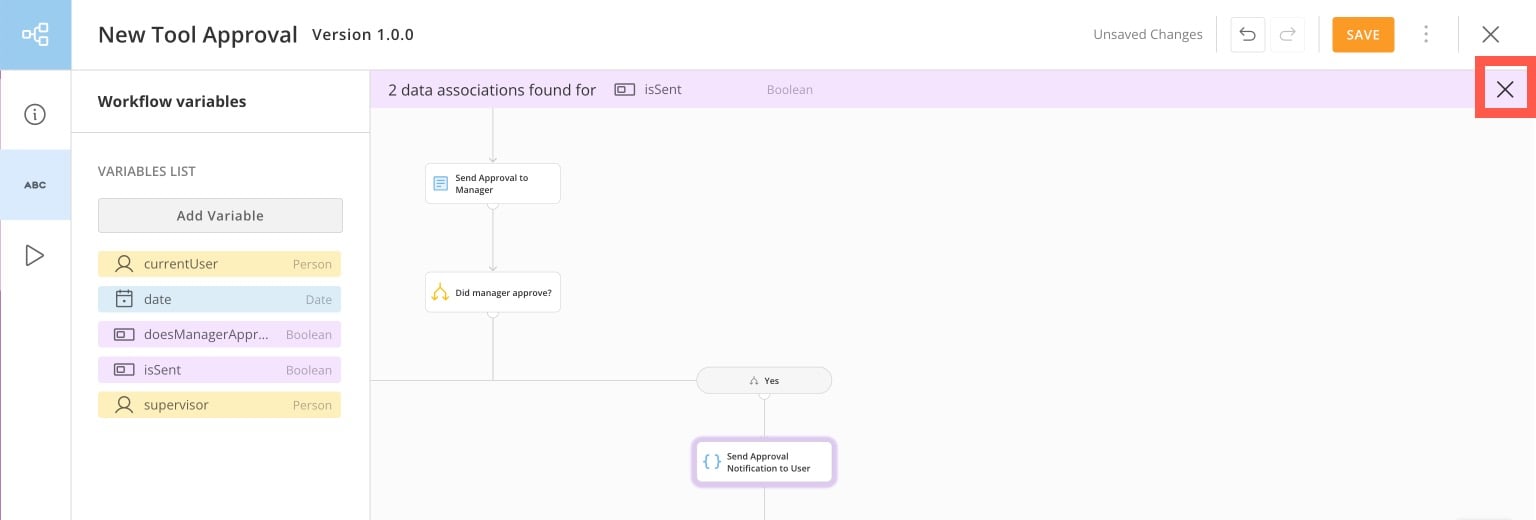
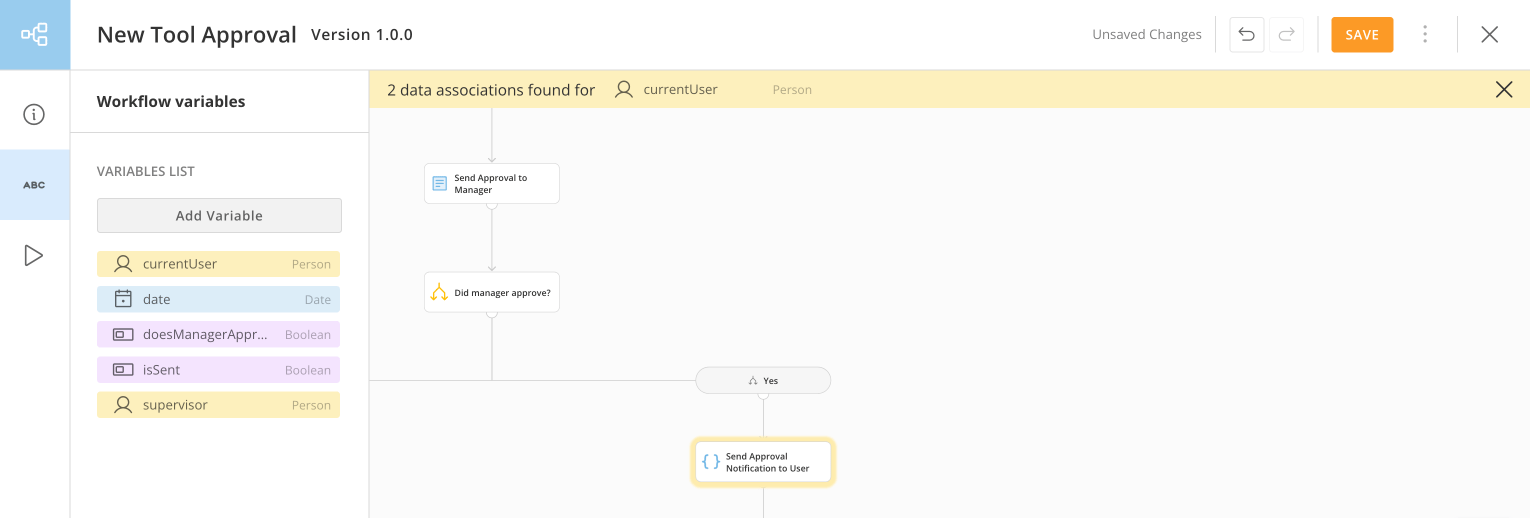 Choosing another variable shows the associations for that selection. Select
  **Close** in the banner to exit data association mode and return to edit mode.
 ### Save Your Workflow
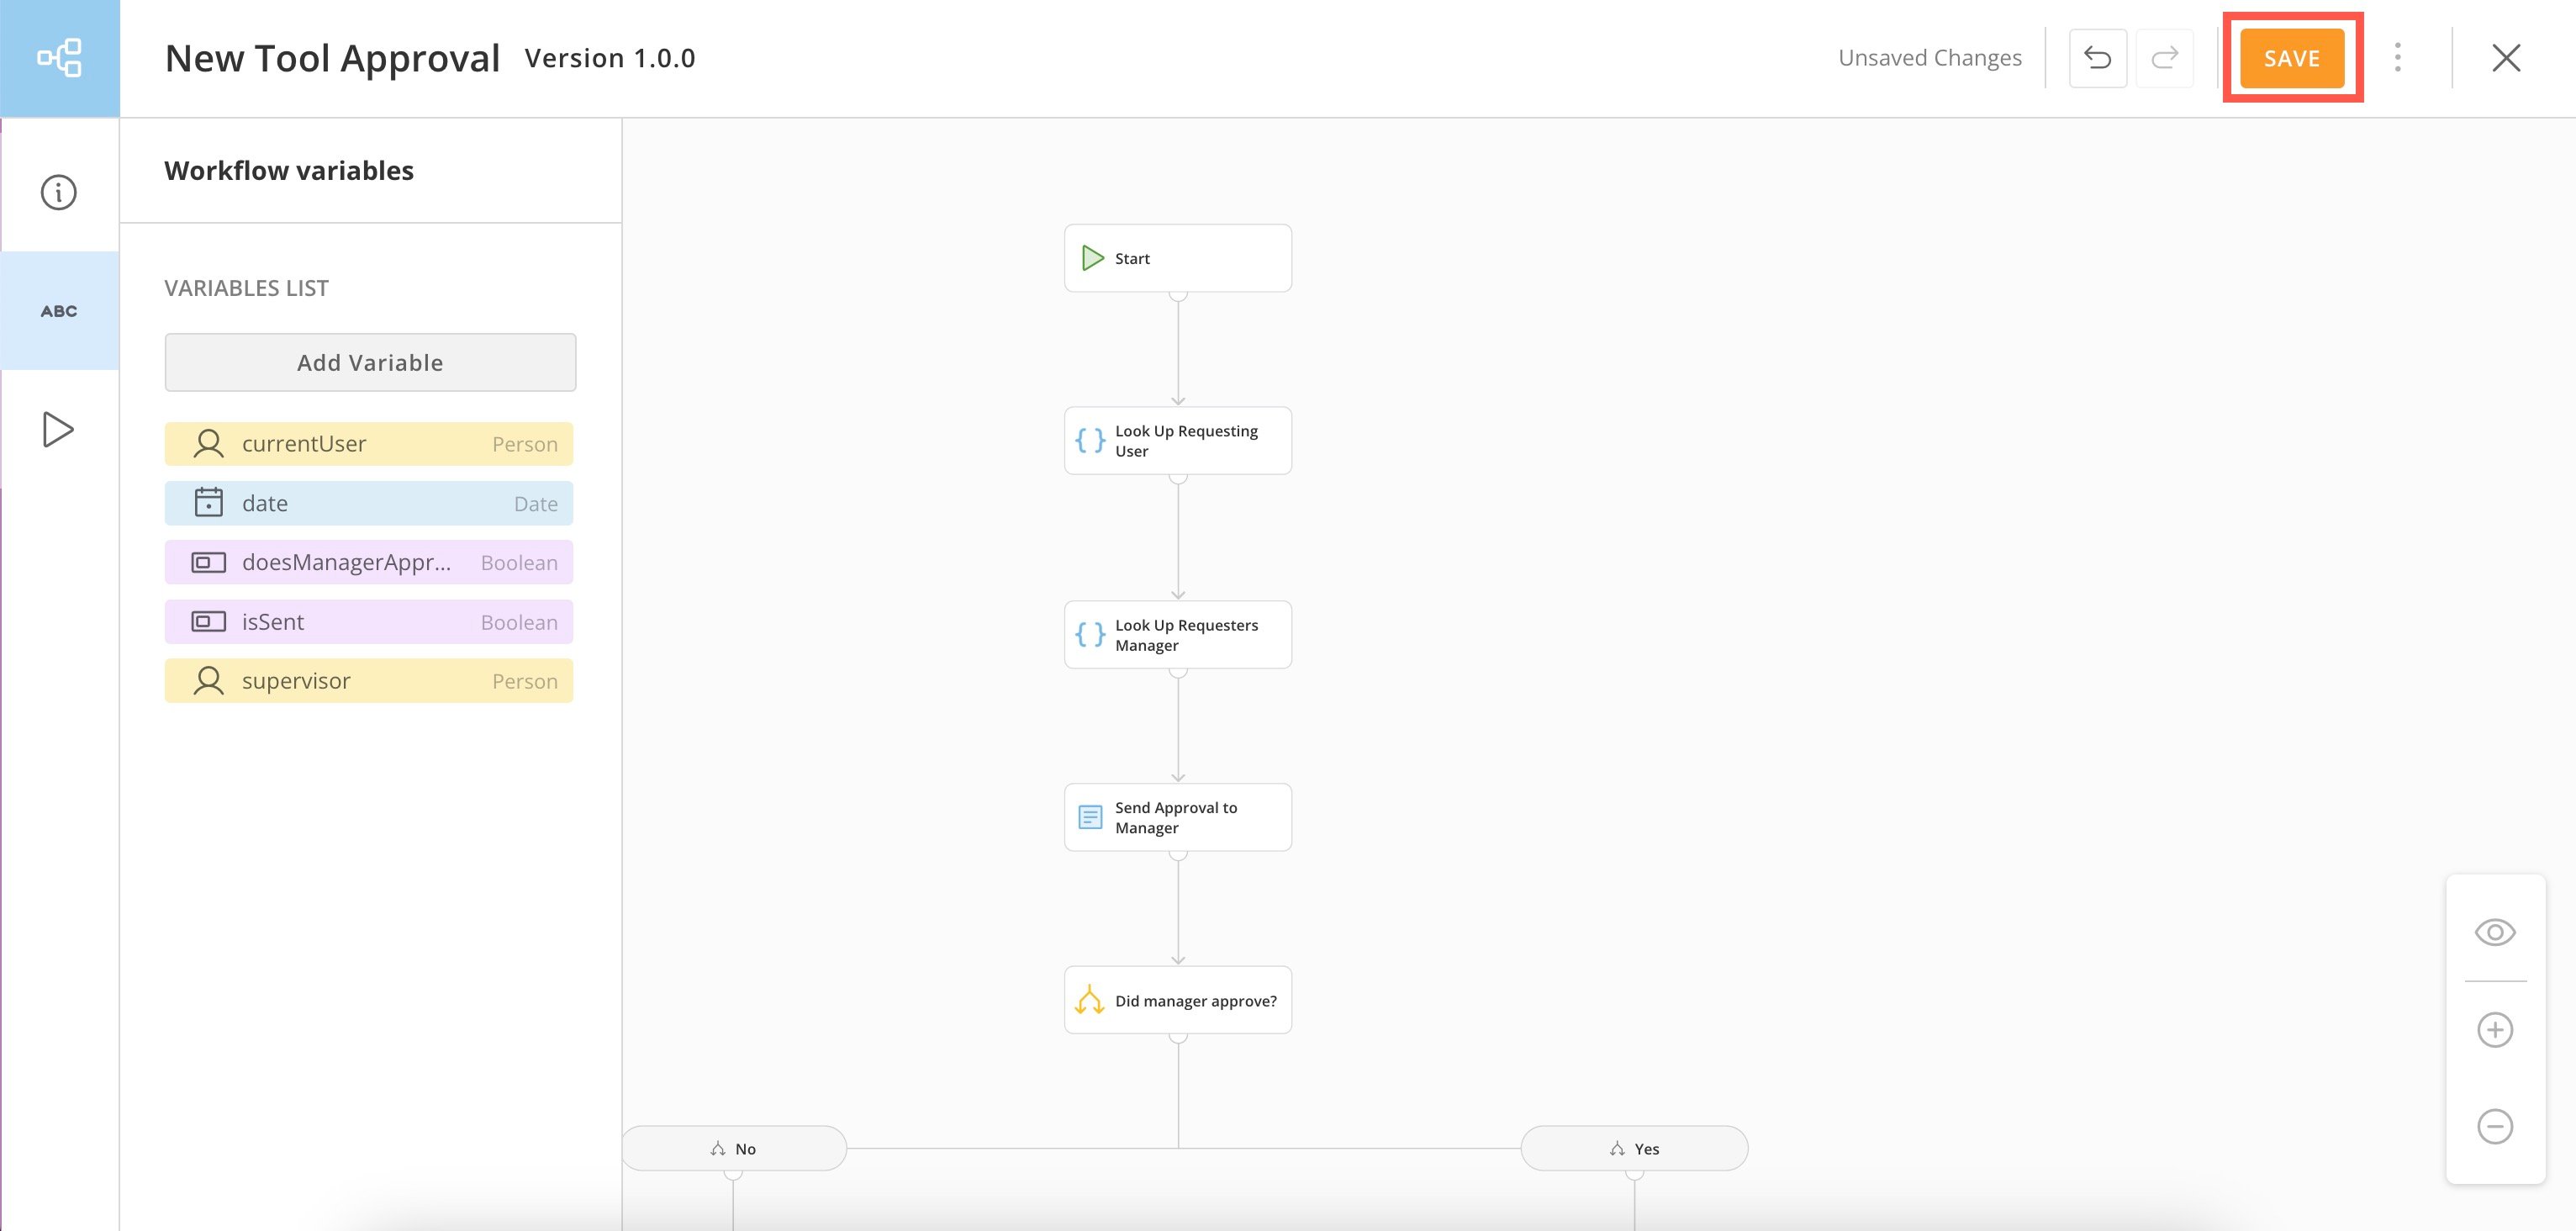
You can keep the changes to your workflow by selecting **Save**.
**Note:** Before saving, you must configure every shape on the canvas. Otherwise, you'll receive an error message.
### Save Your Workflow
You can keep the changes to your workflow by selecting **Save**.
**Note:** Before saving, you must configure every shape on the canvas. Otherwise, you'll receive an error message.
 #### Auto Save
The workflow tool automatically saves the changes you make to the workflow canvas. If there's a 10-second pause with no mouse movement or keyboard input, your edits are saved automatically.
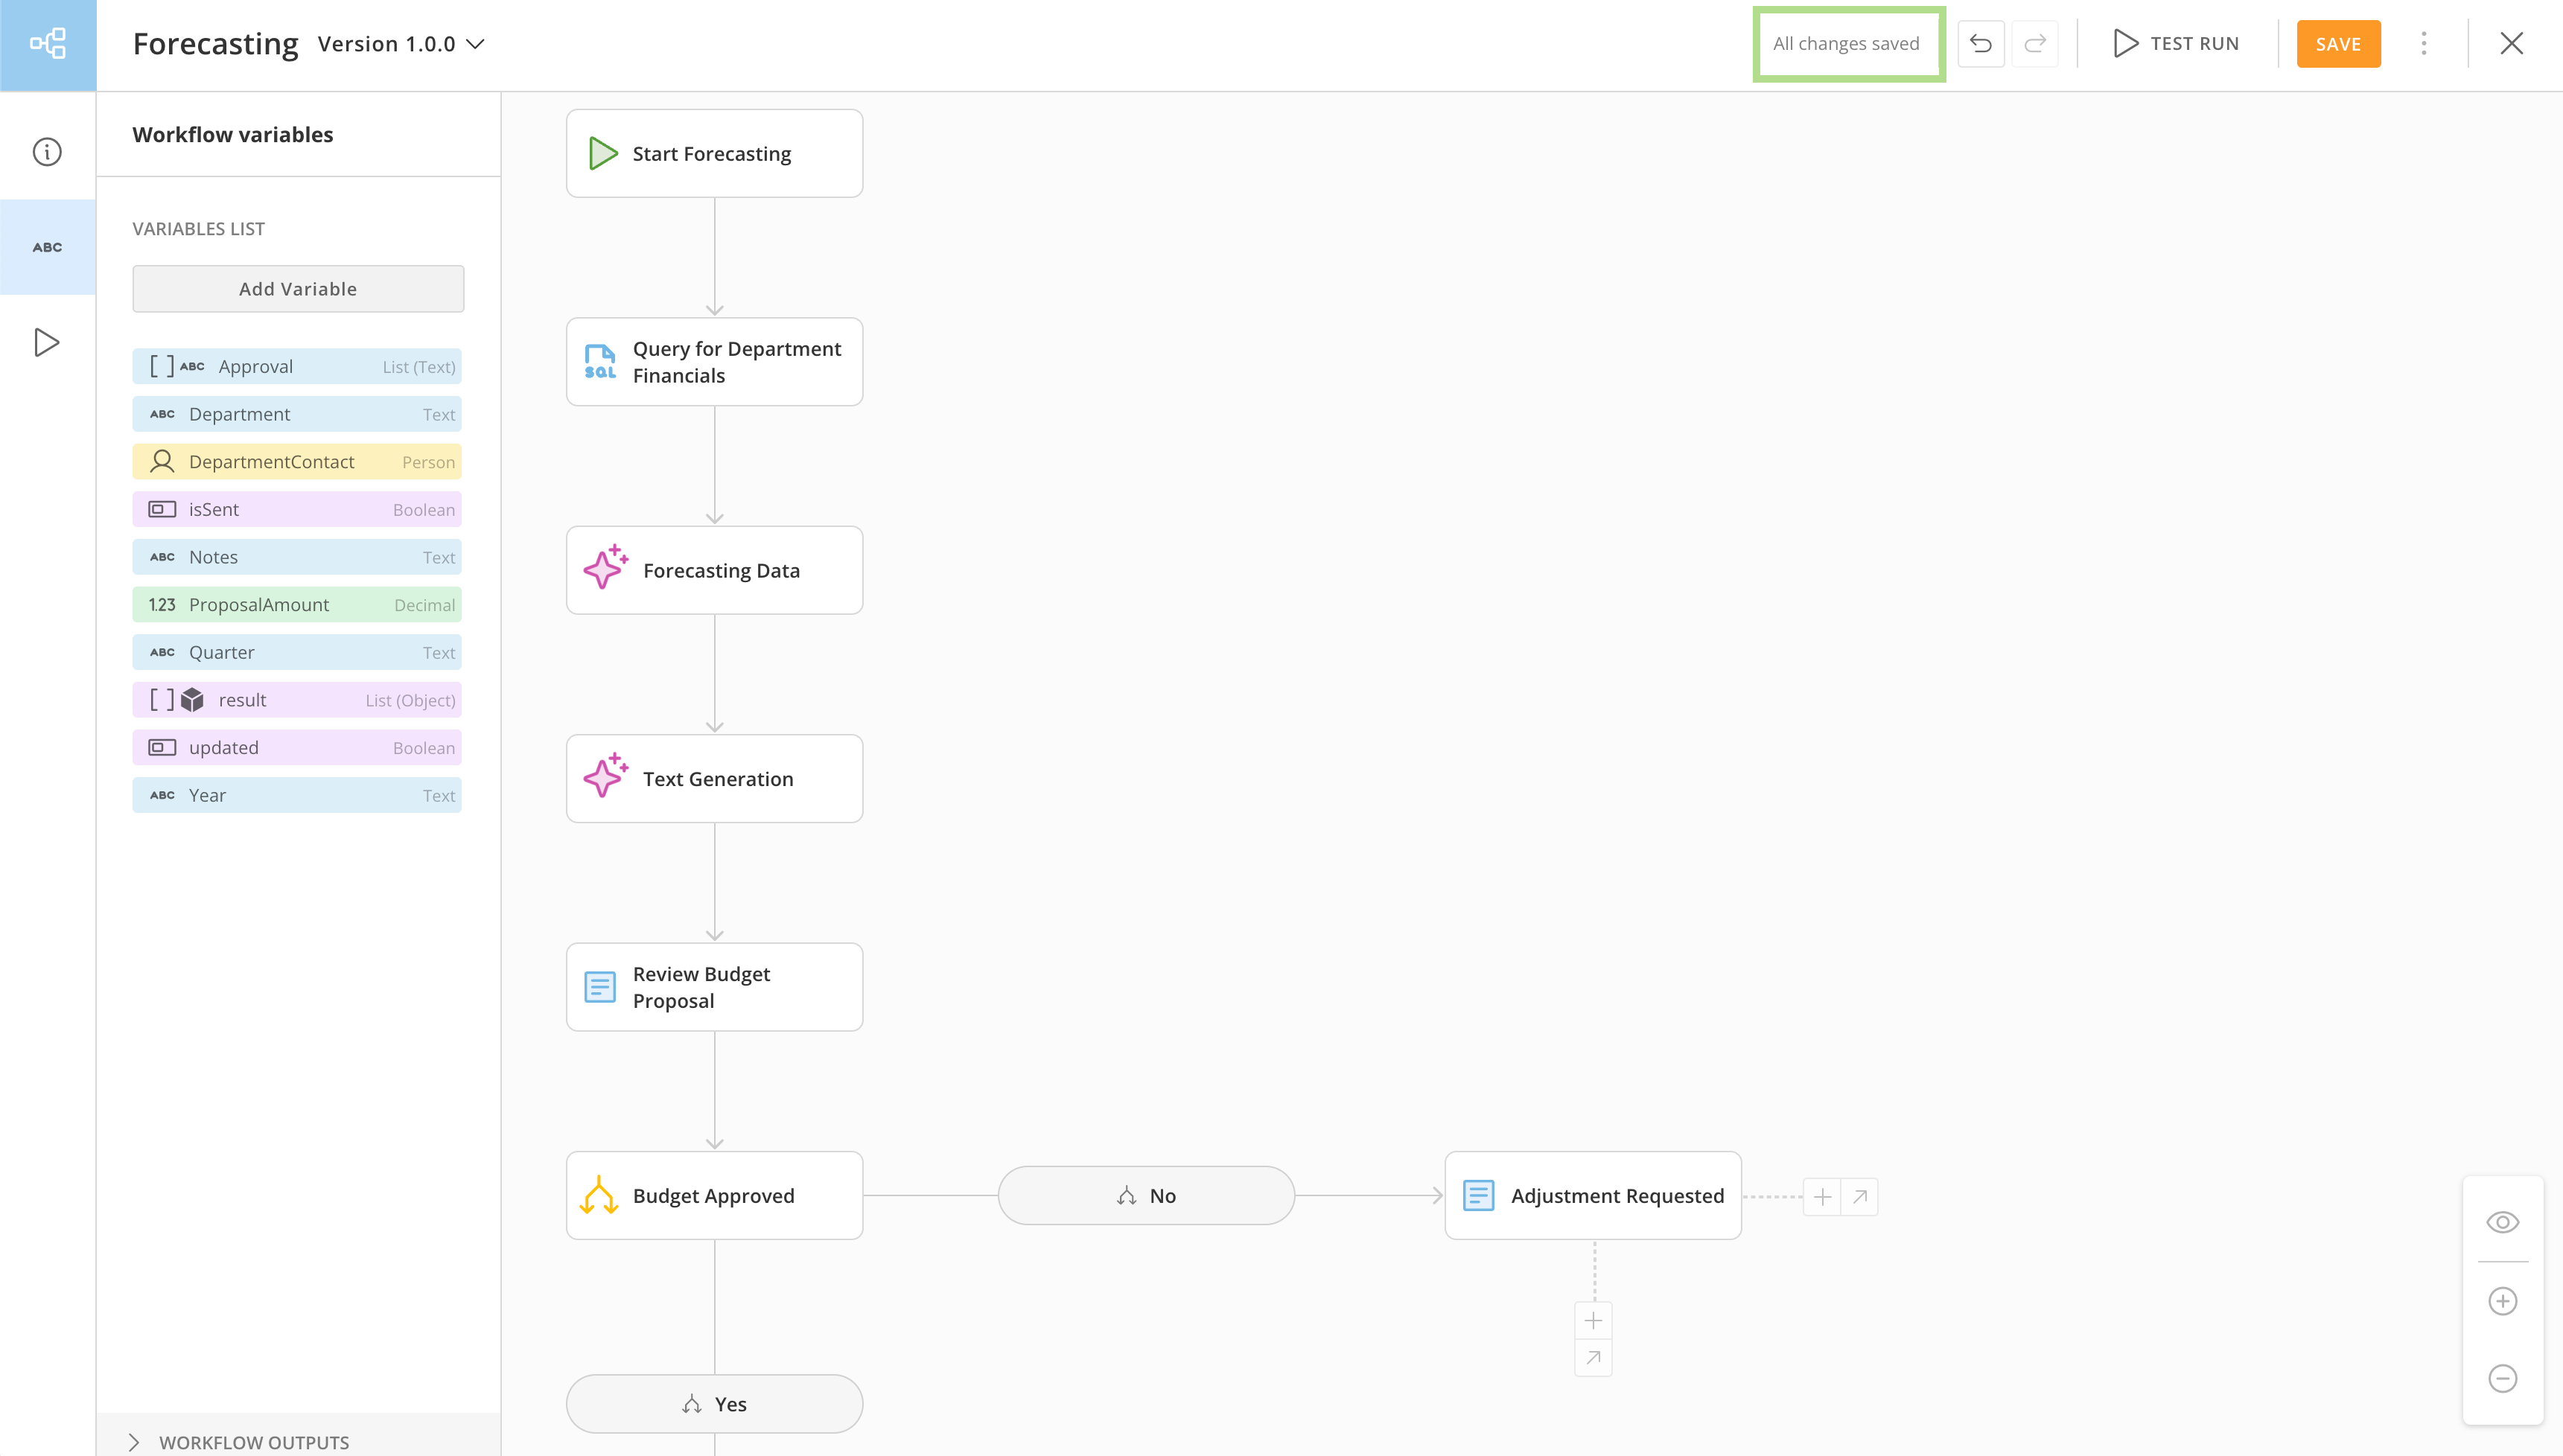
You can check the save status by looking at the indicator in the top header. If there are unsaved changes, it shows “Unsaved Changes.” Once everything is saved—either manually or automatically—it updates to “All changes saved.”
**Note:** Auto save only applies to edits on the canvas. Changes made within configuration modals won't be saved automatically. Always check the save indicator to confirm that your changes have been saved.
#### Auto Save
The workflow tool automatically saves the changes you make to the workflow canvas. If there's a 10-second pause with no mouse movement or keyboard input, your edits are saved automatically.
You can check the save status by looking at the indicator in the top header. If there are unsaved changes, it shows “Unsaved Changes.” Once everything is saved—either manually or automatically—it updates to “All changes saved.”
**Note:** Auto save only applies to edits on the canvas. Changes made within configuration modals won't be saved automatically. Always check the save indicator to confirm that your changes have been saved.
 #### Locking
When editing a workflow version, it is locked to prevent other users from making changes and possibly overwriting your work. If there's no activity for 30 minutes, the lock releases, and the workflow switches to View Only mode.
To continue editing after the lock is released, simply click the “Edit Workflow” option in the three-dot menu.
#### Perform a Save As
You can perform a 'save as' for your workflow by selecting
#### Locking
When editing a workflow version, it is locked to prevent other users from making changes and possibly overwriting your work. If there's no activity for 30 minutes, the lock releases, and the workflow switches to View Only mode.
To continue editing after the lock is released, simply click the “Edit Workflow” option in the three-dot menu.
#### Perform a Save As
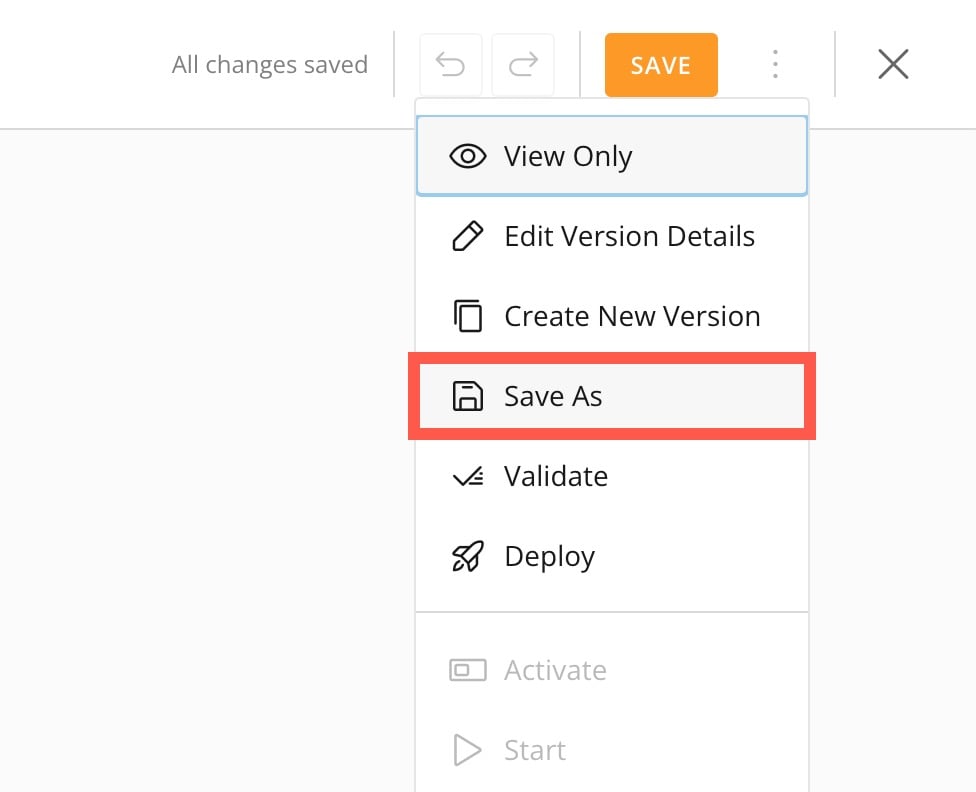
You can perform a 'save as' for your workflow by selecting  **More** (vertical three-dot menu) > **Save As**. If you have unsaved changes, you'll receive a warning message, but you can choose to 'save as' anyway and give the new version a number.
 ### Configure Workflow Start
Whether you create a new workflow from a template or a blank canvas, you must configure the workflow starting shape.
**Note:** Instead of using a manual start, you can trigger a workflow using a timer or from inside another Domo feature, such as App Studio. Triggers can only be configured after the workflow is [deployed](#deploy-a-workflow). Learn how to [configure a trigger](/s/article/000005179) for a deployed workflow version.
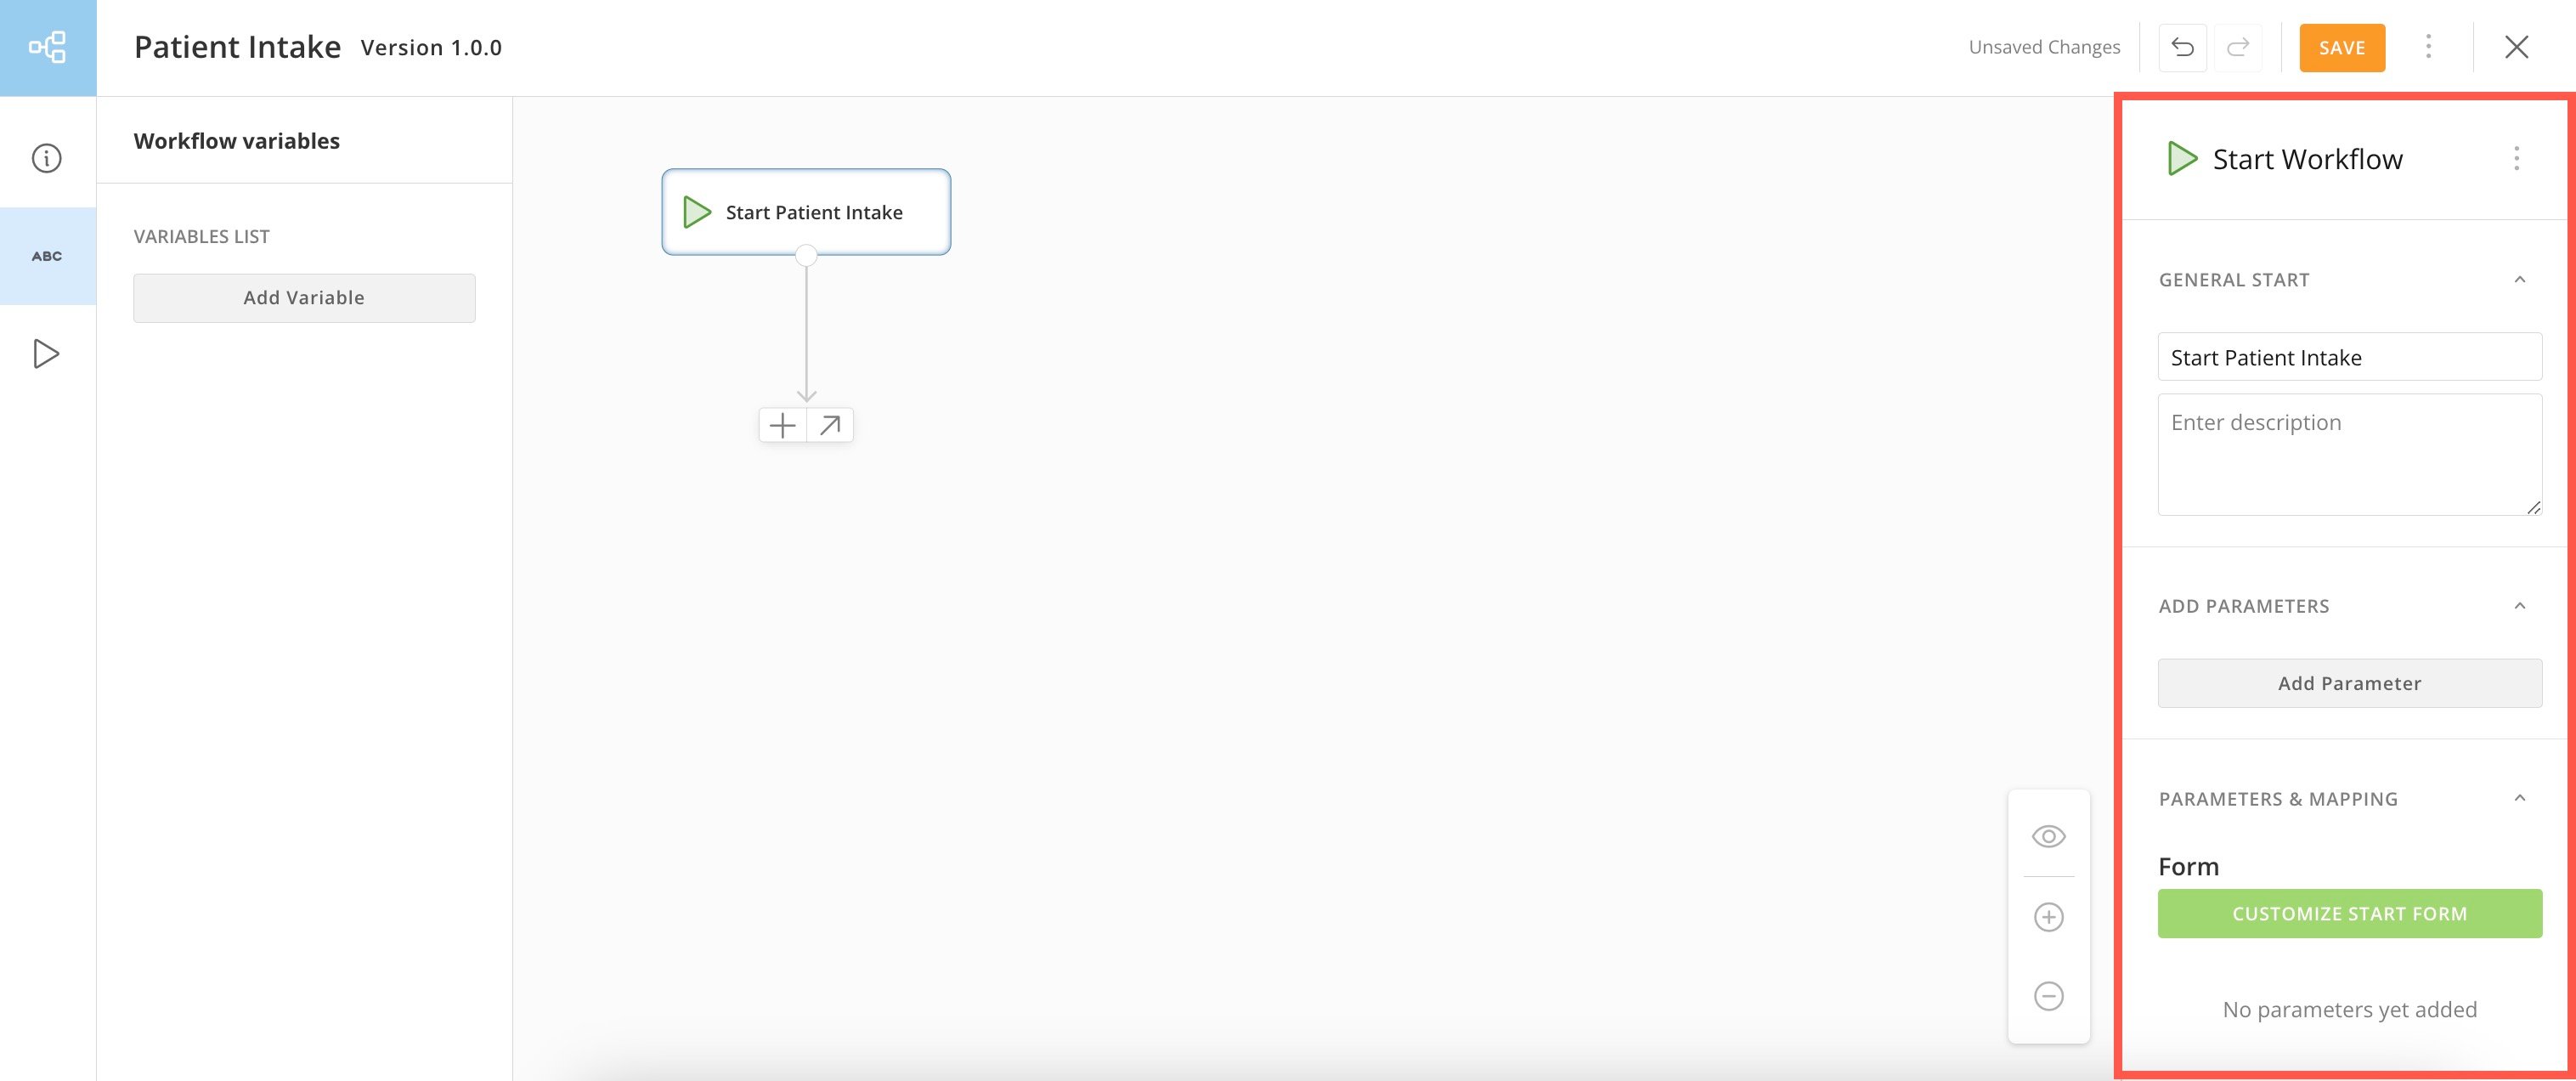
Select the default starting shape on the canvas to open the configuration panel. The title for a start shape defaults to "Start *Workflow Name*." You can change the title either by double-clicking inside the start shape to edit the text or by editing the title field in the configuration panel.\
In the configuration panel, you can also enter workflow description.
In the panel, you can add and configure any parameters the workflow needs as inputs. These can be entered by the workflow user via a form or given an initial or default value that is always passed when the workflow starts.
**Note:** If your workflow will loop, and you would rather not introduce a manual step for each execution or use a complex code function, you can assign an initial value to a variable, allowing the workflow to begin always using that value for the variable. Learn how to [assign an initial value to a variable](#add-a-variable) above.
### Configure Workflow Start
Whether you create a new workflow from a template or a blank canvas, you must configure the workflow starting shape.
**Note:** Instead of using a manual start, you can trigger a workflow using a timer or from inside another Domo feature, such as App Studio. Triggers can only be configured after the workflow is [deployed](#deploy-a-workflow). Learn how to [configure a trigger](/s/article/000005179) for a deployed workflow version.
Select the default starting shape on the canvas to open the configuration panel. The title for a start shape defaults to "Start *Workflow Name*." You can change the title either by double-clicking inside the start shape to edit the text or by editing the title field in the configuration panel.\
In the configuration panel, you can also enter workflow description.
In the panel, you can add and configure any parameters the workflow needs as inputs. These can be entered by the workflow user via a form or given an initial or default value that is always passed when the workflow starts.
**Note:** If your workflow will loop, and you would rather not introduce a manual step for each execution or use a complex code function, you can assign an initial value to a variable, allowing the workflow to begin always using that value for the variable. Learn how to [assign an initial value to a variable](#add-a-variable) above.
 #### Add Parameters
Parameters require or allow data values to be passed into the workflow when it executes. Follow these steps to add and configure your starting parameters:
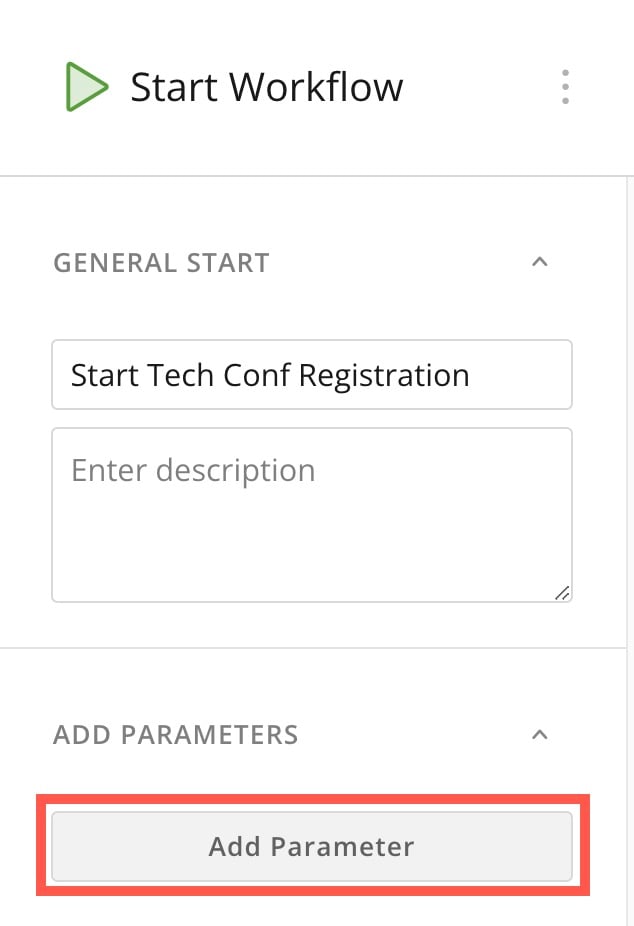
1. Select your start shape to open the configuration panel, and select **Add Parameter** to open the new parameter modal.
#### Add Parameters
Parameters require or allow data values to be passed into the workflow when it executes. Follow these steps to add and configure your starting parameters:
1. Select your start shape to open the configuration panel, and select **Add Parameter** to open the new parameter modal.
 2. In the modal, enter a name for the parameter. Spaces and special characters are not allowed.
3. Choose a data type for the parameter. Learn about the available [data types](/s/article/000005797).
2. In the modal, enter a name for the parameter. Spaces and special characters are not allowed.
3. Choose a data type for the parameter. Learn about the available [data types](/s/article/000005797).
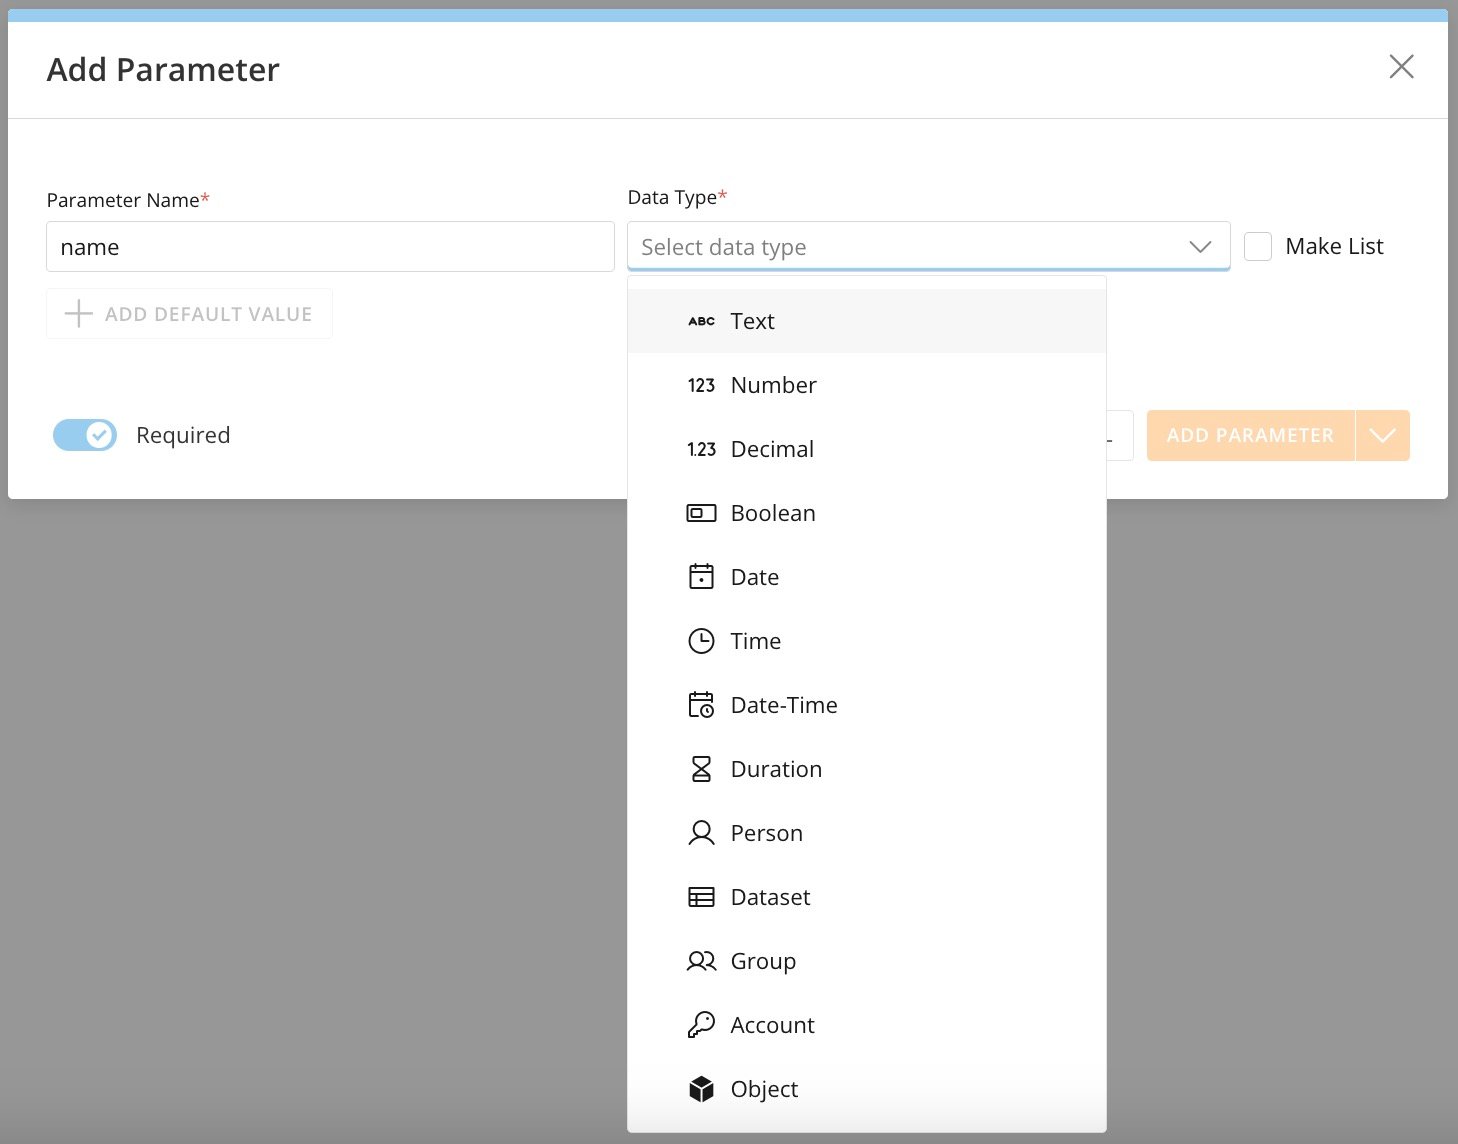 4. Use the **Required** toggle to indicate whether the parameter is required. By default, new parameters are marked as required.
5. (Conditional) If you want to assign a default value to a parameter, select **+ Add Default Value** after defining the name and data type. Default values can be changed until that workflow version is deployed.
4. Use the **Required** toggle to indicate whether the parameter is required. By default, new parameters are marked as required.
5. (Conditional) If you want to assign a default value to a parameter, select **+ Add Default Value** after defining the name and data type. Default values can be changed until that workflow version is deployed.
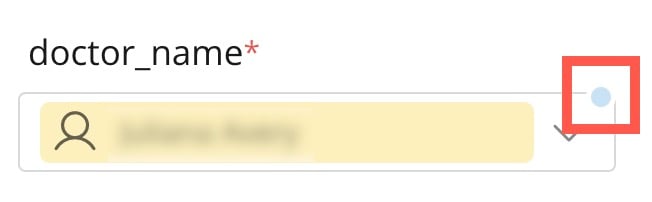
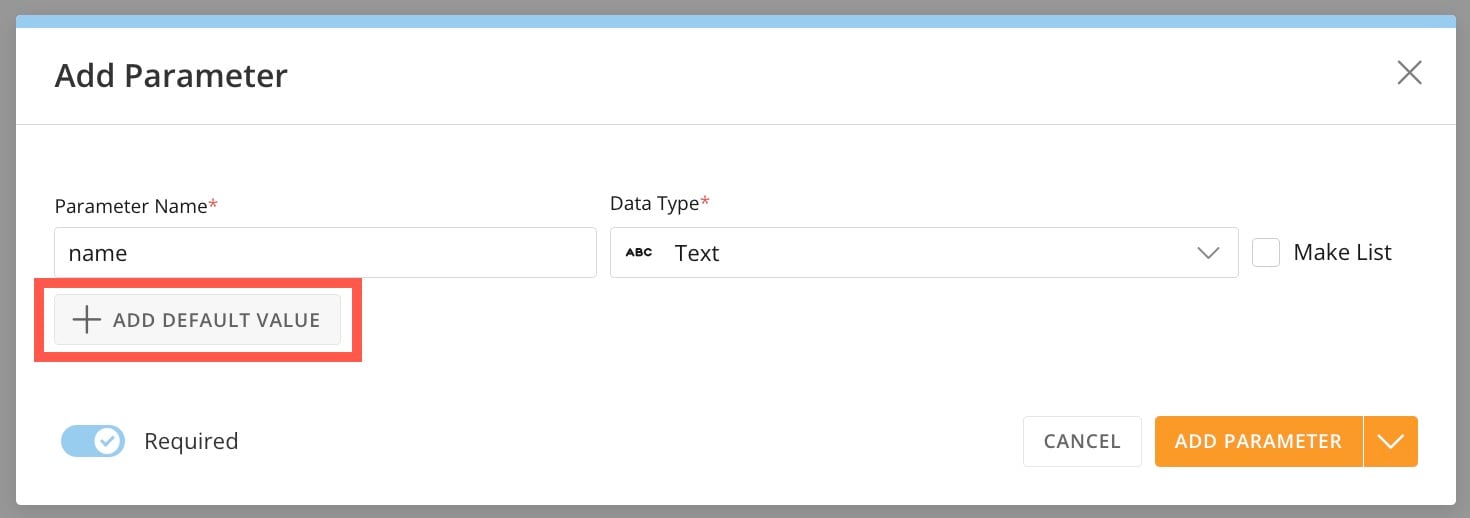 Parameters with a default value display with a blue dot in the parameters list.
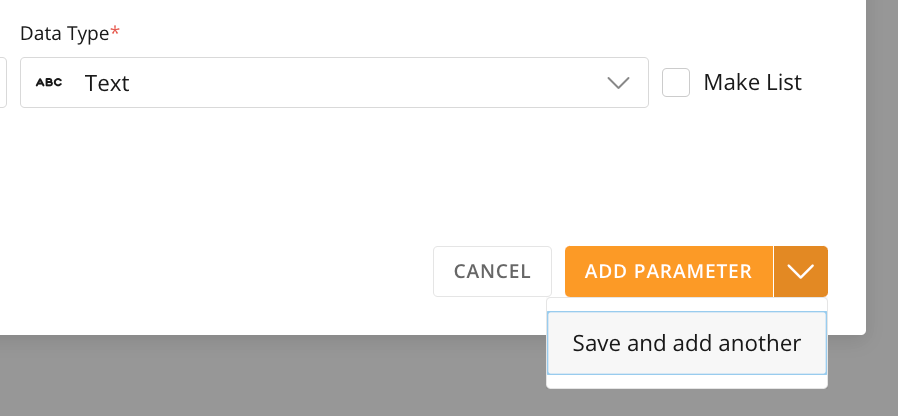
 6. Select **Add Parameter**.
* (Optional) You can choose **More** (orange down arrow icon) > **Save and add another** if you are adding more than one parameter.
6. Select **Add Parameter**.
* (Optional) You can choose **More** (orange down arrow icon) > **Save and add another** if you are adding more than one parameter.
 7. Repeat these steps for as many start parameters as needed.
The configured start parameters display in the configuration panel under **Parameters & Mapping**. A red asterisk beside the name indicates that the parameter is required for the workflow to start.
7. Repeat these steps for as many start parameters as needed.
The configured start parameters display in the configuration panel under **Parameters & Mapping**. A red asterisk beside the name indicates that the parameter is required for the workflow to start.
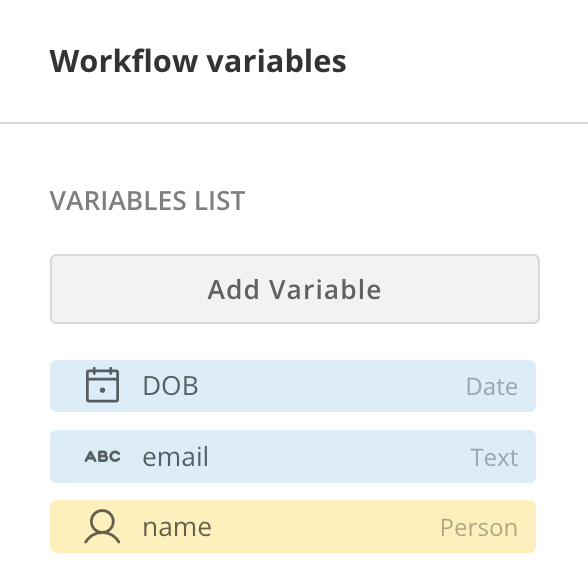
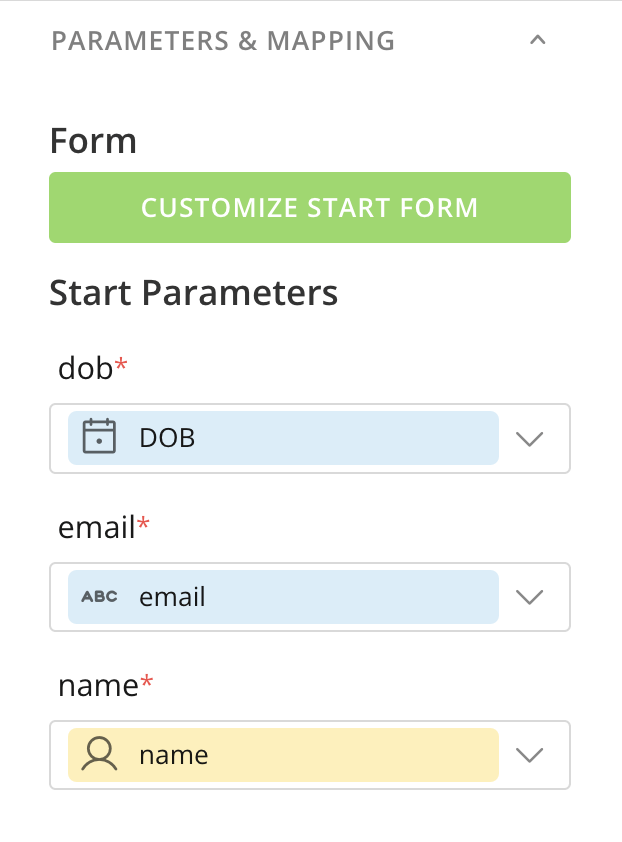 **Note:** A corresponding variable with the same name and data type is mapped to the parameter and added to the workflow variables list, accessible from the left navigation. You can map a parameter to a different variable, but it must be of the same data type.
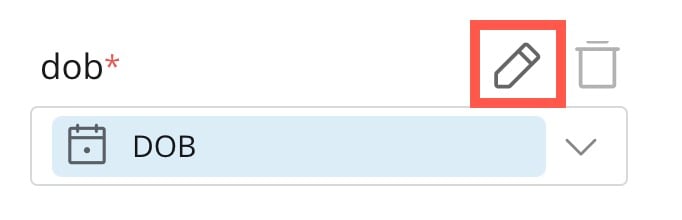
 Make changes to a parameter by hovering over it and selecting
  **Edit**.
 ### Add Shapes to Your Canvas
Your workflow is a series of shapes—representing actions—connected by flows (or lines). After adding shapes to your canvas, you can drag them around to change the visual design of your workflow. Dragging a shape also drags any flows attached to it.
Add a shape to the canvas by selecting
### Add Shapes to Your Canvas
Your workflow is a series of shapes—representing actions—connected by flows (or lines). After adding shapes to your canvas, you can drag them around to change the visual design of your workflow. Dragging a shape also drags any flows attached to it.
Add a shape to the canvas by selecting  **Add action** at the end of any flow to display the action menu.\
Select
**Add action** at the end of any flow to display the action menu.\
Select  **Add Flow** to add another connecting line.
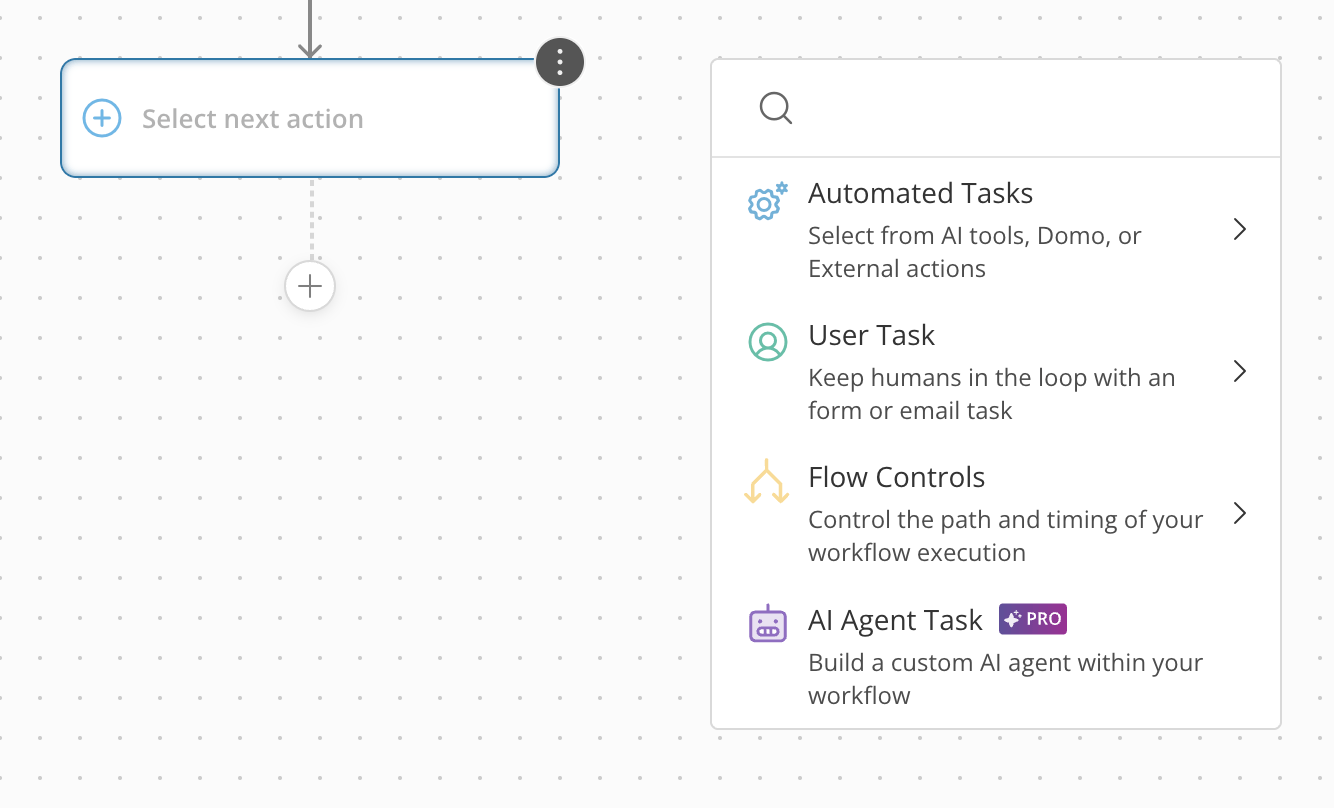 The Action menu includes four simplified top-level categories:
* **Automated Tasks**
* **User Tasks**
* **Flow Controls**
* **AI Agent Task**
You can use the **search bar** at the top of the menu to find specific actions. As you type, the menu dynamically returns results based on matching characters. You can search directly or browse through the menu to locate the action you need.
**Automated Tasks**
**
The Action menu includes four simplified top-level categories:
* **Automated Tasks**
* **User Tasks**
* **Flow Controls**
* **AI Agent Task**
You can use the **search bar** at the top of the menu to find specific actions. As you type, the menu dynamically returns results based on matching characters. You can search directly or browse through the menu to locate the action you need.
**Automated Tasks**
**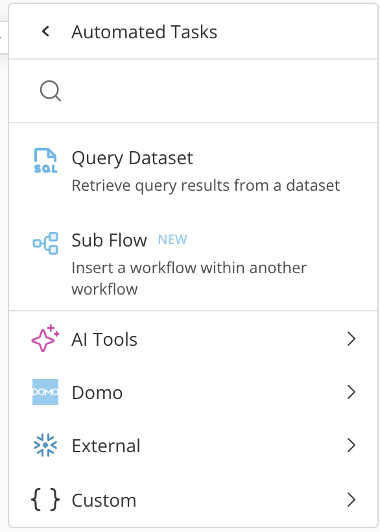 **
If you select **Automated Tasks**, a submenu opens that includes:
* *Query DataSet* — Query and retrieve data from a Domo DataSet in your workflow. You can include variables in your query and preview it before sending. Learn how to add a [query table](/s/article/000005797).
* *Sub Flow* —Insert a workflow within another workflow. Learn how to [add and configure subflows](/s/article/000005930).
* *AI Tools* — Pre-built AI functions to perform tasks in Domo. These include:
* *Domo AI Service Layer —* Use services like Image to Text, Text Generation, and Text to SQL.
**
If you select **Automated Tasks**, a submenu opens that includes:
* *Query DataSet* — Query and retrieve data from a Domo DataSet in your workflow. You can include variables in your query and preview it before sending. Learn how to add a [query table](/s/article/000005797).
* *Sub Flow* —Insert a workflow within another workflow. Learn how to [add and configure subflows](/s/article/000005930).
* *AI Tools* — Pre-built AI functions to perform tasks in Domo. These include:
* *Domo AI Service Layer —* Use services like Image to Text, Text Generation, and Text to SQL.
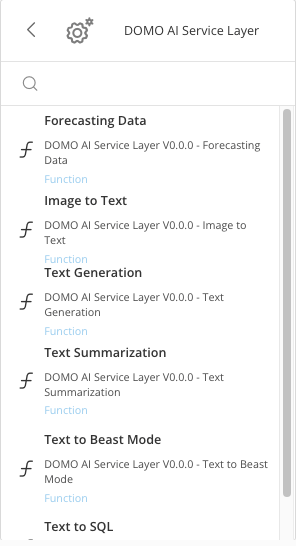 * *Domo Jupyter —* Add and execute a Jupyter Notebook in your workflow. Learn more about [Jupyter Notebooks in Workflows](/s/article/36004740075).
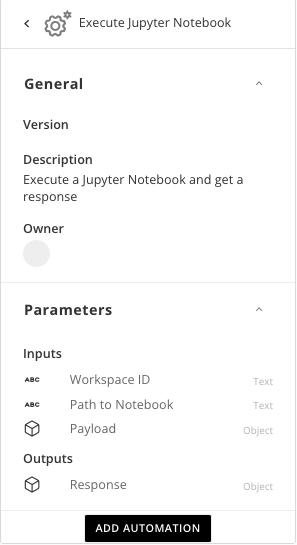 * *Domo* — Select a pre-built function to perform a specific task within the Domo Platform.
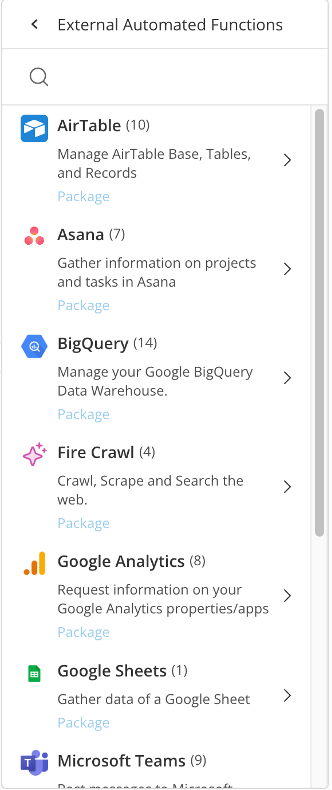
* *External* — Select a pre-built function to integrate with an external system.
* *Domo* — Select a pre-built function to perform a specific task within the Domo Platform.
* *External* — Select a pre-built function to integrate with an external system.
 * *Custom* —A custom function automatically executes a predefined code package to perform a specific task before proceeding to the next step in the workflow. It can have multiple incoming flows but only one outgoing flow.\
Learn how to [configure](/s/article/000005797) and [test](/s/article/000005797) a custom function.
**User Tasks**
A user task represents a human interaction. It can have multiple incoming flows but only one outgoing flow.
* *Custom* —A custom function automatically executes a predefined code package to perform a specific task before proceeding to the next step in the workflow. It can have multiple incoming flows but only one outgoing flow.\
Learn how to [configure](/s/article/000005797) and [test](/s/article/000005797) a custom function.
**User Tasks**
A user task represents a human interaction. It can have multiple incoming flows but only one outgoing flow.
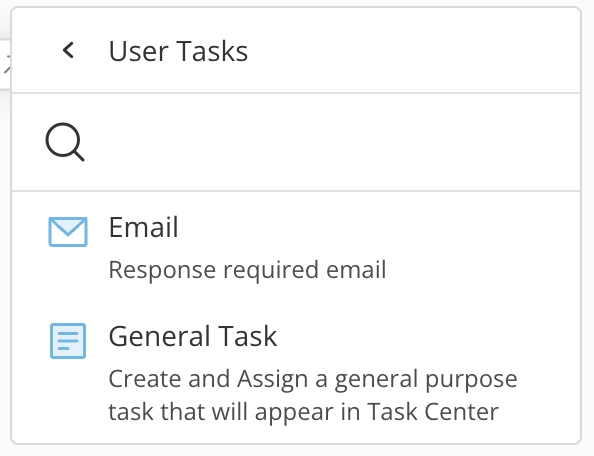 There are two kinds of user tasks:
* *Email —* Automatically sends an email to chosen recipients. Recipients can then respond using options embedded in the email body. Learn how to [configure an email](/s/article/000005797).
* *General task —* Allows you to choose a queue and assign a needed form to a specific user. Learn how to [configure a general task](/s/article/000005797).
**Flow Controls**
Flow controls manage the direction of the workflow.
There are two kinds of user tasks:
* *Email —* Automatically sends an email to chosen recipients. Recipients can then respond using options embedded in the email body. Learn how to [configure an email](/s/article/000005797).
* *General task —* Allows you to choose a queue and assign a needed form to a specific user. Learn how to [configure a general task](/s/article/000005797).
**Flow Controls**
Flow controls manage the direction of the workflow.
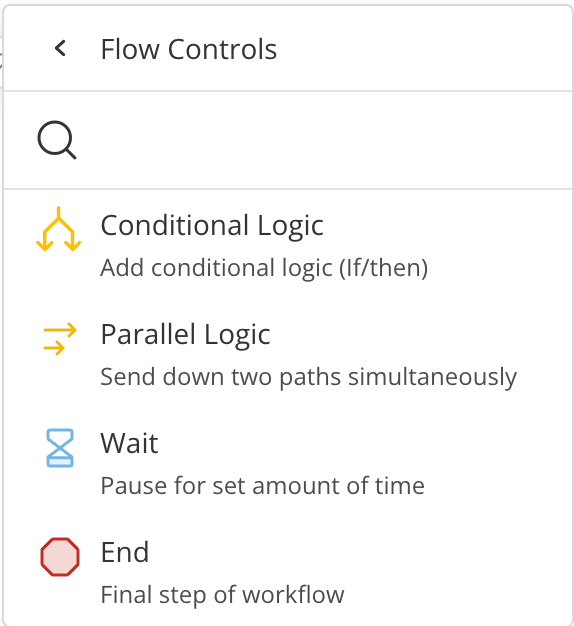 There are four available:
* *Conditional Logic —* Applies IF/THEN statements to your workflow. Learn how to configure [conditional logic](/s/article/000005797).
* *Parallel Logic —* Forces your workflow to perform independent steps in parallel. Learn how to configure [parallel logic](/s/article/000005797).
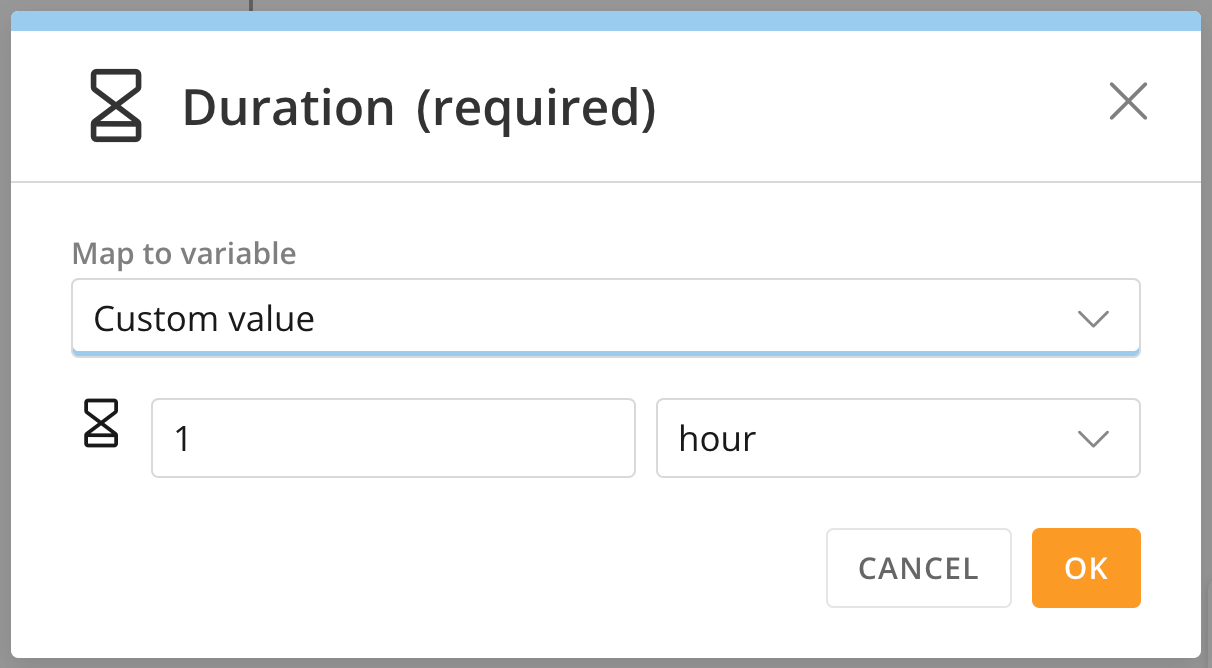
* *Wait —* Delays the workflow for a specified interval before continuing. Wait actions can only have one outgoing flow.\
After adding a wait action, you can name it in the configuration panel. Use the **settings** dropdown in the parameter section to enter a custom value.
There are four available:
* *Conditional Logic —* Applies IF/THEN statements to your workflow. Learn how to configure [conditional logic](/s/article/000005797).
* *Parallel Logic —* Forces your workflow to perform independent steps in parallel. Learn how to configure [parallel logic](/s/article/000005797).
* *Wait —* Delays the workflow for a specified interval before continuing. Wait actions can only have one outgoing flow.\
After adding a wait action, you can name it in the configuration panel. Use the **settings** dropdown in the parameter section to enter a custom value.
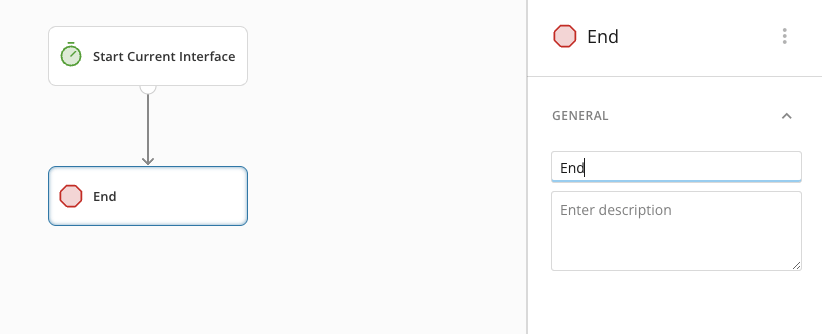
 * *End —* Terminates the workflow. A workflow can have multiple End shapes if the design has places where one flow branches into two or more. Name and describe each End shape in the configuration panel.
 **AI Agent Task**
AI Agents can perform tasks on behalf of a person or system by using tools, data, and workflows. When an AI Agent is embedded directly into a workflow step, it can analyze inputs, make context-aware decisions, and execute actions to reduce manual effort and increase operational efficiency. Employing Domo global and custom functions enables your agent to go beyond thinking and actuallydo.
Learn how to [build an AI agent task in Workflows](/s/article/000005865).
**Searching the Action Menu**
Use the search bar at the top of the Action menu to find specific actions. The menu returns results dynamically as you type, matching characters in real time.
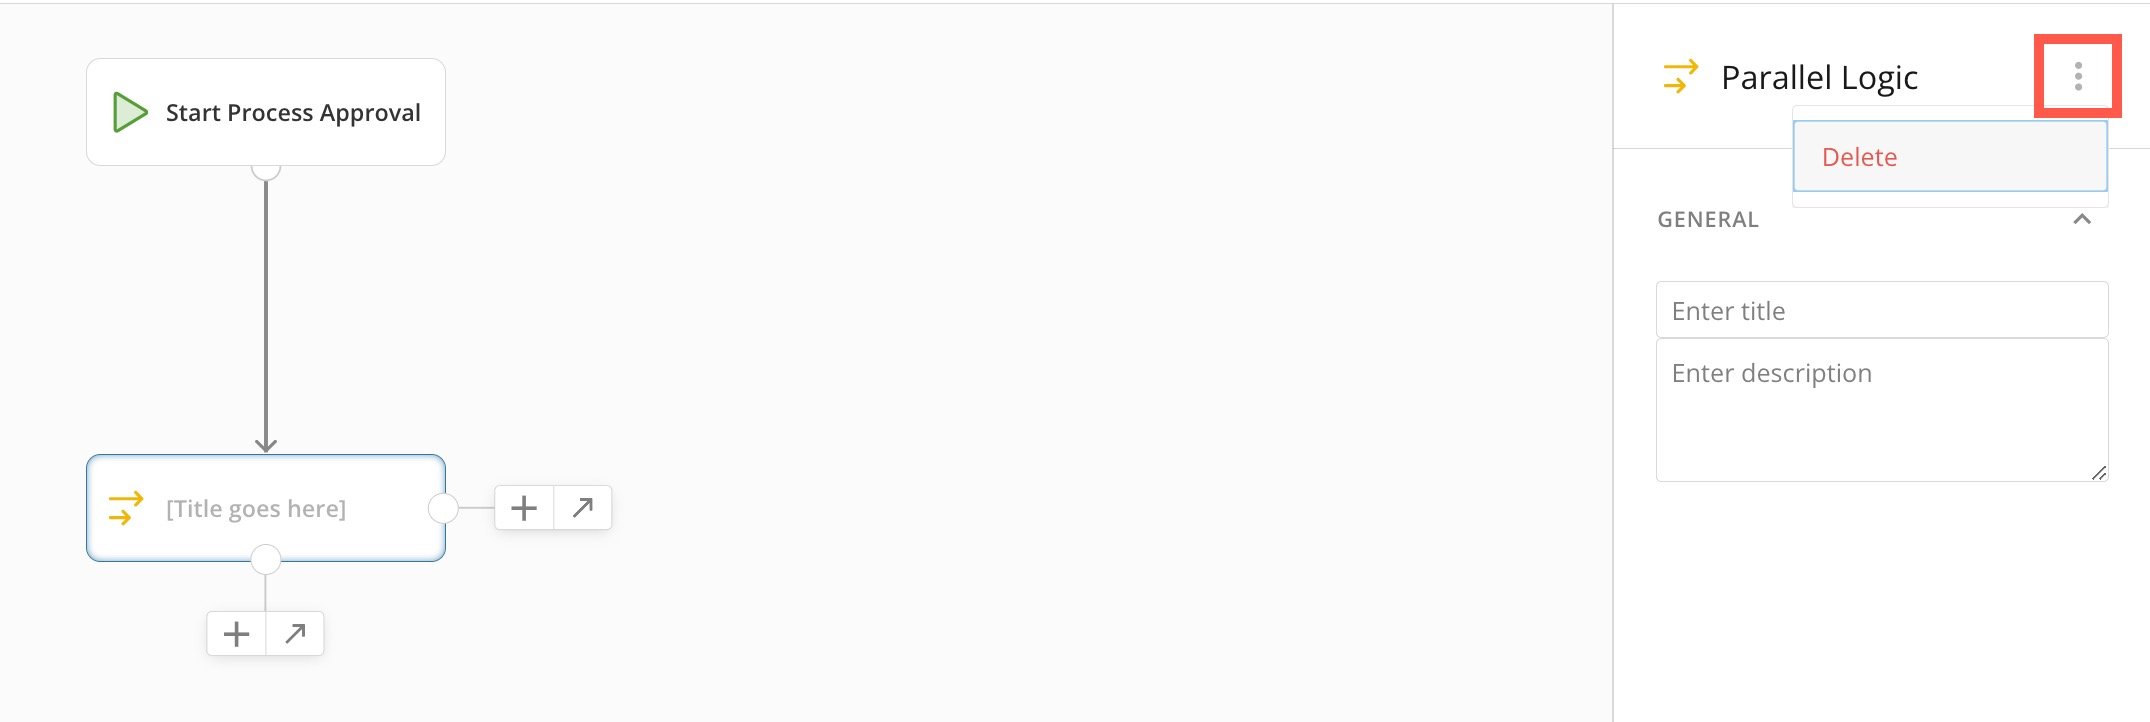
**Remove a shape:** To remove a shape from the canvas, select it to display the configuration panel. In the panel, select **More**(vertical three-dot icon) > **Delete**.
**AI Agent Task**
AI Agents can perform tasks on behalf of a person or system by using tools, data, and workflows. When an AI Agent is embedded directly into a workflow step, it can analyze inputs, make context-aware decisions, and execute actions to reduce manual effort and increase operational efficiency. Employing Domo global and custom functions enables your agent to go beyond thinking and actuallydo.
Learn how to [build an AI agent task in Workflows](/s/article/000005865).
**Searching the Action Menu**
Use the search bar at the top of the Action menu to find specific actions. The menu returns results dynamically as you type, matching characters in real time.
**Remove a shape:** To remove a shape from the canvas, select it to display the configuration panel. In the panel, select **More**(vertical three-dot icon) > **Delete**.
 ### Add Comments
You can add comments to your workflow canvas to provide extra context or descriptions for specific steps or actions.
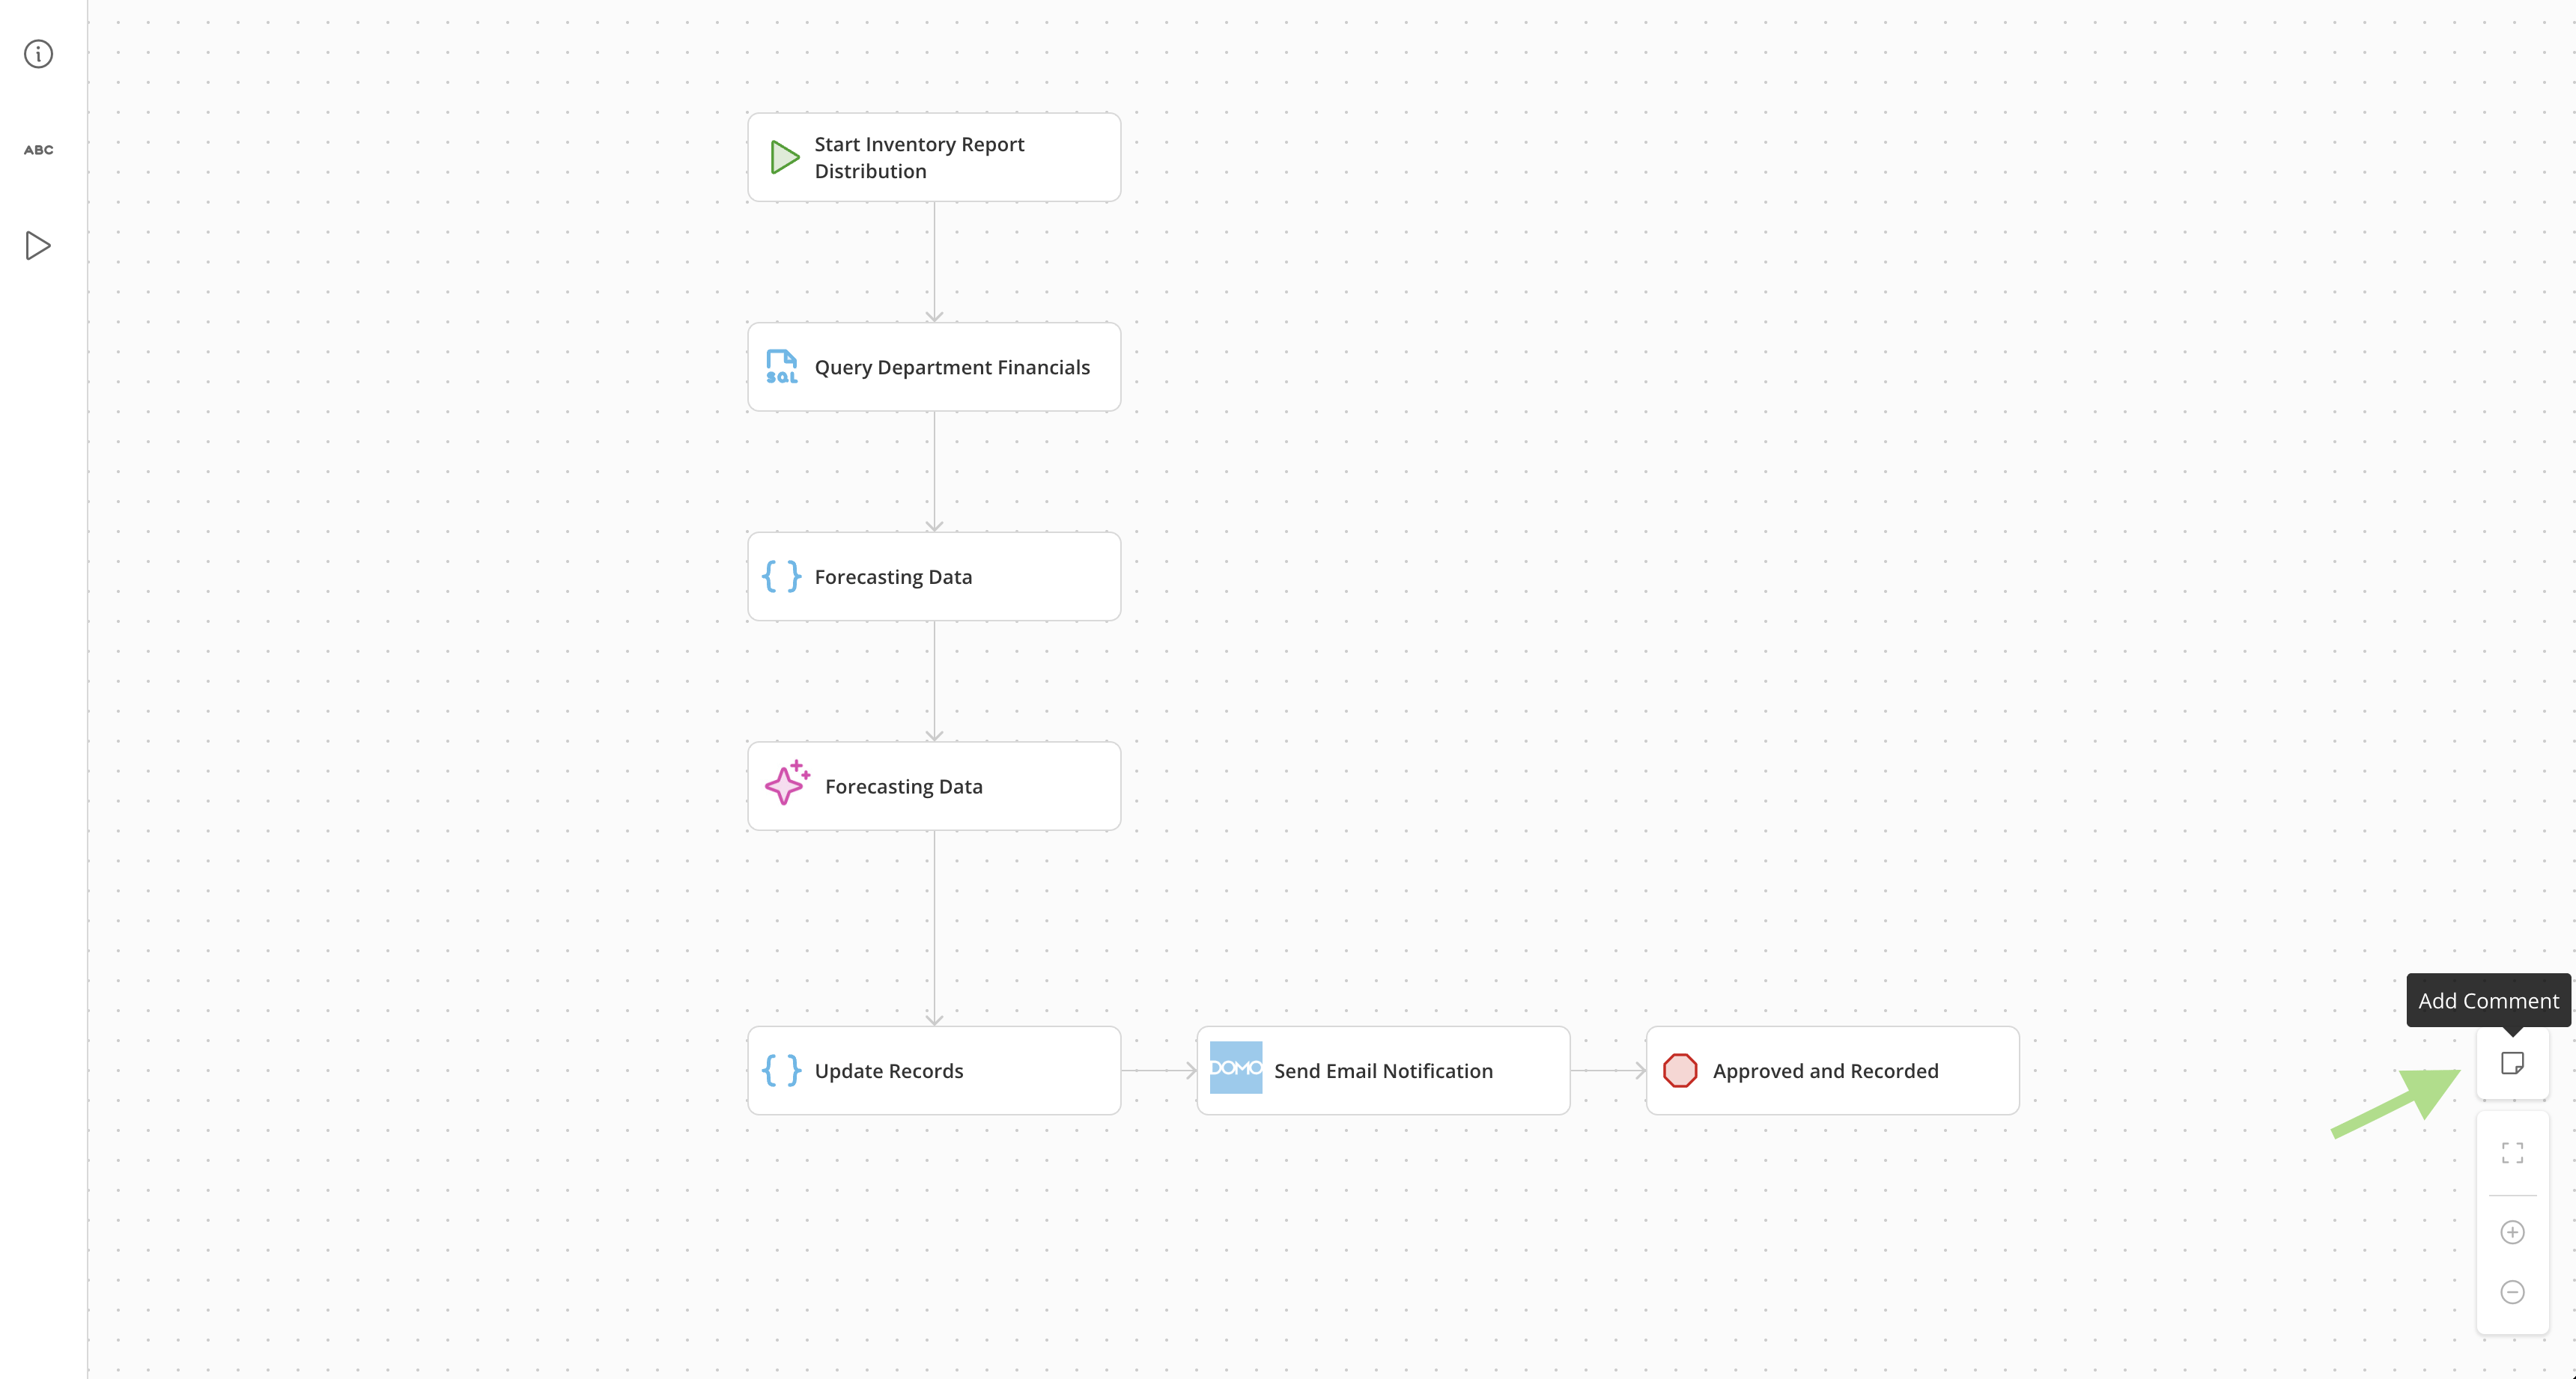
1. Select **Add Comment** above the zoom controls in the bottom-right corner of the canvas.
### Add Comments
You can add comments to your workflow canvas to provide extra context or descriptions for specific steps or actions.
1. Select **Add Comment** above the zoom controls in the bottom-right corner of the canvas.
 2. Drag and drop the comment box anywhere on the canvas. You can resize and reposition it as needed.
3. Select inside the comment box to type your text. A formatting toolbar appears, where you can customize the text's style, color, and background.
2. Drag and drop the comment box anywhere on the canvas. You can resize and reposition it as needed.
3. Select inside the comment box to type your text. A formatting toolbar appears, where you can customize the text's style, color, and background.
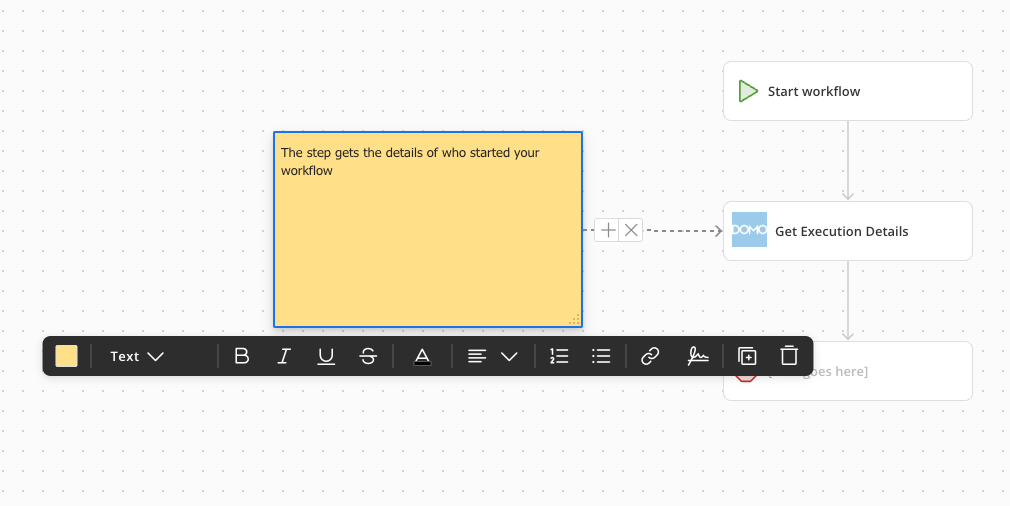 4. (Optional) To associate a comment with a workflow step, connect the comment box to a step by dragging from one of the circular ports on the comment to a port on the step.
**Note:** This connection is visual only and does not affect the workflow execution.
5. To delete a comment or its connection line, select it and press the **Delete** key, or use the on-screen delete options.
Add as many comments as you need to make your workflow clearer and more informative.
### Connect Existing Steps
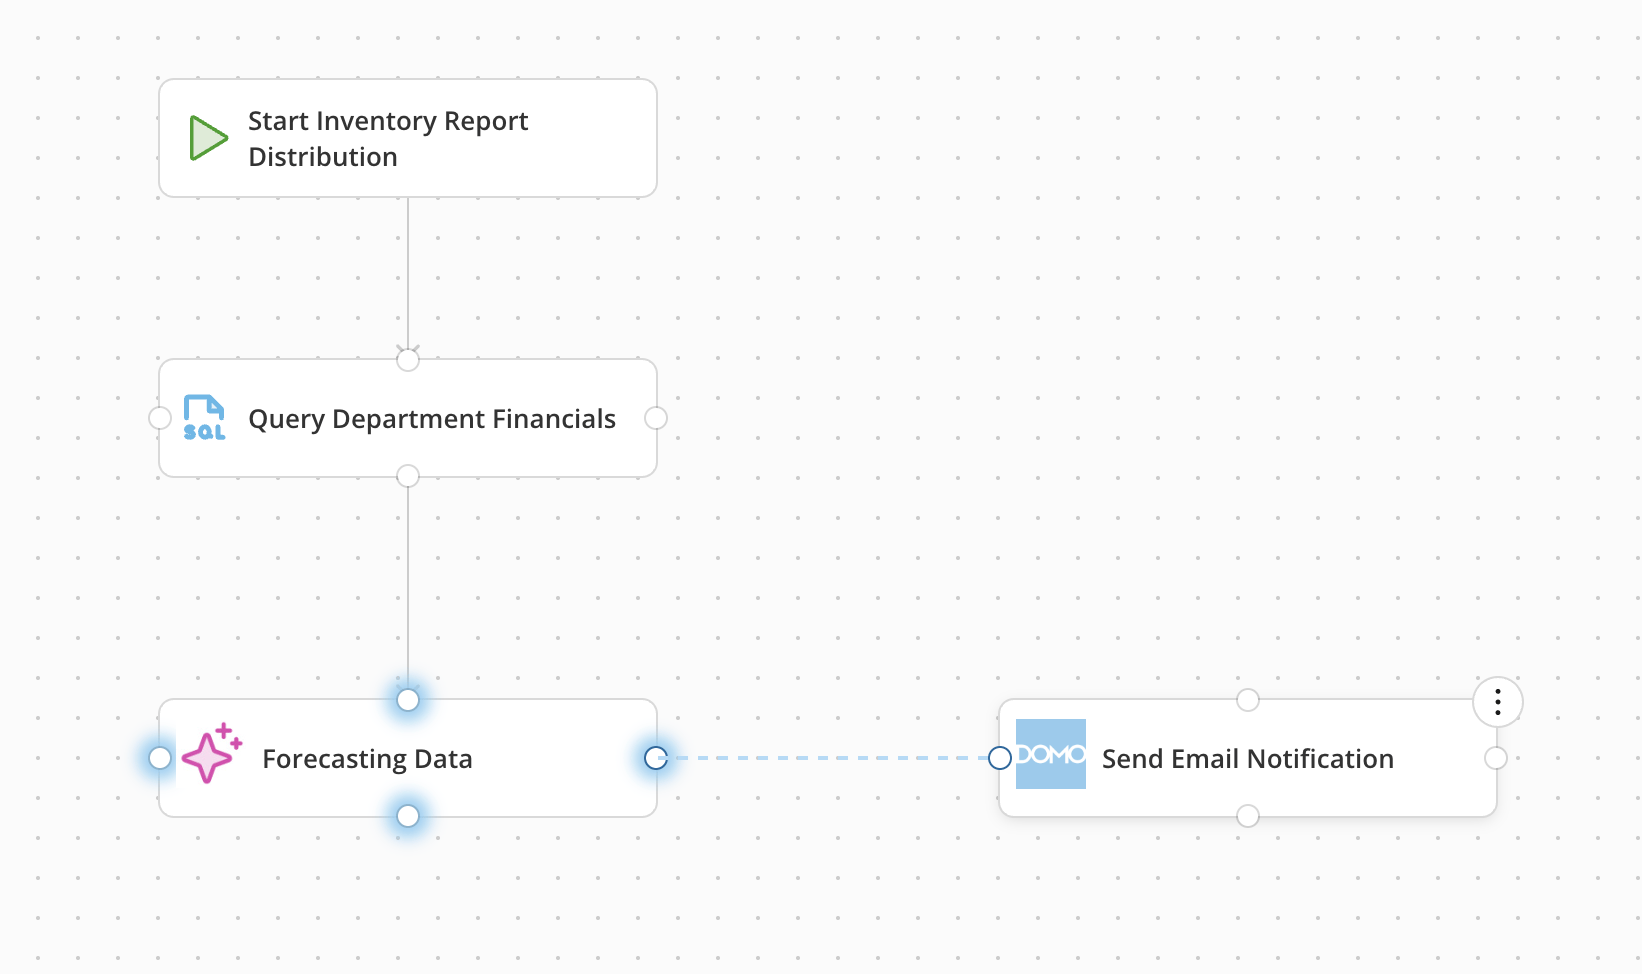
To connect one workflow step to another, hover on the tile to reveal its ports. Click one of the circular ports, then drag the connecting line to a port on another step.
To delete a connecting line, either click the line and press the **Delete** key on your keyboard, or choose the **(X) Delete** option that appears on the line.
4. (Optional) To associate a comment with a workflow step, connect the comment box to a step by dragging from one of the circular ports on the comment to a port on the step.
**Note:** This connection is visual only and does not affect the workflow execution.
5. To delete a comment or its connection line, select it and press the **Delete** key, or use the on-screen delete options.
Add as many comments as you need to make your workflow clearer and more informative.
### Connect Existing Steps
To connect one workflow step to another, hover on the tile to reveal its ports. Click one of the circular ports, then drag the connecting line to a port on another step.
To delete a connecting line, either click the line and press the **Delete** key on your keyboard, or choose the **(X) Delete** option that appears on the line.
 **Next step:** After configuring all shapes in your workflow, you must [validate](#validate-a-workflow) it before deployment.
## Validate a Workflow
Validating your workflow identifies issues and incorrectly configured shapes. If there are issues, the system navigates you to a Validation view to correct them.
There are three kinds of validation issues:
* **Informational —** You don't need to correct informational issues before deploying your workflow. These issues are typically superficial and don't impact workflow performance. Informational issues are color-coded blue.
* **Warning —** Youdon't need to correct warnings before deploying a workflow, but we strongly recommend doing so. Warnings usually indicate that a best practice is not being followed and are color-coded yellow.
* \*\*Error —\*\*Errors must be corrected before you can deploy a workflow. Errors are color-coded red.
### Access Validation Mode
You can put a workflow version into validation mode by deploying it from either of two locations:
* From the canvas, choose **Action menu** > **Deploy**.
* From the [version list](/s/article/000005179), select
**Next step:** After configuring all shapes in your workflow, you must [validate](#validate-a-workflow) it before deployment.
## Validate a Workflow
Validating your workflow identifies issues and incorrectly configured shapes. If there are issues, the system navigates you to a Validation view to correct them.
There are three kinds of validation issues:
* **Informational —** You don't need to correct informational issues before deploying your workflow. These issues are typically superficial and don't impact workflow performance. Informational issues are color-coded blue.
* **Warning —** Youdon't need to correct warnings before deploying a workflow, but we strongly recommend doing so. Warnings usually indicate that a best practice is not being followed and are color-coded yellow.
* \*\*Error —\*\*Errors must be corrected before you can deploy a workflow. Errors are color-coded red.
### Access Validation Mode
You can put a workflow version into validation mode by deploying it from either of two locations:
* From the canvas, choose **Action menu** > **Deploy**.
* From the [version list](/s/article/000005179), select  **Action** **menu** (three vertical dots icon) > **Deploy**.
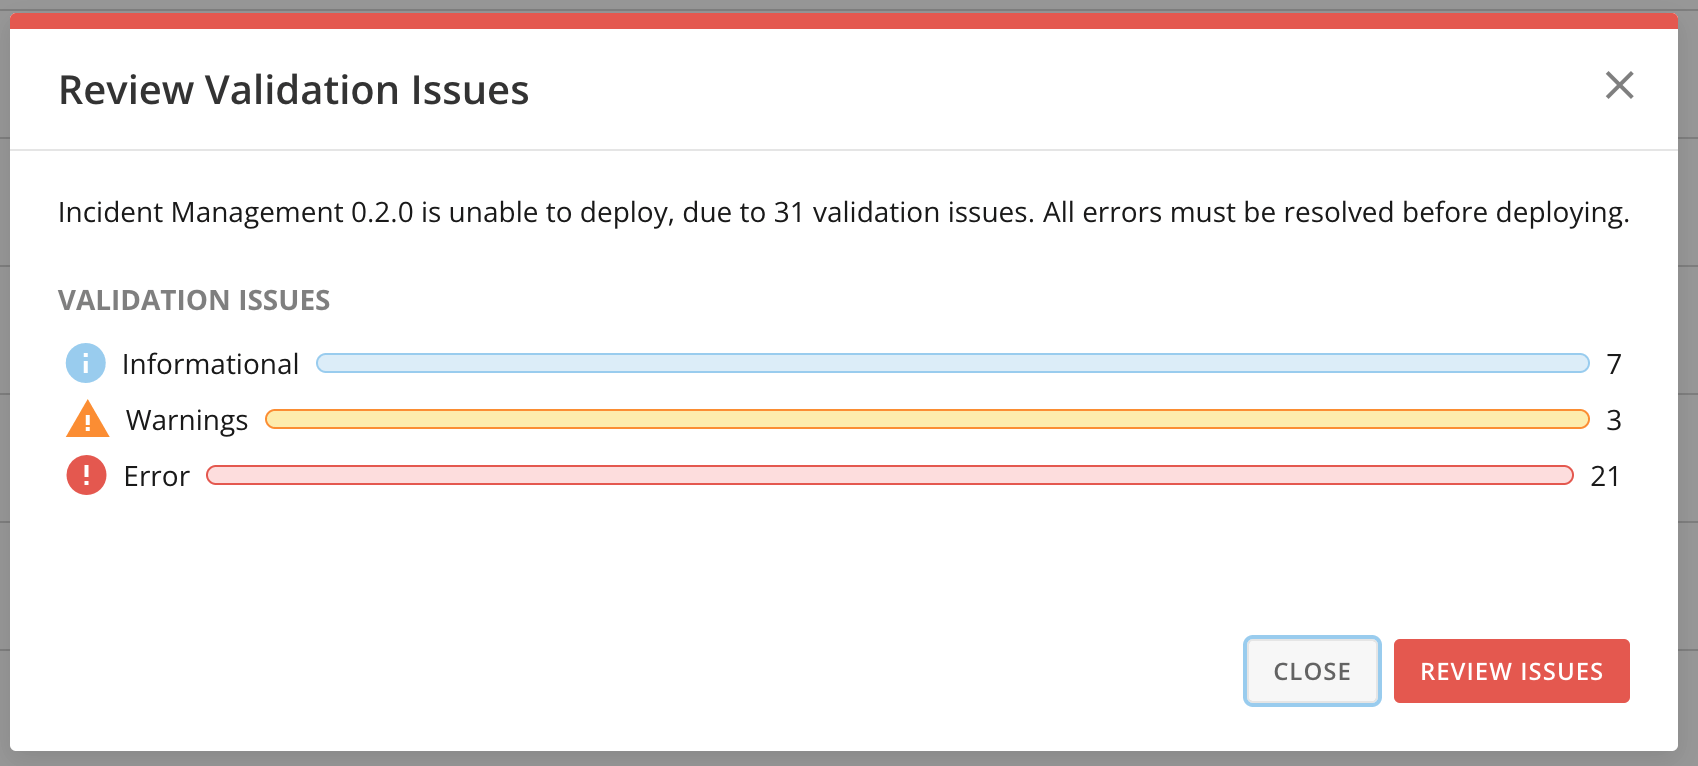
If the version has validation issues, a dialog displays with a border the color of the most severe issue (blue, yellow, or red). The dialog prompts you to either cancel the deployment or review the issues in validation mode. All errors must be resolved before you can deploy the workflow.
**Action** **menu** (three vertical dots icon) > **Deploy**.
If the version has validation issues, a dialog displays with a border the color of the most severe issue (blue, yellow, or red). The dialog prompts you to either cancel the deployment or review the issues in validation mode. All errors must be resolved before you can deploy the workflow.
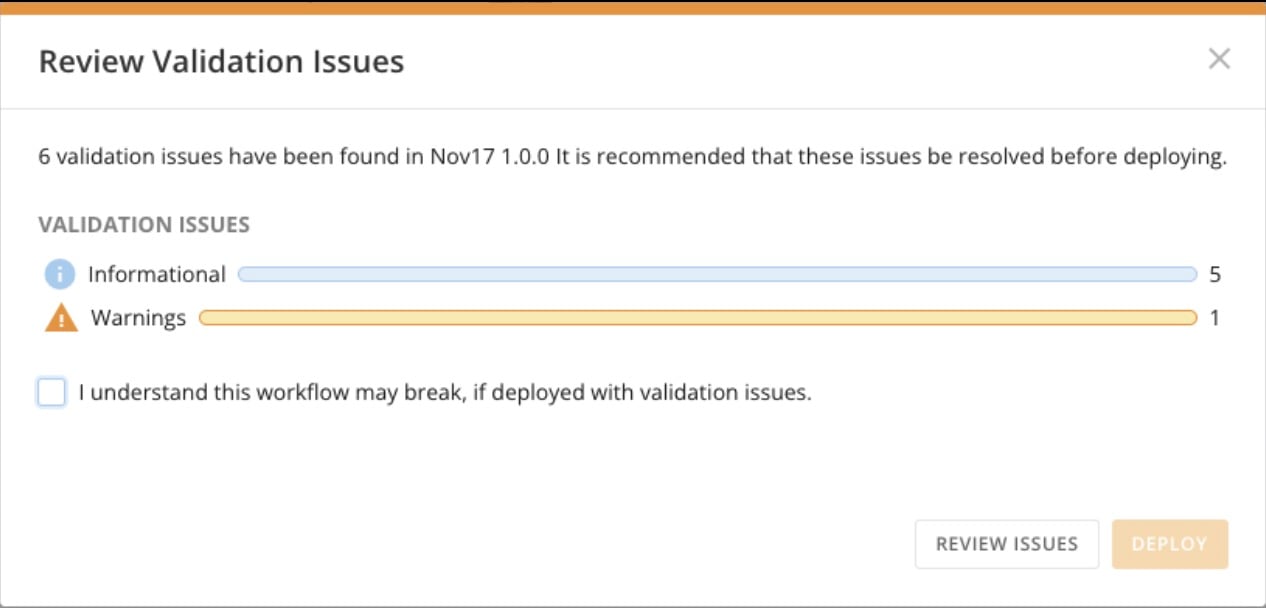
 If only warnings or information issues are found, a dialog with an orange border displays. You can either review the warnings in validation mode or check the box to acknowledge their potential negative impact during runtime and select **Deploy** to proceed with the deployment.
 From either dialog, selecting **Review Issues** opens the canvas in validation mode.
### Review Issues in Validation Mode
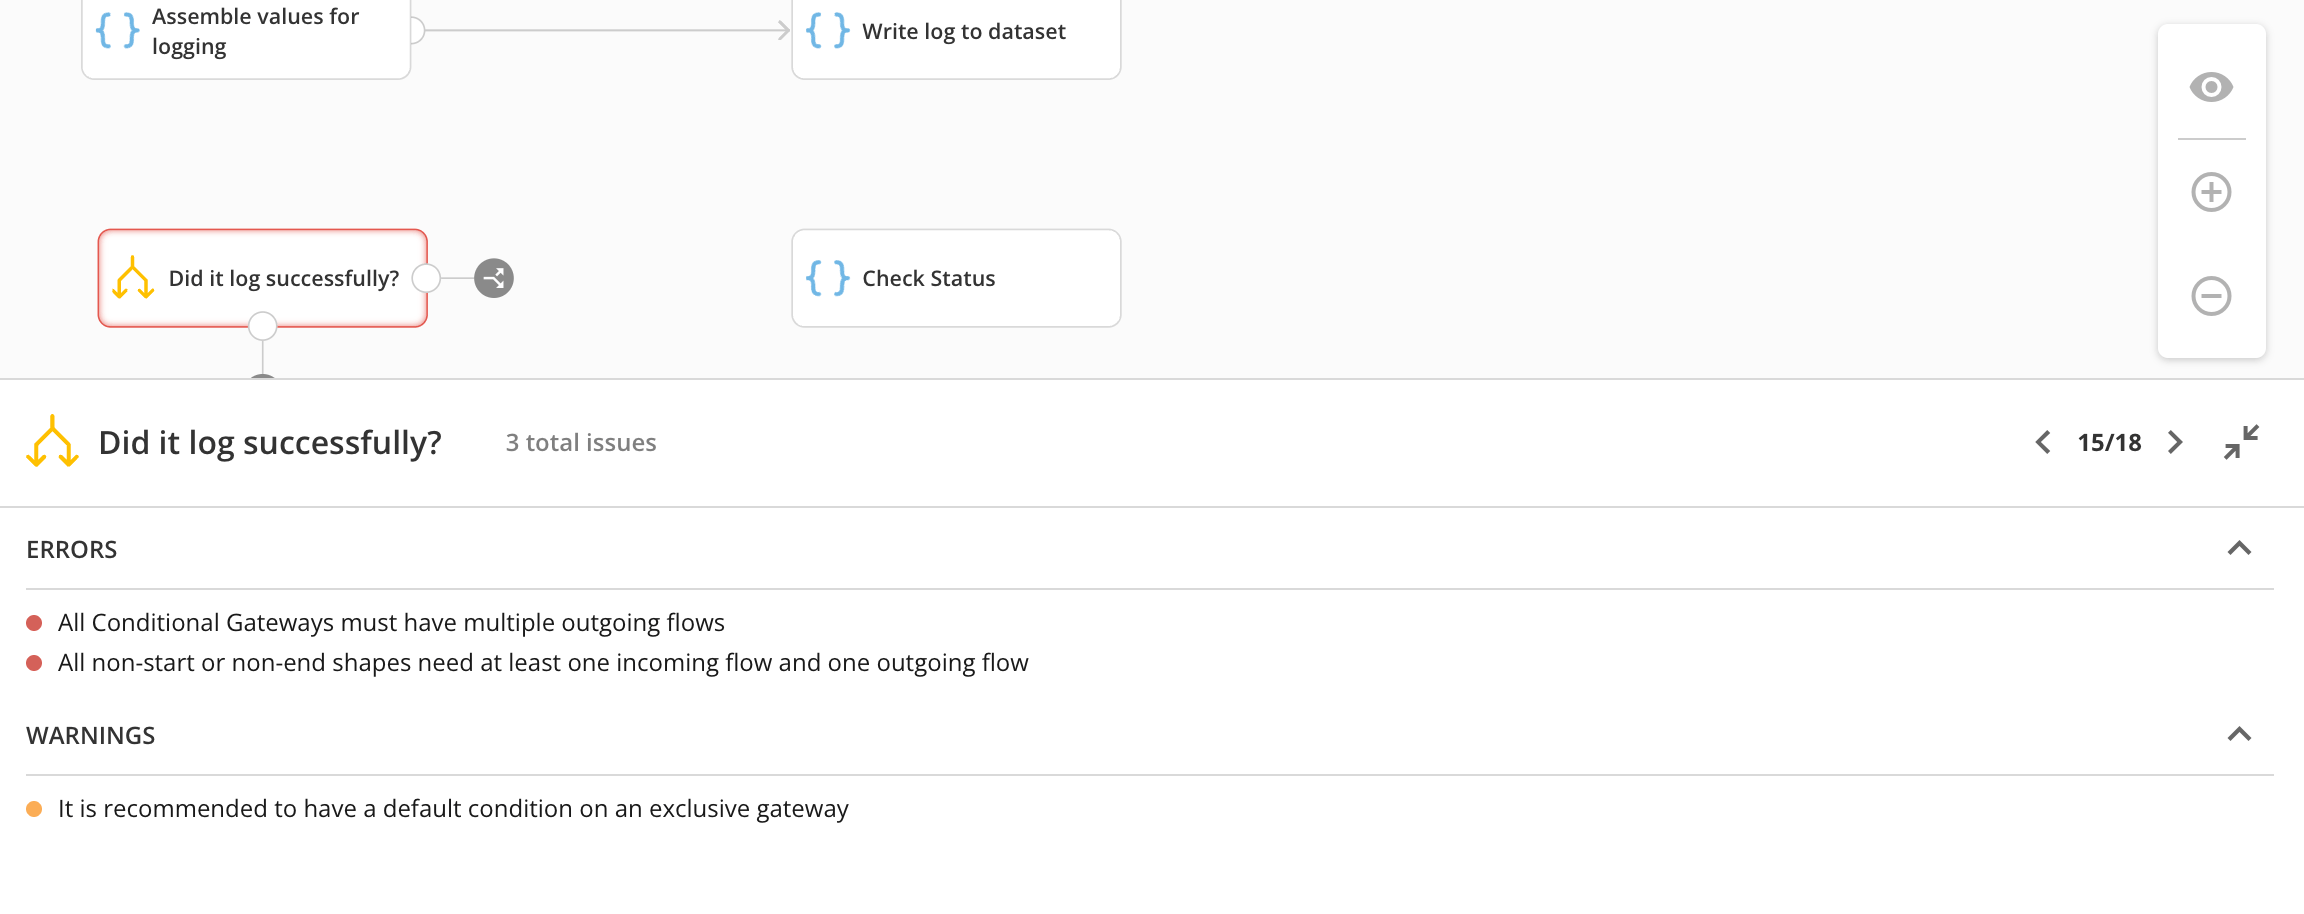
In validation mode, any shape with validation issues displays with the icon and colored border associated with its most severe validation issue. Selecting a shape also expands the message panel at the bottom of the canvas with details of each error.
**Note:** When you select a variable from the list in the **Workflow variables** tab, you leave validation mode and open the [data association tool](#view-data-association).
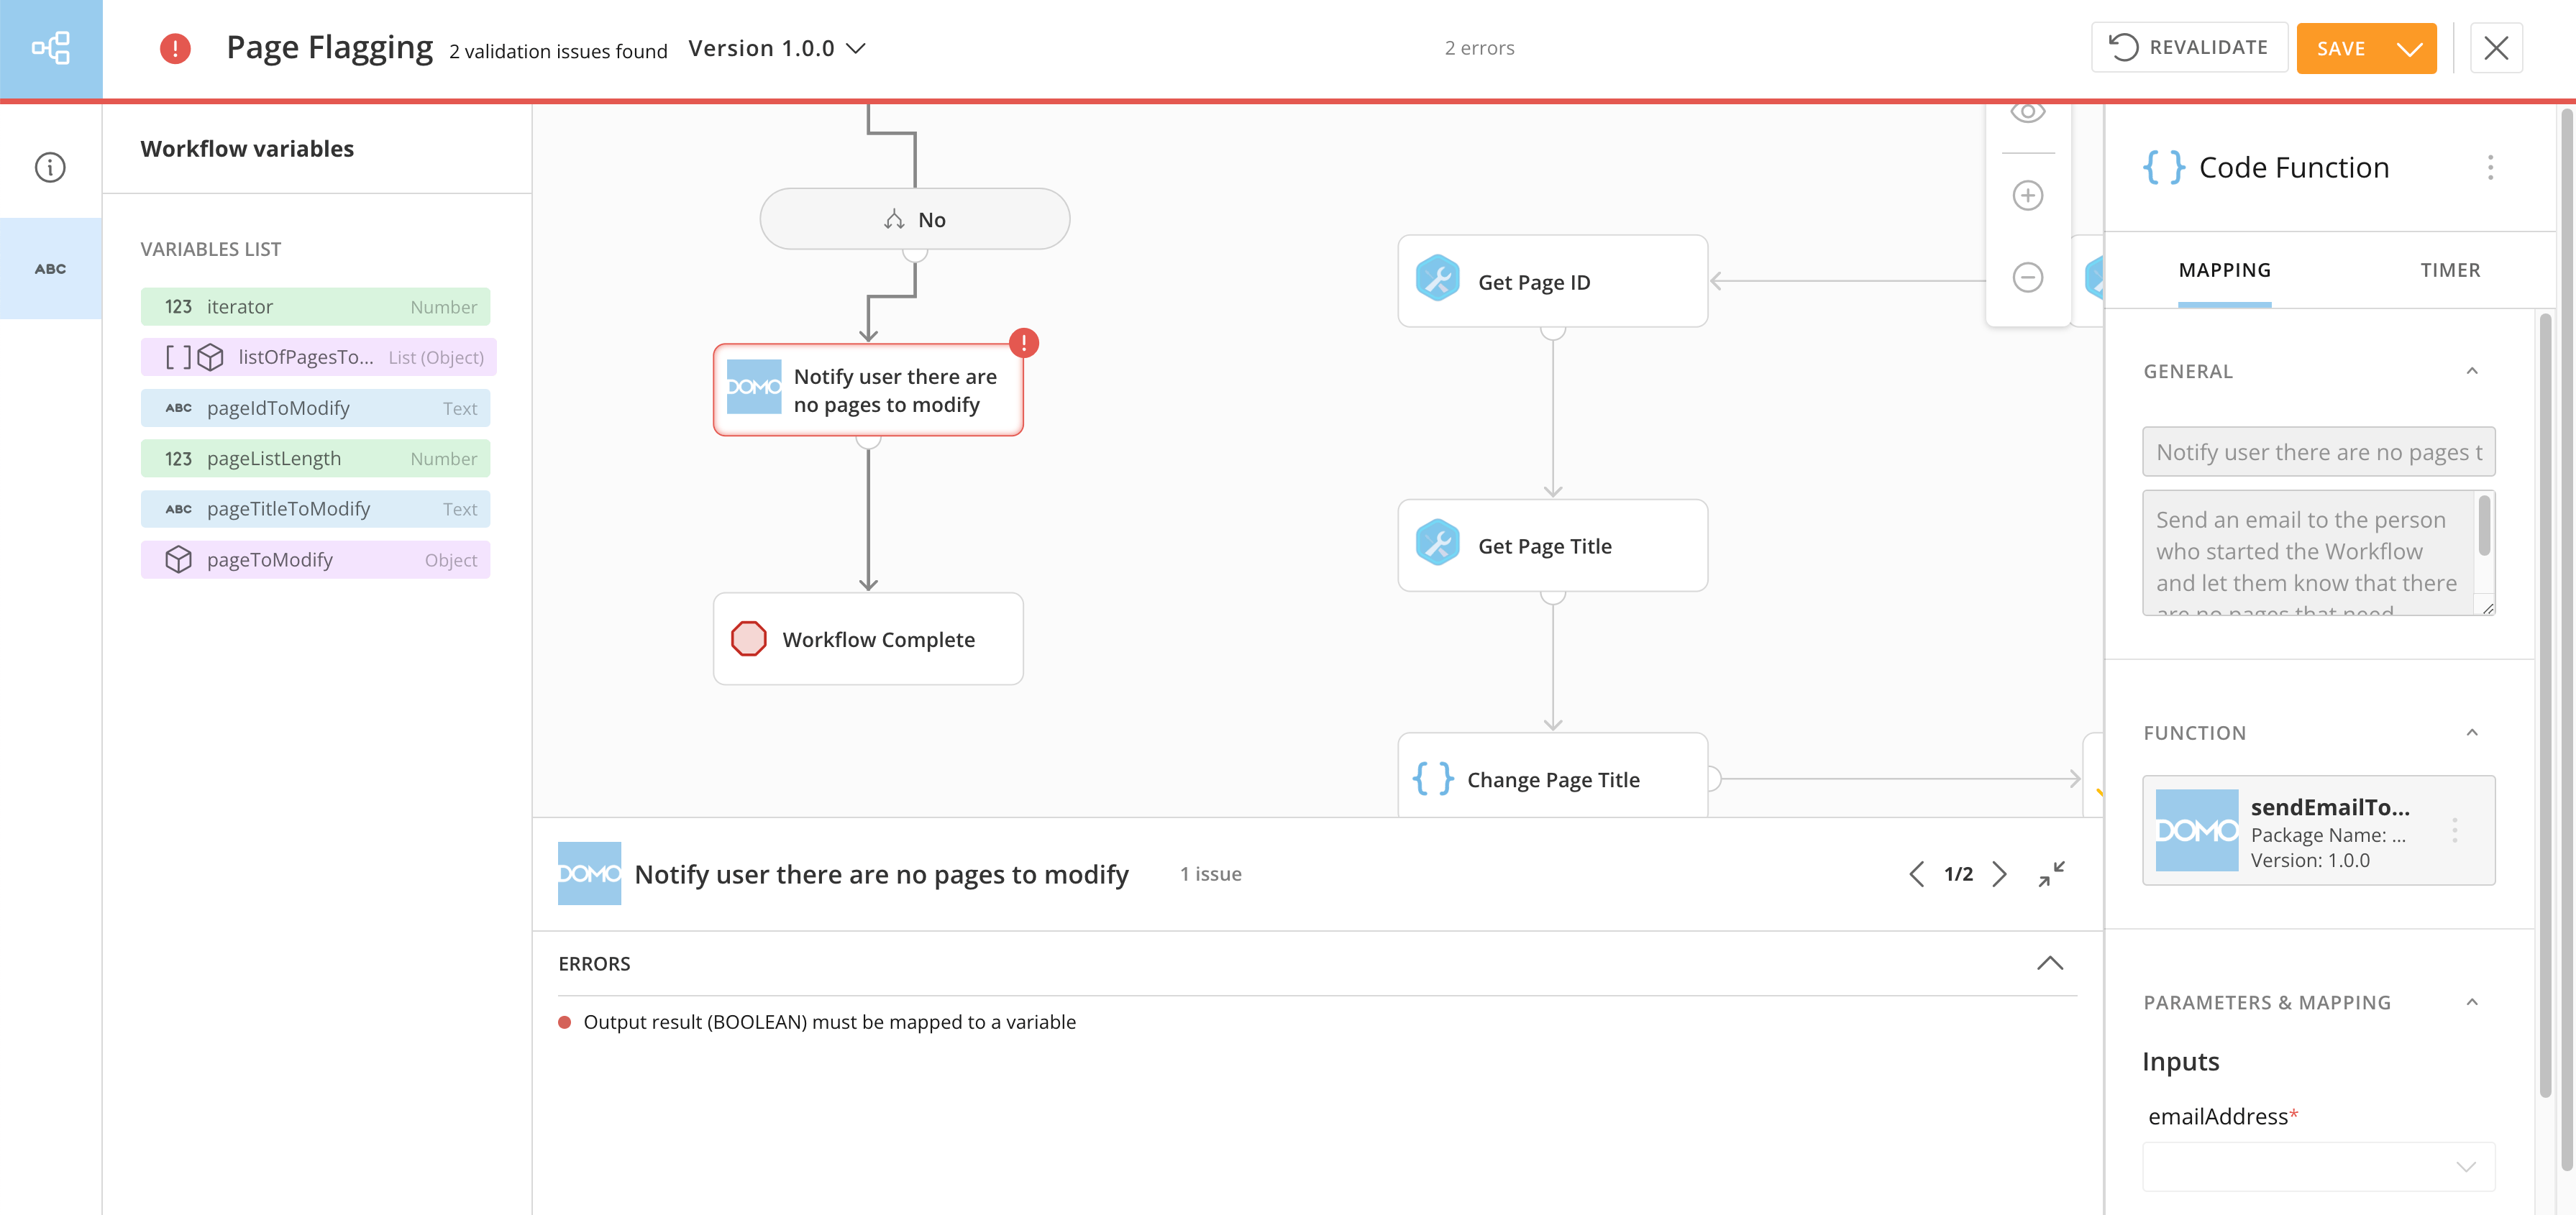
In this image, the Code Function shape named "Notify user there are no pages to modify" has a red Error icon and border because it has at least one error. Details about each error or other issue display in the message panel at the bottom of the canvas.
From either dialog, selecting **Review Issues** opens the canvas in validation mode.
### Review Issues in Validation Mode
In validation mode, any shape with validation issues displays with the icon and colored border associated with its most severe validation issue. Selecting a shape also expands the message panel at the bottom of the canvas with details of each error.
**Note:** When you select a variable from the list in the **Workflow variables** tab, you leave validation mode and open the [data association tool](#view-data-association).
In this image, the Code Function shape named "Notify user there are no pages to modify" has a red Error icon and border because it has at least one error. Details about each error or other issue display in the message panel at the bottom of the canvas.
 #### Message Panel
The message panel displays information about all issues detected in the workflow version and how to resolve them, separated by individual shapes. General workflow validation issues display when no shape is selected.
#### Message Panel
The message panel displays information about all issues detected in the workflow version and how to resolve them, separated by individual shapes. General workflow validation issues display when no shape is selected.
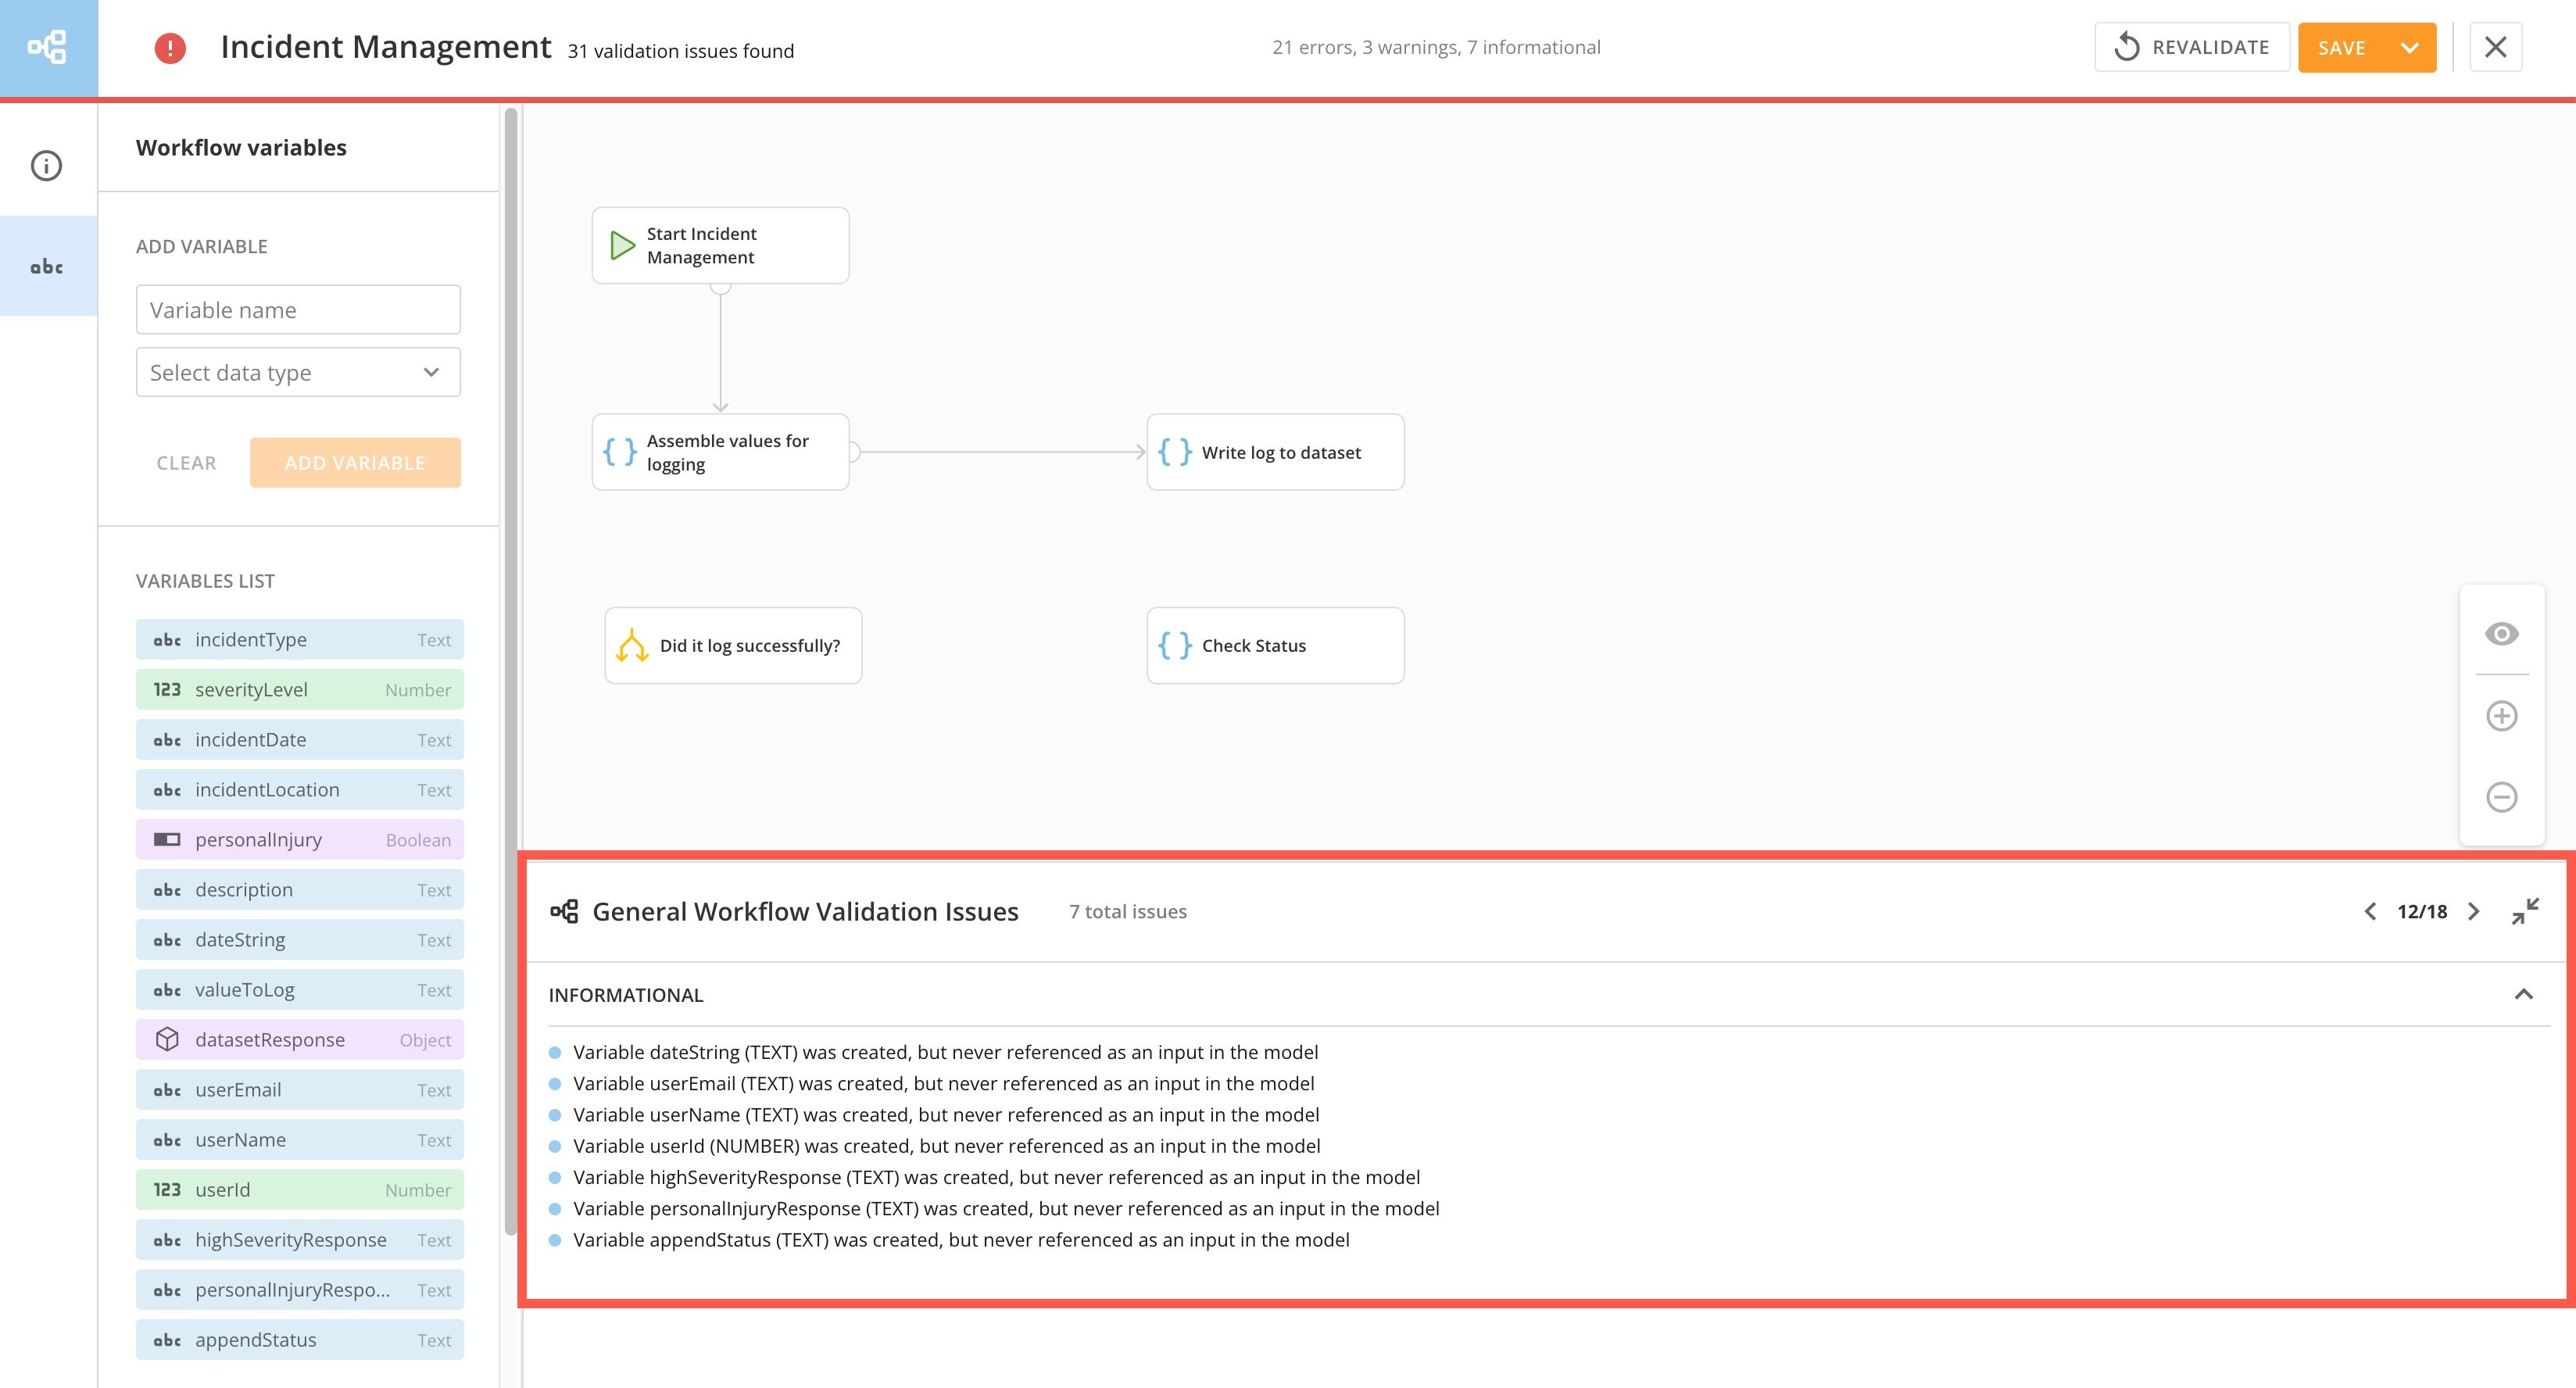 The ribbon at the top of the message panel includes the name of the shape (if one is selected), the total number of issues for that shape (or the total number of general issues), controls that allow you to page through the message panel to view every shape with issues in the workflow, and a control to
  collapse the message panel. When the message panel is collapsed, you can select
  **Expand** to reopen the message panel.
 Shapes without validation issues do not appear in the message panel.
As you move through the screens of the message panel, if a certain shape has more than one type of issue, the issues display in severity groupings—error messages separated from warning messages, for example.
Shapes without validation issues do not appear in the message panel.
As you move through the screens of the message panel, if a certain shape has more than one type of issue, the issues display in severity groupings—error messages separated from warning messages, for example.
 **Next step:** Next, [deploy](#deploy-a-workflow) your workflow.
## Deploy a Workflow
Workflows must be deployed before they can run. A deployed *version* can be started manually or started by a trigger. Deploying a version puts it into [validation mode](#validate-a-workflow); after it's validated, it deploys.
If you have Deploy or Admin [permission](/s/article/000005179) to the workflow, you can select **Action menu** > **Deploy** for a version from the version list or from inside edit or view mode.
**Next step:** Learn how to [start](#start-a-workflow) your workflow.
## Start a Workflow
To start a workflow, you must have Execute or Admin [permission](/s/article/000005179) to it. Your workflow must be [validated](#validate-a-workflow) and [deployed](#deploy-a-workflow) before starting.
**Important:** You can only start a deployed version if it is active. Deactivated versions can't be executed.
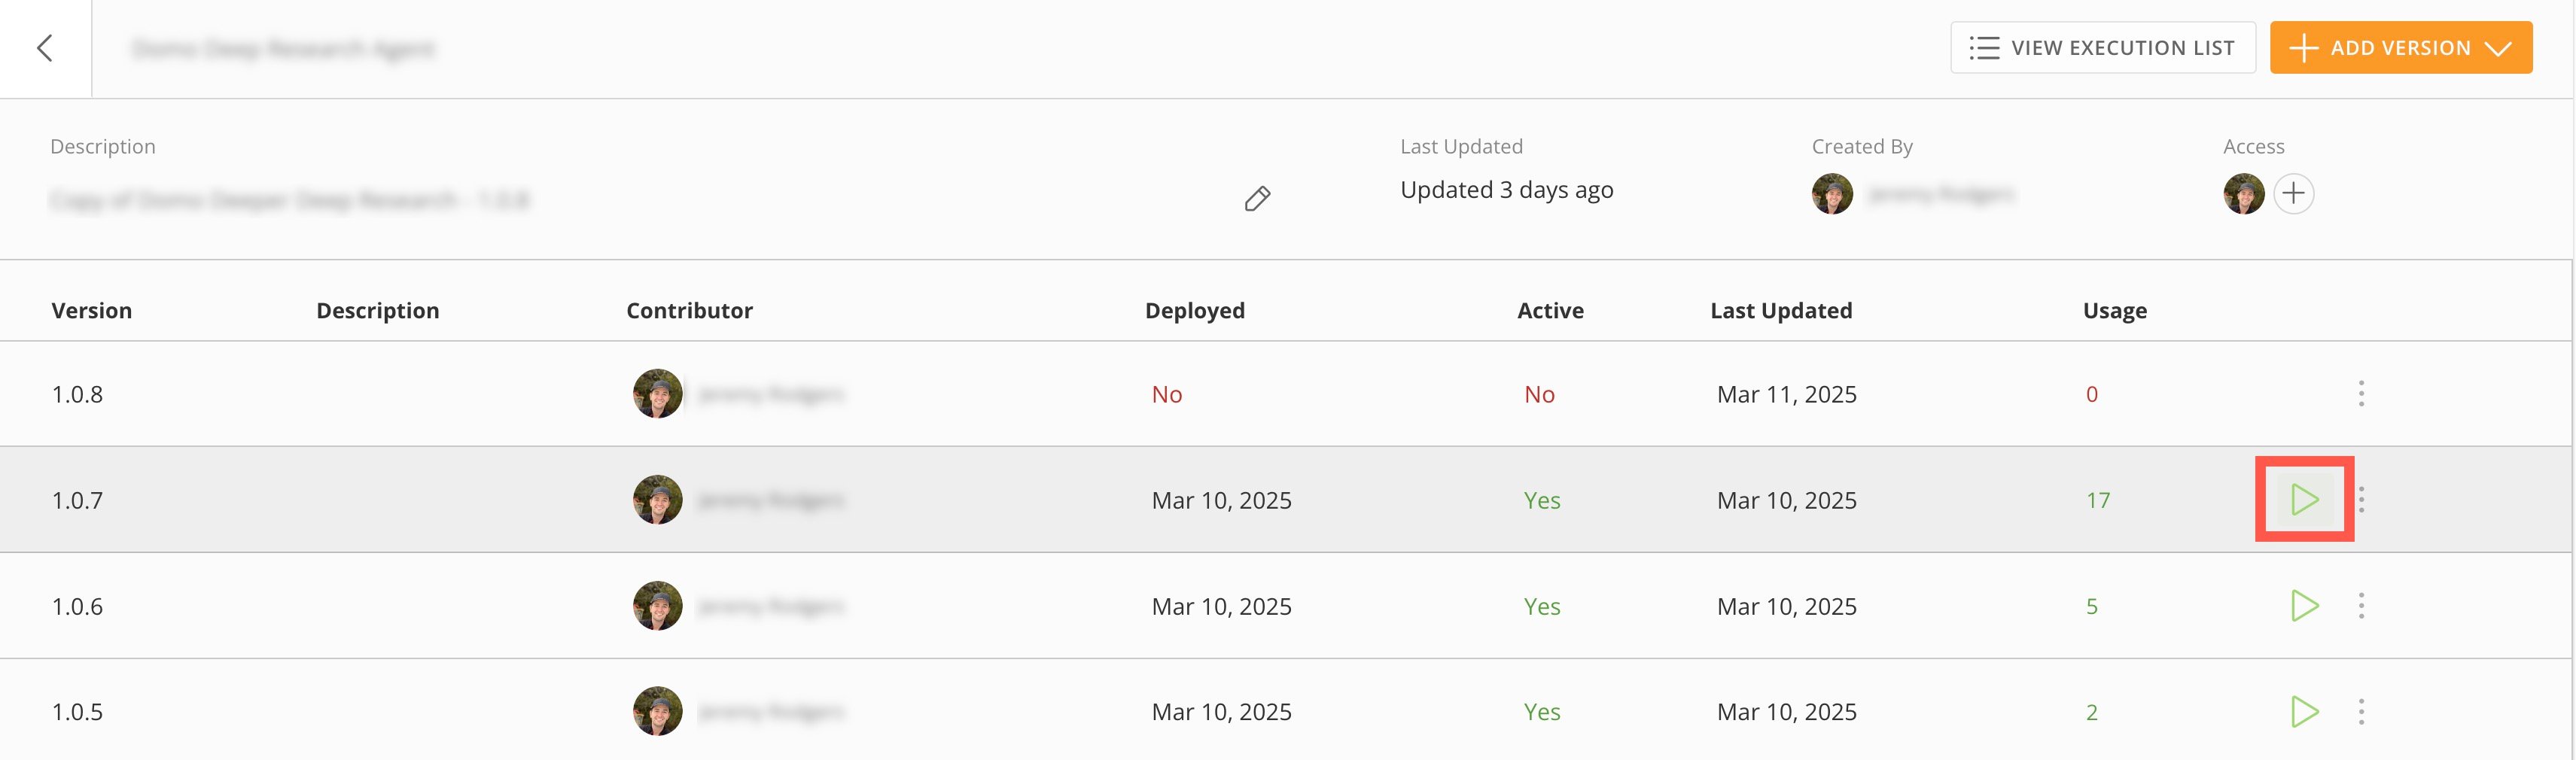
You can start a workflow version from the version list page by selecting
**Next step:** Next, [deploy](#deploy-a-workflow) your workflow.
## Deploy a Workflow
Workflows must be deployed before they can run. A deployed *version* can be started manually or started by a trigger. Deploying a version puts it into [validation mode](#validate-a-workflow); after it's validated, it deploys.
If you have Deploy or Admin [permission](/s/article/000005179) to the workflow, you can select **Action menu** > **Deploy** for a version from the version list or from inside edit or view mode.
**Next step:** Learn how to [start](#start-a-workflow) your workflow.
## Start a Workflow
To start a workflow, you must have Execute or Admin [permission](/s/article/000005179) to it. Your workflow must be [validated](#validate-a-workflow) and [deployed](#deploy-a-workflow) before starting.
**Important:** You can only start a deployed version if it is active. Deactivated versions can't be executed.
You can start a workflow version from the version list page by selecting  **Start** (or from the canvas in edit or view-only mode by selecting
  **Action menu** > **Start**).
 **Note:** Users with the Manage Workflows grant *and* Admin or Execute permission to a workflow can configure alternative triggers for it, such as from within an App Studio app. Learn more about [workflow triggers](/s/article/000005179).